How to Stop Lawn Mower Shooting Rocks
Lawnmower shooting rocks are when your lawnmower shoots or ejects small stones, dirt clumps, and other types of debris. This happens because small things are getting kicked up by the blades of grass coming in contact with the lawnmower blade.
The problem is very annoying and dangerous as it can cause severe damage to you if a flying object hits you. Not to mention that it’s just messy to have all these tiny objects being ejected from your lawnmower onto your freshly cut grass. However, there are several ways to go about solving this problem. In this article, I will discuss how to stop lawn mower shooting rocks. So, let us get started.

What is Causing My Lawn Mower to Shoot Rocks?
Lawnmower Blades
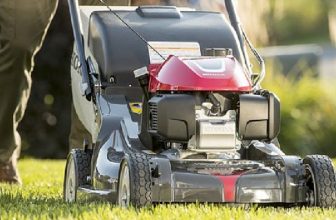
The primary cause of your lawnmower shooting rocks is the blades. Lawnmower blades spin very fast, and they cut through grass with ease. However, when debris like small stones, twigs or dirt clumps get caught in between the blades, they can get flung out at a high velocity. This is what causes the lawnmower to shoot rocks.
Cutting Height
Another reason for your lawnmower shooting rocks may be because you are cutting your grass too low. Cutting your grass too short can cause the blades to come into contact with small stones and other debris on the ground, resulting in them getting ejected.
Mower Condition
A poorly maintained lawnmower can also contribute to the problem of rocks shooting out. Dull blades or a damaged blade can increase the chances of small objects being kicked up and thrown out of the mower.
Why Does a Lawn Mower Shoot Rocks?

The primary cause of lawn mower rocks is excessive wear to the front and back wheels for most people. As the wheel wears down, it creates a void in which small pebbles can become lodged. Then, with every revolution of the wheel, that rock jabs into your lawn and shoots out behind you – usually resulting in a puncture or tear somewhere on your body. Wear can happen with natural use, abuse, or a combination of the two.
Generally speaking, the harder you push your mower, the less often you service it, which will lead to accelerated wear on critical components. And so this is why many people experience rocks being shot from a lawnmower for a variety of reasons. However, if you have experienced stones being discharged from your old lawnmower, take heart because there are steps that you can take to fix your lawnmower and prevent rocks from flying out at random points during mowing.
Needed Materials:
In order to stop your lawnmower from shooting rocks, you will need a few materials. These include:
Work Gloves:
To protect your hands and fingers while you work on your lawnmower.
Socket Set with Wrenches:
Necessary tools to remove the blade from your lawnmower.
New Blade:
If your current mower blade is dull or damaged, then a new one will be needed. Make sure to purchase the correct size for your lawnmower.
Blade Balancer:
This is to ensure that your new blade is balanced and will not cause any issues.
12 Stepwise Guide on How to Stop Lawn Mower Shooting Rocks:
Step 1: Prepare the Mower
Start by turning off the lawnmower and disconnecting the spark plug. This is to ensure that the mower does not accidentally start while you are working on it. You may also want to wear work gloves to protect your hands. It is also recommended that it work on a flat surface. It will make the task easier. You can also place some cardboard or a drop cloth under the mower to catch any debris that may fall.
Step 2: Remove the Blade
Using a socket set or wrench, remove the blade bolt and lift off the blade carefully. Make sure to keep all parts together in a safe location so you can easily put them back together later. You may want to take a picture or make note of how the blade is positioned on the mower before removing it. It will make it easier to put back in the correct position later. You can also use a blade removal tool if you have one. You can find this at your local hardware store.
Step 3: Inspect the Blade
Once the blade is removed, inspect it for any damage or dullness. If there are signs of wear and tear, then it is time to replace the blade with a new one. If the blade looks fine, you may proceed to the next step. The blade should be sharp and have no visible nicks or dents. It is essential to have a sharp blade to cut the grass cleanly and prevent debris from getting stuck between the blades. But it is equally important to balance the blade properly.
Step 4: Sharpen the Blade
If your blade looks dull, then you will need to sharpen it. You can do this by using a sharpening stone, a metal file or a blade sharpener. Follow the manufacturer’s instructions for the best results. The blade should be evenly sharpened on both sides to ensure proper balance. You can also take your blade to a professional for sharpening. The blade should be sharpened regularly to maintain its effectiveness.
Step 5: Balance the Blade
Even if your old blade looks fine, it is essential to balance it after sharpening or if it has been a while since the last balance. This will ensure that the blade spins evenly and does not cause any excess vibrations or wobbling. You can use a blade balancer to check and correct the balance of your mower blade. It is a simple tool that you can find at your local hardware store. The blade should be balanced before reattaching it to the mower.
Step 6: Check Wheels
While you have the blade off, take the time to inspect the wheels for signs of wear and tear. If they are worn down, it is time to replace them. You can also clean any debris or stones that may be stuck in the wheels using a brush or your hands. The wheels should be smooth and roll easily. You can also apply a small amount of lubricant to ensure smooth movement. It is also important to check the axle and bearings for any damage.
Step 7: Clean Underneath the Mower
Once the blade and wheels have been taken care of, you can now turn your attention to cleaning underneath the mower. Use a brush or your hands to clear any debris, stones or grass clippings that may have accumulated. This will also prevent any buildup of debris that can cause the blade to become unbalanced. You can also use a hose to rinse off any remaining debris. It is essential to keep the underside of the mower clean to prevent any issues.
Step 8: Check the Blade Deck
While cleaning underneath the mower, inspect the blade deck for any signs of damage or rust. If there are any cracks or holes, then it is time to replace the deck. It is also important to remove any rust using a wire brush or sandpaper. This will prevent rust from spreading and causing further damage. You can also apply a rust inhibitor to protect the deck from future damage. It is recommended that this is done regularly for maintenance purposes.
Step 9: Reattach the Blade
Once everything has been inspected and cleaned, it is time to reattach the blade. Make sure that it is in the correct position and securely attached using the blade bolt. You can also apply a small amount of oil to the bolt to prevent rust and make it easier to remove in the future. Make sure that the blade spins freely and does not wobble or scrape against anything when turned by hand. Otherwise, you may need to readjust the blade. The blade should be secure and balanced. It is essential to double-check before moving on. The blade should also be sharpened regularly for optimal performance.
Step 10: Test the Mower
With the blade reattached, you can now test out your lawnmower. Start up the mower and let it run for a few minutes while checking for any issues. If everything seems fine, you can proceed with mowing your lawn. Make sure to wear protective gear such as goggles and earplugs while mowing. Otherwise, you may expose yourself to flying debris and loud noise. You can also wear a face mask to protect yourself from dust and fumes. It is important to prioritize safety while mowing.
Step 11: Properly Dispose of the Old Blade
If you have replaced your old blade with a new one, make sure to dispose of it properly. You can take it to your local recycling center or contact your city’s waste management department for proper disposal procedures. Do not throw it in the trash as it can be dangerous to handle and may harm the environment. Properly disposing of your old blade is important for both safety and environmental reasons. It is also important to properly clean and store your lawnmower after each use to prolong its lifespan. Make sure to remove any debris or grass clippings and store it in a dry place.
Step 12: Maintain Your Lawnmower
To keep your lawnmower running smoothly, it is essential to maintain it regularly. This includes sharpening and balancing the blade, checking and replacing worn-out parts, and cleaning after each use. It is also important to follow the manufacturer’s instructions for proper maintenance. Regular maintenance will not only prolong the lifespan of your lawnmower but also ensure a well-manicured lawn. Additionally, make sure to use the right fuel for your mower and store it properly during the off-season. Proper maintenance is key to a functioning lawnmower.
Following these steps on how to stop lawn mower shooting rocks and properly maintaining your lawnmower will ensure that it remains in good condition for years to come. By taking the time to regularly check and maintain your mower, you can save yourself from costly repairs or replacements in the future. Happy mowing!
Precautions While Repairing a Lawn Mower From Shooting Rocks:
Lawnmower shooting rocks is a problem that usually results from worn-out drive belts for blades. If a lawnmower shoots rocks, first check the drive belt for worn-out parts.
If you plan to replace this part yourself, be sure to remember to unplug your electric power cord before beginning repairs on your machine. Be sure also to have your shop manual handy, so you can identify all of the components and arrange them in their proper location as they are removed from the machine. This will ensure more accurate reinstallation, thus giving you that smooth-feeling lawn that has been free of rocks for some time now.
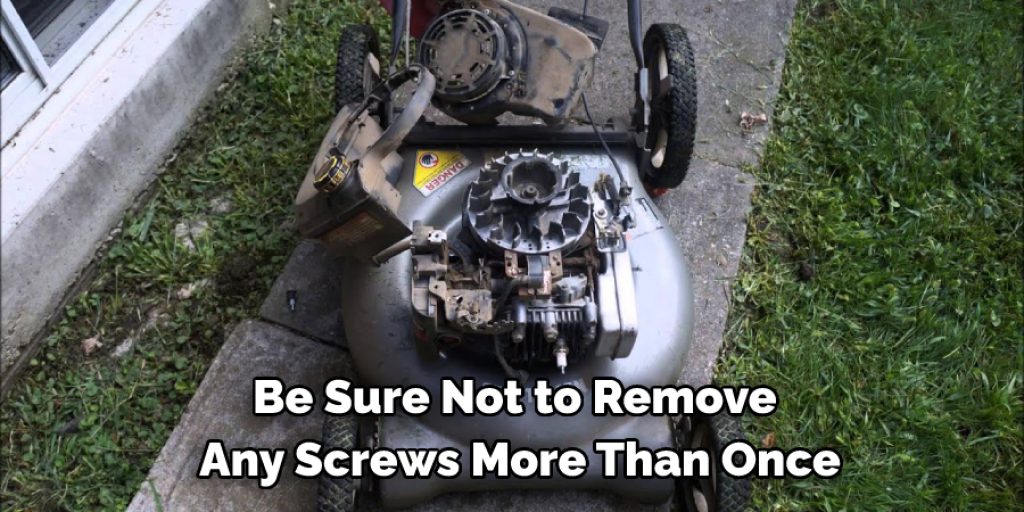
Be sure not to remove any screws more than once, or else chances are excellent that you’ll lose them. Remember, it’s always important to be sure you have a clean workspace so you can keep track of your parts.
How To Clean a Lawn Mower?
1. Unplug the mower from the wall socket before you begin to clean it. Never service a mower while it is plugged in or near standing water. Doing so can result in electrocution or death, as well as damage to your machine. Additionally, you risk damaging the electronics within your mower if there is electricity present when you are trying to clean it, which could prolong the life of your machine and save money over time.
2. Remove any clippings, rocks, or debris that may be stuck inside of an exposed belt pulley by flipping your lawnmower on its side and removing them with a flathead screwdriver or other sturdy utensil that fits into crevices easily (this should only be done on a mower that runs with belts). Be sure to remove as much debris as you can, as some rocks or clippings may not be visible.
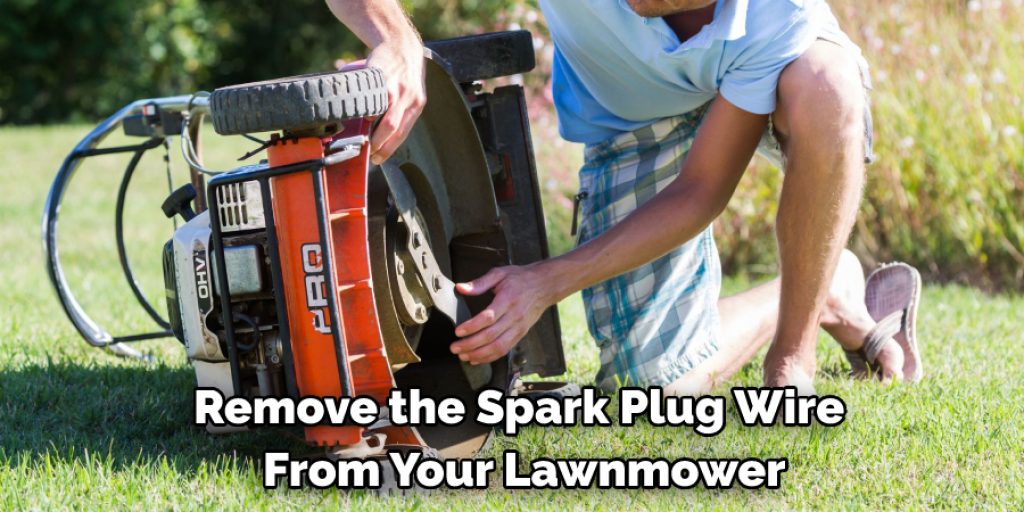
3. Remove the spark plug wire from your lawnmower and use contact cleaner spray around the area where it attaches to the engine block (but make sure not to spray inside the wire casing! You don’t want any electrical mishaps!) and let dry completely. Using a broken-down pencil eraser about one inch in diameter, clean around each tread within your tire treads.
4. Fill up your gas tank until it is complete, run your lawnmower for about 3 minutes at half speed to distribute gasoline throughout all parts of your machine, then turn off your mower and let it sit for another 3-5 minutes. Be sure to observe the fuel-air mixture on your engine by doing this, as you want to make sure that no soot or any other deposits are spilling out of the exhaust.
5. Begin cleaning your lawnmower with a hose, making sure not to spray water directly at any exposed belts or pulleys within the machine (this can warp the metal parts inside of it). Instead, use a brush or sponge that fits easily into crevices to clean all dirt and debris out of every aspect of your lawn mower’s inner workings.
6. After brushing off excess grime from your lawn mower, use a leaf blower on the outside of the mower to get rid of any loose dirt, leaves, or grass clippings.
7. Spray a layer of WD-40 on all parts that move, such as pulleys and hinges, to prevent rust from occurring within your machine while it is stored indoors during the winter months. If you live in a coastal area that has high humidity levels, spray a second coat on these parts after a few days have passed.
8. Wipe down the entire exterior surface of your lawnmower with an old rag to remove dust and other small particles that may be lingering around it before you store it for the season (or whenever you intend to put it away).
Frequently Asked Questions:
Q1: How Often Should I Change the Oil in My Lawnmower?
A: It is recommended to change the oil in your lawnmower after every 25 hours of use or at least once a year. This will ensure that your machine runs smoothly and efficiently. You can check your owner’s manual for specific recommendations on oil changes. It is also important to use the correct type of oil for your lawnmower.
Q2: Why is It Important to Properly Dispose of Old Lawnmower Blades?
A: Old lawnmower blades can be sharp and dangerous to handle, and disposing of them improperly can harm the environment. Proper disposal ensures safety and helps protect the environment. You can check with your local waste management company for guidelines on how to properly dispose of old lawnmower blades.
Q3: How Often Should I Sharpen My Lawnmower Blade?
A: It is recommended to sharpen your lawnmower blade at least once a year or whenever you notice it is not cutting grass as efficiently as before. A dull blade can damage your lawn and make mowing more difficult. Make sure to also balance your blade when sharpening to ensure it operates smoothly. Regular maintenance and proper handling of your lawnmower blades can extend their lifespan.
Conclusion:
I hope you have obtained all the necessary information for how to stop lawn mower shooting rocks from this article. Thank you and have a nice day! Remember to always prioritize safety and proper maintenance when using and repairing your lawnmower. By following these tips, you can keep your lawn looking beautiful without any unwanted accidents or damage. Happy mowing!