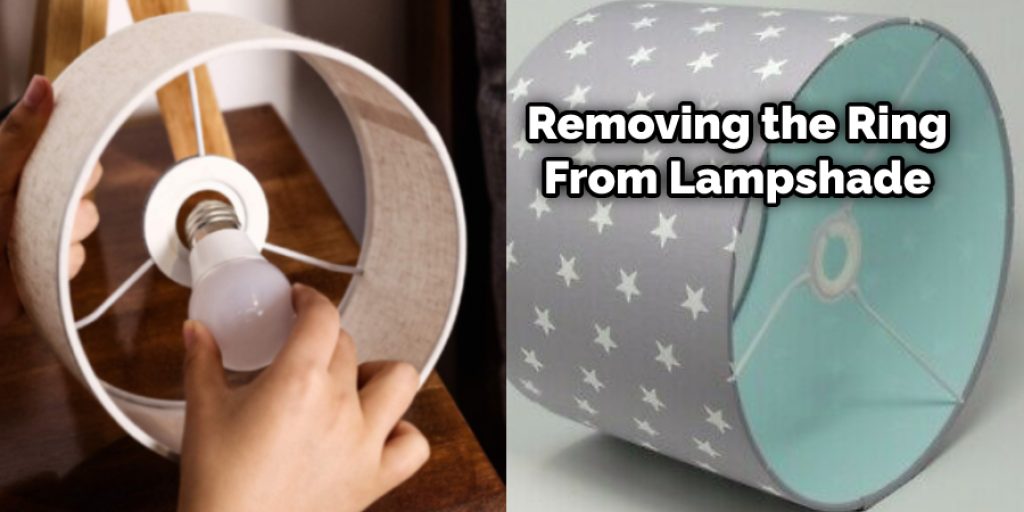
How to Remove Lamp Shade Reducer Ring
A lampshade reducer ring is a thin band that you can attach to the top of your lampshade. This allows it to fit inside of a light fixture with an outer diameter smaller than the inner diameter of the lampshade.
Using this accessory will help ensure that your new or used lamp shade fits well in your room’s lighting fixtures, which will make it easier for you to enjoy its features and beauty. If you’re not sure how much this accessory costs, then read on!
We’ll tell you everything about these valuable items so that you can get all of the information before making up your mind. So, this article is for you. You will learn how to remove lamp shade reducer ring with just one simple trick!
What is a Lampshade Reducer Ring?
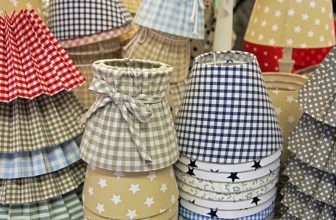
A lampshade reducer ring is a plastic or metal band that attaches to the top of your lampshade. It helps decrease the inner diameter of the shade, making it compatible with lighting fixtures that have a smaller outer diameter. This accessory is commonly used for standing lamps, desk lamps, and chandeliers.
You can find reducer rings in various sizes, materials, and styles to fit different types of lampshades and fixtures. Some may have a clip-on design, while others may require adhesive or screws for attachment. It is an essential accessory for those who want to update their lighting fixtures without having to buy new lampshades.
Why Should You Use a Lampshade Reducer Ring?
There are several reasons why you should consider using a lampshade reducer ring:
Versatility:
As mentioned earlier, reducer rings come in various sizes and designs, making them suitable for different types of lampshades and fixtures. This means you can easily switch out your lampshade between different lighting fixtures without worrying about compatibility.
Cost-effective:
Instead of buying new lampshades that fit perfectly with your lighting fixtures, a reducer ring allows you to reuse your existing shades. This can save you money in the long run, especially if you like to change up your home decor frequently.
Easy Installation:
Most reducer rings are easy to install and can be done without any special tools or expertise. This means you can quickly update your lighting fixtures with just a few simple steps.
Needed Materials:
Before we move on to the process of removing a lampshade reducer ring, here are the materials you’ll need:
Lampshade Reducer Ring:
You can purchase this accessory from most hardware stores or online retailers. Make sure to choose the right size and design for your lampshade and fixture.
Screwdriver (if Required for Your Specific Reducer Ring):
Some reducer rings may require screws for attachment. In this case, you’ll need a screwdriver to remove them.
11 Steps to Follow on How to Remove Lamp Shade Reducer Ring
Step One: Determine
First, you will need to determine if the lampshade is dimmable or not. Do this by feeling if there are ridges on top of the metal, usually silver ridged rim surrounding the top of the lampshade. If they are there, you cannot remove them with a standard screwdriver like most other lampshades.
Then, if the ridges are there, you will need to determine if your lampshade is plastic or metal. If it is metal, you can use a screwdriver with a socket on end to remove the reducer ring. If it’s plastic, you can use a hairdryer to heat the reducer ring to be easier to remove.
Step Two: Remove the Ring
Once you have determined that your lampshade is dimmable, that it is metal, and that you are using a screwdriver with a socket on the end, you can begin removing the reducer ring. First, take off the lampshade cover by loosening the screw on the top of the shade.
Then, begin at one edge and insert a flathead screwdriver into the groove in the rim of the lampshade, and angle it upwards towards you. Do this along all of the ridges until you get to the top. Then, once you have loosened the metal around the entire ring watch, it falls away from you and lets the watch hit the ground without catching it.
Step Three: Cleaning up
Now that you have removed the ring from your lampshade, you have to clean off the top of it. If there is any residue or adhesive left on the lampshade from where it was stuck down, you will need to remove it. To do this, use a hairdryer and warm it up well.
Then, take some rubbing alcohol, put it on a paper towel or cotton swab, and begin removing the adhesive left after removing the ring from your lampshade. Once the adhesive is gone and your lampshade is clean, you can put it back on and adjust it to your preferred height.
Step Four: Disposal
When you are finished with the ring, you can throw it away in the garbage without worrying that anyone will be able to use it. If you attempted this on a lampshade that was plastic and is ruined, do not worry! There is nothing wrong with your lamp or shade; it is just the wrong kind of shade.
You can also use this method to remove the ring from lampshades, but it is not recommended unless you have an unwanted metal one. It would be much easier to buy a plastic reducer ring and attach it in place of the metal one.
Step Five: Reminders
Do not attempt to take off the ring on your lampshade if you do not know how. This is for metal lamp shades only, and plastic ones will be ruined with this method. If you cannot unscrew something or pull it apart, don’t try it! You can get hurt easily doing things like this instead of just buying a new lampshade.
If you have a metal lampshade with ridges and you know how to use a screwdriver, you can use this method. If you have any questions on how to remove lamp shade reducer rings, feel free to contact me through my Tumblr blog, and I will try and answer them as soon as possible!
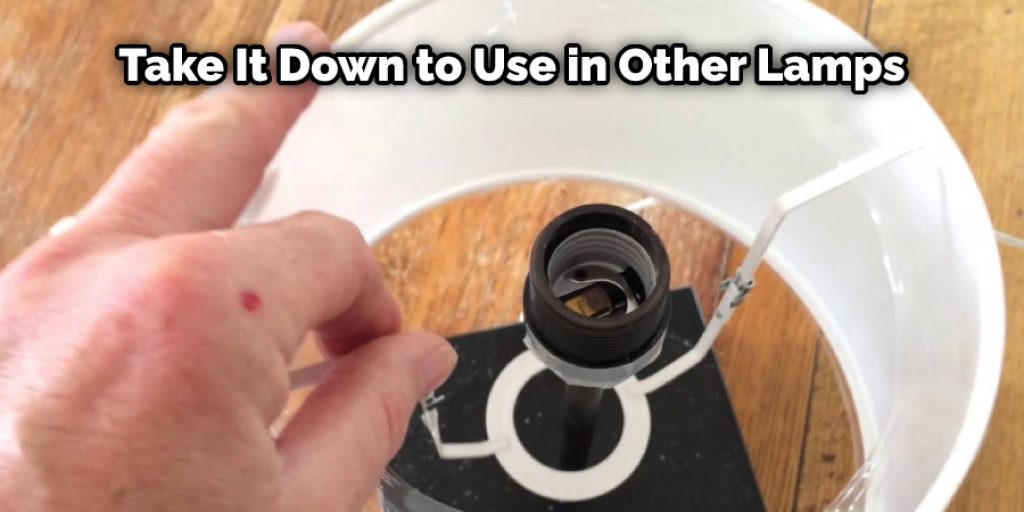
Step Six: Maintain
Once you have removed the ring, make sure to clean off the top of it with rubbing alcohol and a paper towel or cotton swab after every time you remove it. This will ensure that your lampshade never looks dirty and therefore never need replacing when you take it down to use in other lamps!
If you want, wait until the next time you want to take down the shade and clean it off, then put it back up. However, if you know that you are done with your lampshade for a while, but will still need it in the future, make sure to store it safely so that it is not ruined by being bent or damaged when you try to reassemble it in the future.
Step Seven: Replacing the Reducer Ring
If you have removed the reducer ring permanently or need to replace it with a new one, simply follow the same steps in reverse. Place the ring back onto your lampshade and line up any screws or clips that may be necessary for re-attachment.
Then, use your screwdriver or hairdryer (depending on the type of lampshade and reducer ring) to secure the ring back onto your lampshade. Make sure everything is tightly attached and that the shade sits properly on your lighting fixture.
Step Eight: Experiment with Different Shades
With a reducer ring, you can now easily switch up your lampshades and experiment with different shapes, colors, and textures. This allows for more versatility in home decor and can completely change the look of a room.
Don’t be afraid to try out different styles and see what works best for your space. It’s an easy and cost-effective way to update your lighting fixtures without having to replace them entirely.
Step Nine: Get Creative with DIY Lampshades
If you’re feeling crafty, you can even make your own lampshades using the same process of attaching a reducer ring. This allows for even more customization and creativity in your home decor.
You can use materials like fabric, paper, or even old t-shirts to create a unique lampshade that reflects your personal style. Just make sure to follow the steps above when attaching the ring to ensure proper fitting and stability.
Step Ten: Reuse and Recycle
Lastly, when you are finished with your lampshade or need to replace it, consider donating it or repurposing it for another use. Lampshades can also be recycled at certain facilities to reduce waste and help the environment. So, before throwing it away, think about other ways to give your lampshade a new life. Whether you have metal or plastic lampshades, removing the reducer ring can open up a world of possibilities.
With this guide on how to remove lamp shade reducer ring, you should now have all the information needed to successfully remove and replace reducer rings on your lampshades. So go forth and experiment with different shades, get creative with DIY projects, and enjoy a beautifully lit home!
How Long Will It Take?
The process of removing a reducer ring from a lampshade can take anywhere from 10 to 30 minutes, depending on the type of ring and any adhesive or residue left behind. It is important to take your time and be careful during this process to avoid damaging your lampshade or getting hurt.
You may also need to factor in time to clean the top of the lampshade and reattach the ring if needed. Overall, it is a relatively simple process that can easily be done in one sitting.
However, if you are unsure of how to remove the ring or are uncomfortable with doing so, it is always best to seek help from a professional or purchase a new lampshade instead. Safety should always be a top priority when working with any household items.
Additional Tips:
- Always use caution when handling tools and electrical fixtures.
- Make sure your lamp is unplugged before attempting to remove the reducer ring.
- Make sure to properly store your lampshade to prevent damage
- Don’t be afraid to ask for help if you are unsure about the process
- Always keep safety in mind when working with any type of lampshade.
- Consider using a step stool or ladder if you are unable to reach the lampshade easily.
- If you are unsure about removing the reducer ring, consider hiring a professional for assistance.
- Remember to have fun and be creative with your lampshade designs! So, don’t be afraid to go beyond traditional lampshade shapes or materials.
- Consider using eco-friendly options when making or purchasing new lampshades. This can help reduce waste and protect the environment.
- As a general rule, always make sure to turn off and unplug your lighting fixtures before attempting to remove or replace any parts.
- Lastly, don’t forget to regularly clean and maintain your lamps and lampshades for long-lasting use and optimal lighting! So, make sure to follow these steps carefully and enjoy the endless possibilities of lampshade customization with reducer rings. Happy decorating!
Frequently Asked Questions:
Q: Can I Use This Method for Plastic Lampshades?
A: No, this method is only recommended for metal lampshades with ridges on the top rim. Using this method on plastic lampshades may result in damage to the shade. You can use a hairdryer to heat the reducer ring on a plastic lampshade and remove it more easily. The ring can then be replaced with a plastic one. It is not recommended to attempt to remove the ring on plastic lampshades as it may result in damage and the need for a new shade.
Q: How Do I Dispose of the Reducer Ring?
A: The best way to dispose of the reducer ring is by throwing it away in the garbage. Make sure to dispose of it safely and securely so that no one can use it again. If you have a plastic lampshade and have attempted to remove the ring, make sure to dispose of the old shade properly as well. You can also recycle the metal ring if your local recycling allows it. The important thing is to make sure that it is safely and properly disposed of.
Q: Can I Use a Screwdriver to Remove the Ring?
A: No, you will need a screwdriver with a socket on the end to remove the reducer ring from metal lampshades. If you use a regular screwdriver, you may damage the ridges on top of the lampshade and make it difficult to remove the ring. It is important to use the correct tools and be careful when working with metal lampshades.
Q: How Often Should I Clean off the Top of the Reducer Ring?
A: It is recommended to clean off the top of the reducer ring after each time you remove it from your lampshade. This will prevent any adhesive residue from building up and keep your lampshade looking clean. However, if you do not plan on using the lampshade for a while, make sure to thoroughly clean it before storing it away. It is also important to make sure the ring is completely dry before putting it back on your lampshade.
Q: Can I Store My Lampshade Without the Reducer Ring?
A: It is not recommended to store your lampshade without the reducer ring attached. The ridges on top of the lampshade may become damaged if stored without the support of the ring, making it difficult to reattach in the future. If you know that you will not be using your lampshade for a while, make sure to properly clean and store it with the reducer ring attached to prevent any damage. Additionally, storing the lampshade with the ring attached will make it easier to reassemble in the future when needed.
Q: Can I Use This Method for Any Type of Lampshade?
A: No, this method is specifically for removing reducer rings from metal lampshades with ridges on the top rim. It is not recommended for other types of lampshades, as they may require different methods or techniques. It is important to understand the type of lampshade you have and research the appropriate method for removing any attachments before attempting to do so. If unsure, it is best to consult a professional or contact the manufacturer for guidance.
Conclusion Paragraph:
A lampshade reducer ring is a metal band that connects the bottom of an upholstered, pleated, or bell-shaped lampshade to its stem. To remove the reducer ring from your fixture, you will need to unscrew it by hand using a screwdriver with a Phillips head blade on one side and a flathead blade for leverage on the other.
Ensure not to over-tighten as this can cause damage to your fixture’s threads and could break them off entirely if they are old enough. Finally, the conclusion paragraph is informative and provides information on how to remove lamp shade reducer ring.
You Can Check It Out to Recover a Vintage Lampshade
Elizabeth Davis
Elizabeth is a creative writer and digital editor based in the United States. She has a passion for the arts and crafts, which she developed from a young age. Elizabeth has always loved experimenting with new mediums and sharing her work with others. When she started blogging, she knew that DIYquickly would be the perfect platform to share her tutorials and tips. She's been writing for the blog from the beginning, and her readers love her helpful advice and easy-to-follow instructions. When she's not writing or editing, Elizabeth enjoys spending time with her family and friends.