
How to Attach Foam to Fabric
You ought to be cautious not to do wrong the cloth while attaching fabric to foam. For starters, implementing adhesive straight to a part of the material will deform the cloth. A fusible interfacing medium is typically used to detach the fabric from the adhesive. The interfacing layer creates a defensive barrier from the solvent on the fabric.
It is safer to use foam adhesive while attaching foam, and not a hot glue tool, as this can burn the foam content. There are several forms of foam adhesives, or at most art shops, you can find both the fusible interfacing product and the foam adhesive. Foam Lock is an additive to spray carpeting. It sticks to foam, cardboard cloth, and foam tossing. It’s the go-to spraying glue for house cushions and simple home interior trim. Read this article on how to attach foam to fabric to find more.
How to Attach Foam to Fabric
It works instantly and can be used for either permanent or temporary bonds. Just spray one layer and press for a quick seal, when the coating is already tacky. Spray both sides, allow a tack to dry the glue, and then press for a lasting grip. The adhesive attaches instantly, allowing the repositioning of the two objects until it sets.
Summary: In order to attach foam to fabric, you will first need a surface to which the foam can be attached. You can use a cutting board, a piece of wood, or even a canvas. Next, you will need the foam and the fabric. Cut the fabric to the size of the foam, and then use a hot glue gun or a zigzag stitch to attach the foam to the fabric.
Materials:
• Design foam (Fabric padding is sold in several varieties in art shops. It appears in circles or sheets. I have used white, so it would be easier to polish and color so that you can adapt the shade of the foam to the shade you need your finished clothing to be).
• Compact Backing cloth (You could even use cheesecloth for wearable fitness items. However, this corset would have to be lined up because we used a light fabric.

Materials to Attach Foam to Fabric
- Acrylic Painting (I found black and metal copper);
- Rub-n-buff (A quite useful silver coating for this wax-based coating)
- Steel riffling Materials (the sticky scale of leaf and duct tape)
- Accent bits
- Paper Mud (I needed this to highlight my baby face.)
- Spanner Device
- Knives and Accessories
- Style (You can also create your version)
- Brush
- Coating (Unless packed, the rubbed-n-buff and leafing will wipe off on garments)
- Big Gage Rope (I used Multiple Anchor Cable, 16 gauge).
- Gesso (most adequate Primer)
- Spray paint (I chose gun-metal layered color, silver or stone texture to create a rusty impact)
Instructions to Attach Foam to Fabric
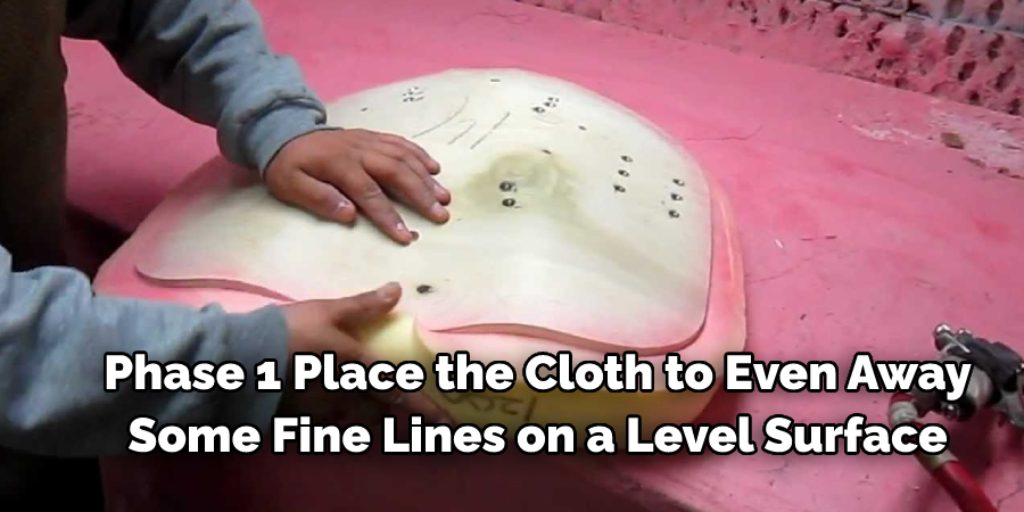
• Phase 1 Place the cloth to even away some fine lines on a level surface. If that has ample folds, you might want to go over the material with an iron.
• Place a thin fusible interface layer on the opposite side of the clothing. Press the fusible controller over the cloth to protect it from the fabric.
• Phase 3 Split the fusible thread interfacing into the same form as the cloth.
• Phase 4 Place the slice of foam on a piece of parchment paper, through the rubber, squirt foam adhesive. Just use a foam paintbrush to smoother out all the adhesive, particularly around foam borders.
• Phase 5: Put the cloth over the foam template, face upwards. Move it across the foam to fit correctly. Use your palm to fine-tune any irregularities.
• Phase 6 Place a wax piece of paper atop the cloth. Position a thick book over the fabric to hold it smooth when it is drying. The wax paper may keep the excess adhesive from the material from attaching to the cover.
Tips
For quick cleaning and recycling, use a disposable foam brush and wax paper until the task is done.
Step-by-Step Guide: How to Attach Foam to Fabric
Step 1: Gather Your Materials.
You Will Need:
Foam:
This can be found at most art stores in various shapes and sizes. Make sure to choose a color that will blend well with your fabric.
Fabric:
Choose a fabric that is durable and easy to work with. Cotton, linen, and polyester are all good choices.
Fusible Interfacing:
This will protect your fabric from the adhesive used to attach the foam. Cut it into the same shape as your fabric.
Foam Adhesive:
This can also be found at most art stores. Make sure to choose the right type of adhesive for your project.
Other materials:
Acrylic paint, Rub-n-buff, steel riffling materials, paper mud, spanner tool, knives and accessories, accent pieces, Gesso primer, spray paint, and big gauge rope.
Step 2: Cut the Foam to Size.
Cut the foam to the size of your project. For example, if you are attaching it to a shirt, cut it to the size of the shirt. If you are making a pillow, cut it to the size of the pillow. Cut the fabric to the size of your project, plus one inch on each side. For example, if you are attaching it to a shirt, cut it to the size of the shirt, plus two inches on each side. If you are making a pillow, cut it to the size of the pillow, plus two inches on each side.
Place the foam on top of the wrong side of the fabric. Fold over one inch of fabric around the edges of the foam and pin it in place. Sew the fabric around the edges of the foam, removing the pins as you sew.
Step 3: Glue the Foam to the Fabric.
Use strong glue that will hold the foam to the fabric. You can find this type of glue at most craft stores. Apply the glue to the back of the foam, and then place it onto the fabric. Use your hands to smooth out any wrinkles or bubbles. Let the glue dry for at least 24 hours before moving on to the next step.
Step 4: Sew the Velcro onto the Fabric.
The Velcro will help keep the foam in place so it doesn’t move around. You can find Velcro at most fabric stores. Cut two pieces of Velcro and sew one piece onto the fabric and the other piece onto the foam. Make sure they line up when they are attached. But if you are making something that will be stretched, remember to make the Velcro spaced out so it can stretch with the material.
Step 5: Attach the Foam to the Shirt.
First, put on the shirt, then attach the foam. The Velcro should be strong enough to keep the foam in place, but you can also use safety pins to attach the foam to the shirt if you are worried about it shifting around. It’s best to try on the shirt before wearing it out to make sure that the foam is in the right spot and feels comfortable. Adjust as needed.
Step 6: Enjoy Your New Shirt!
You now have a shirt with foam attached to it! You can use this same method to attach the foam to other types of clothing or even to a blanket or pillow. Have fun with your new project!
This is a great way to add extra padding to a shirt or make your unique pillows. With just a few simple materials, you can attach the foam to the fabric in no time.
Some Helpful Tips and Suggestions:
1. Choose the right type of adhesive. There are many different types of adhesives on the market, so it is important to select one specifically designed for bonding foam to the fabric.
2. Make sure both surfaces are clean. Any dirt or debris on either the foam or fabric can prevent the adhesive from bonding properly.
3. Use an even amount of adhesive. Applying too much adhesive can cause the foam to become too heavy and may lead to it sagging over time.
4. Allow the adhesive to dry completely before using the fabric. If you try to use the material before the adhesive has dried, it may not stick properly.
5. Before applying your project to the entire surface, test it in a small area. This will help ensure that the adhesive is working properly and that the fabric is sticking correctly.
6. If you are using a spray adhesive, follow the manufacturer’s instructions carefully. Over-spraying can cause the foam to become too sticky and make it difficult to work with.
7. When cutting foam, use a sharp knife or razor blade to avoid tearing the fabric. A dull knife can snag on the fabric and cause it to tear.
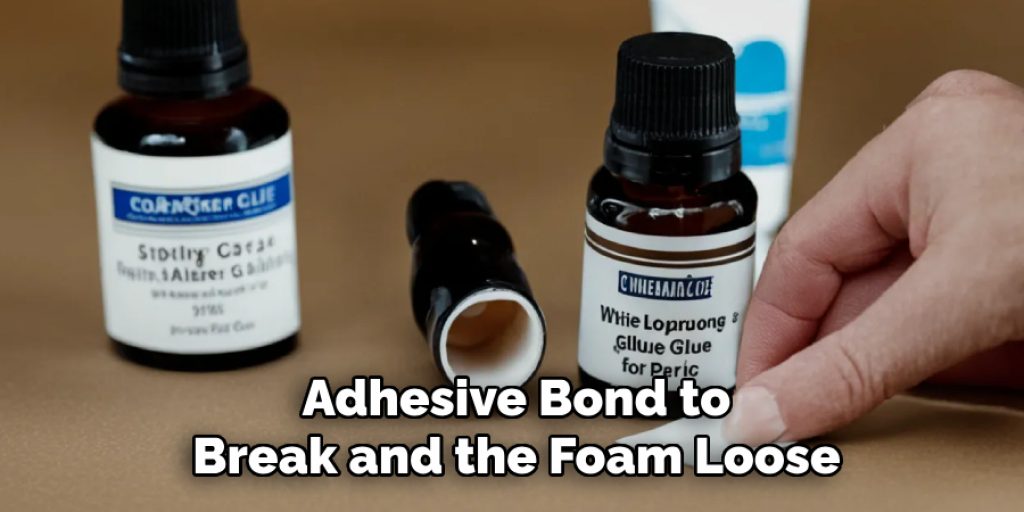
8. Be careful not to stretch or distort the fabric when working with it. This can cause the adhesive bond to break and the foam loose.
Why Should You Attach Foam to Fabric?
There are a few reasons you might want to attach the foam to the fabric. The most common reason is to add extra padding or insulation to the fabric. This can be useful for making padded clothing, such as jackets or vests, or adding insulation to bags and other items. Another reason to attach foam to fabric is for aesthetic purposes. You can use it to create raised patterns or 3D effects on your fabric. This can be done by gluing the foam to the fabric or by stitching it on.
Finally, you might want to use foam to stabilize the fabric. This can be helpful when working with delicate fabrics that might otherwise tear or fray. Foam can also be used to add structure to fabric projects, such as bags or hats.
Another reason to attach the foam to the fabric is to create a more solid surface. This can be helpful if you are making a piece of furniture, such as a chair or couch, and you want to make sure that the foam will not shift around or collapse over time.
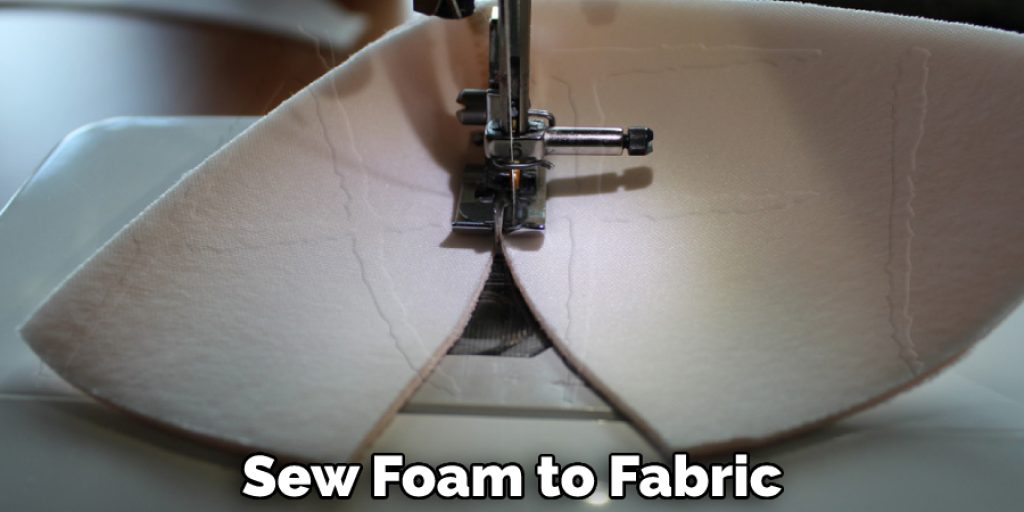
Can You Sew Foam to Fabric?
Yes, you can sew foam to fabric, and there are a few different ways to do it. The most common way is to use an adhesive spray, like 3M 77. Another option is to use basting spray, a temporary adhesive that washes out easily. You could also use fusible webbing, iron-on adhesive, or sew-in Velcro.
No matter which method you choose, make sure the foam and fabric are clean and dry before starting. Cut the foam to the desired size, then place it on the wrong side of the fabric. You can use a straight edge to help keep everything aligned.
Frequently Asked Questions
Can You Sew Foam to Fabric?
Sewing foam into fabric is possible, but it is important to use the right type of foam and the correct sewing techniques. Otherwise, the foam might tear or crack.
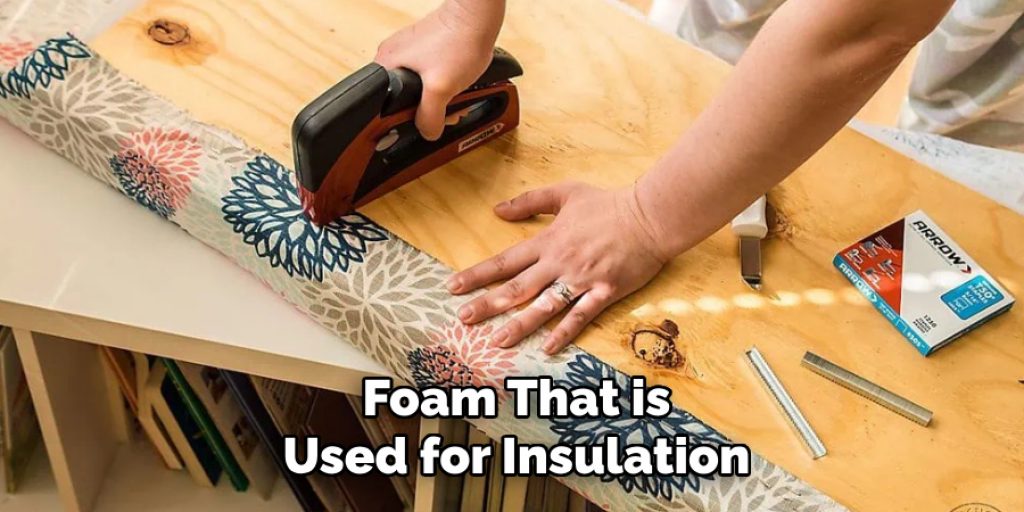
Foam that is used for insulation or other applications where it is not expected to tear or crack should be sewn to fabric using a standard seam allowance and a zigzag stitch. Make sure the seams are sealed with a layer of hot glue so that the foam doesn’t move around while the glue dries.
What Adhesive Can Be Used on Foam?
There are many adhesives that can be used on foam, but the most common are water-based adhesives. These adhesives are safe to use and do not leave residue behind.
Some other types of adhesives that can be used on foam include:
• Acrylic adhesive: This type of adhesive is ideal for use on acrylics because it is non-toxic and dries quickly.
• Latex adhesive: This type of adhesive is best suited for use on latex materials because it is durable and has a high shear strength.
Can Eva Foam Be Sewn?
Eva foam is not your standard construction foam, but it can be seen used in many different ways. Made from polyurethane, Eva foam has a soft, spongy texture that makes it ideal for use as an insert in furniture to make it more comfortable and durable.
What Is Fabric Glue?
Fabric glue is a type of adhesive that is used to attach fabric pieces together. It is also known as a sewing adhesive, fabric gluing agent, or fabric fastener.
There are many types of fabric glue, but the most common ones are:
• E6000 is a popular choice for general use because it is non-toxic and has a low odor.
• Tacki-Mac is a strong and water-resistant adhesive that can be used on fabrics with high moisture content.
• Glue Dots are small, round pieces of adhesive that are easy to apply and remove.
Is Gorilla Glue Good for Fabric?
It depends on the type of fabric and how much Gorilla Glue you are using. However, if you are using Gorilla Glue for repairs or modifications to fabrics, it is generally safe to use.
If you are using Gorilla Glue for decorative purposes such as adding stripes or patterns to fabrics, it is best to avoid using it on delicate fabrics as the glue may cause damage. Instead, use other types of adhesives that are specifically designed for fabric applications.
What Is the Strongest Glue for Fabric?
There is no one answer to this question as the best glue for fabric depends on the type of fabric, the purpose of the glue, and your personal preferences. However, some of the most common types of glues that are used to attach fabrics include:
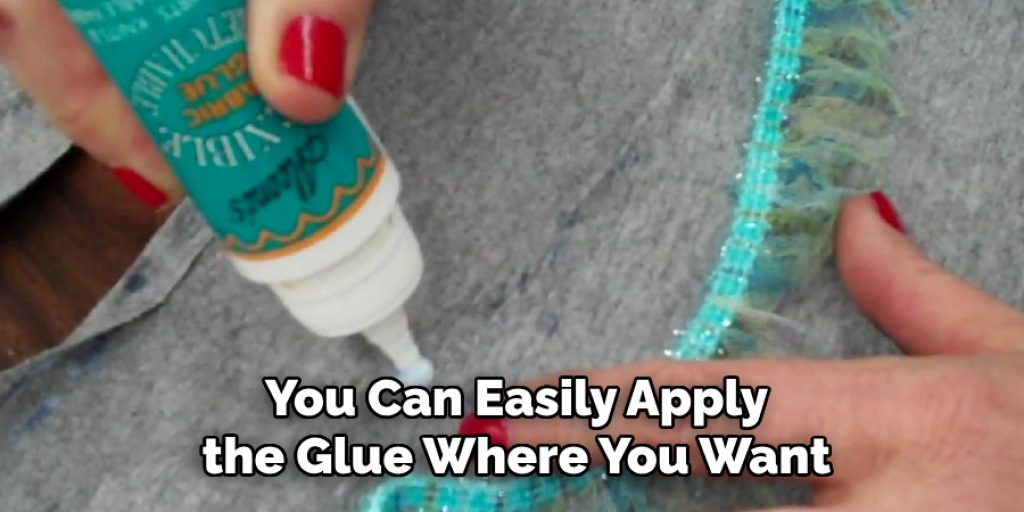
• Glue Guns:
These are handheld devices that use a small cartridge filled with adhesive to apply the glue to surfaces. They are convenient because you can easily apply the glue where you want it without having to go through long and tedious steps of measuring and transferring the adhesive.
• Glue Sticks:
These are similar to glue guns in that they use a cartridge filled with adhesive, but they come in a stick form instead of a gun form. This makes them easier to hold and control when applying the adhesive.
• Liquid Adhesives:
These are also known as hot melt adhesives because they require heat (usually around 100 degrees Fahrenheit) to activate the adhesive. This is usually done by using an iron or a stovetop burner.
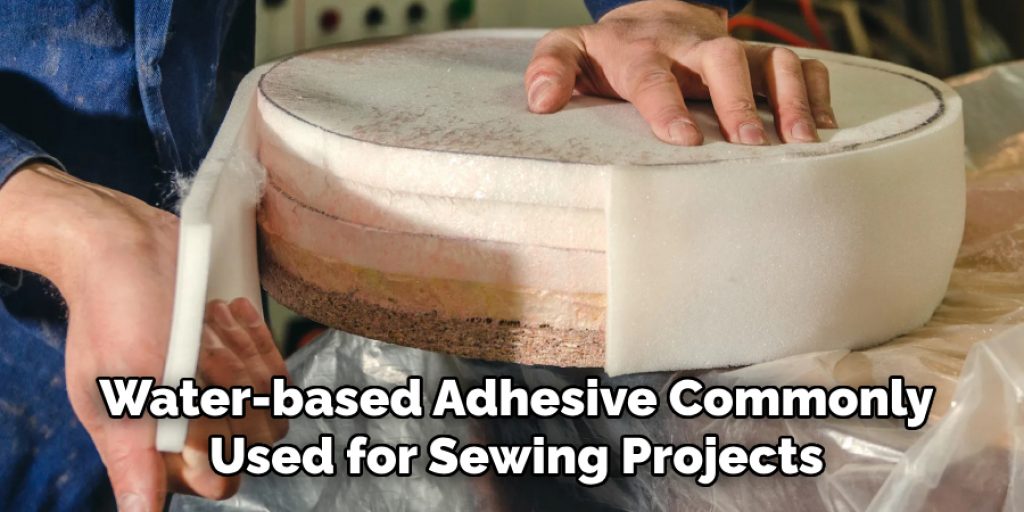
• Pva (Polyvinyl Acetate) Glue:
This is a water-based adhesive commonly used for sewing projects because it is easy to work with, doesn’t leave any residue, and dries quickly.
Conclusion:
In conclusion, attaching foam to fabric is a process that can be completed with a few simple tools and supplies. By following the steps in this guide on how to attach foam to fabric, you should be able to create a professional-looking finished product.
We hope you found this blog post helpful and that you are now armed with the knowledge necessary to take your crafting skills to the next level. Have you tried this method before? What tips do you have for others who want to give it a try? Let us know in the comments below!
You Can Check It Out to: Make Back Cushions for Sofa
You may read also –
1. How to Make a Fabric Wreath Styrofoam
2. How Can I Make an Appliance Handle Cover Out of Fabric
Nancy Behan
Nancy is an embroidery artist, fashion blogger and a full time editor at DIY quickly. Nancy edits the fashion section on DIY quickly, focusing on the embroidery and cross stitch articles, alongside with fabric and other costume design elements. She graduated from the University of Michigan with a Bachelor of Arts in Art History. She loves to work on her own projects, read books and watch romantic movies in her spare time.


