How to Attach Headboard to Dorm Bed
Dorm beds can be quite uncomfortable, but with a little creativity, you can make them much more comfortable. In this post, we’ll show you how to attach headboard to dorm bed using simple materials. This will add comfort and style to your bed. Let’s get started!

What Is a Dorm Bed?
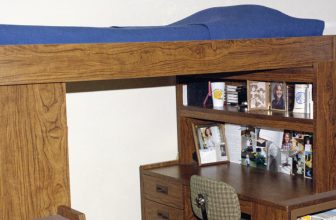
A dorm bed is a type of bed that is typically found in a college or university dorm room. Dorm beds are usually twin-sized, meaning they are smaller than a standard-sized bed. This makes them perfect for smaller spaces, such as dorm rooms.
Dorm beds often come with built-in storage, such as drawers or cabinets, which is perfect for storing extra clothes, textbooks, or other items. Some dorm beds even come with a desk attached, which can be great for studying or working on projects.
Dorm beds are typically very simple and straightforward, but they can vary in style depending on the school or university. For example, some schools might have more modern dorm beds, while others might have more traditional styles.
No matter the style, dorm beds are a great way to save space in a small room.
Why Should You Need to Attach Headboard to Dorm Bed?
Dorm beds are not the most comfortable places to sleep. The mattresses are thin, and the metal frames can be quite hard. As a result, many students find that they need an extra cushion to make their dorm bed more comfortable. One way to add a bit of padding is to attach a headboard.
A headboard can provide comfort and support, making it easier to drift off to sleep. In addition, attaching a headboard can help add a bit of style to your dorm room. With so many different designs available, it is easy to find a headboard that matches your personality.
Whether you prefer a traditional wood frame or a modern upholstered look, attaching a headboard to your dorm bed is a great way to add comfort and style.
Needed Materials:
Headboard:
The first thing you will need to attach a headboard to your dorm bed is, of course, the headboard itself. As mentioned before, there are many different types of headboards available, so be sure to choose one that fits your style and budget.
Bed Frame Brackets:
To attach the headboard to your dorm bed, you will also need bed frame brackets. These are typically inexpensive and can be found at most hardware stores. Make sure to choose brackets that fit your bed frame.
Screws:
You will also need screws to attach the headboard to the brackets and the brackets to your bed frame. The size of the screws may vary depending on the type of headboard and brackets you have chosen, so make sure to read the instructions carefully before purchasing.
Tools:
To attach the headboard, you will need some basic tools such as a screwdriver, a drill (optional), and a level. It is also helpful to have an extra set of hands to hold the headboard in place while attaching it to your bed frame.
How to Attach Headboard to Dorm Bed Step-by-Step Guide
Step 1: Choose the Right Headboard
The first step is to make sure you have the right headboard. There are many different headboards, so it’s important to pick one that will fit your bed and your style. If you’re not sure what type of headboard you want, take a look at some pictures online or in magazines for inspiration.

You can also check with your school to see if they have any specific guidelines for headboards in the dorm rooms. It’s always best to double check before making a purchase.
Step 2: Measure the Bed
Once you have the right headboard, it’s time to measure your bed. This is important because you need to make sure the headboard will fit both the width and height of your bed. Most headboards are adjustable, so you’ll also need to note how far away from the ground you want them to be.
You can do this by measuring from the top of your mattress to where you want the bottom of the headboard to sit. The average height for a headboard is around 24 inches, but this can vary depending on your personal preference.
Step 3: Get a Drill and Some Screws
Now that you have the right headboard and the correct measurements, it’s time to get a drill and some screws. The type of screw you’ll need will depend on the material of your headboard. If you’re not sure, ask someone at a hardware store for help.
It’s always a good idea to have extra screws on hand, just in case. You don’t want to get halfway through the project and realize you don’t have enough screws!
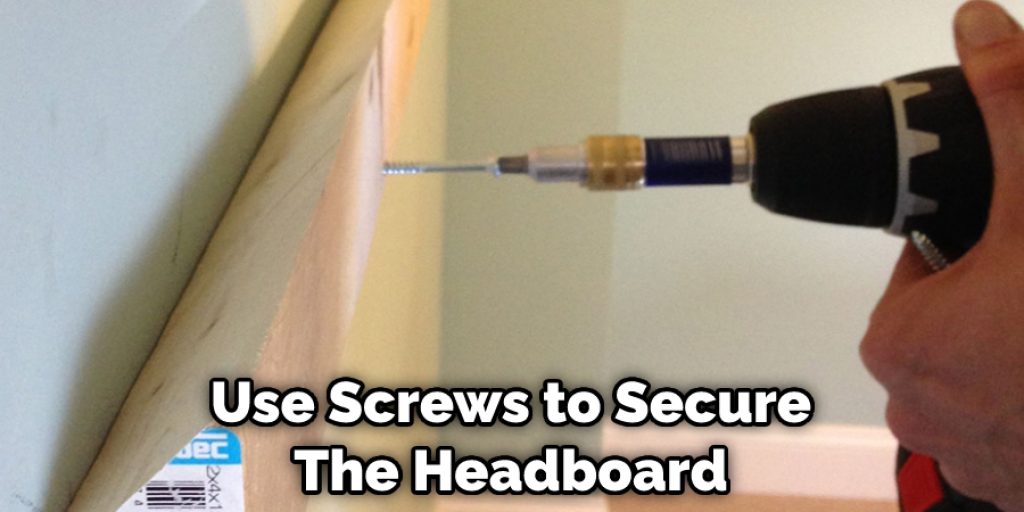
Step 4: Attach the Headboard to the Bed
With the drill and screws, it’s finally time to attach the headboard to your bed. Start by screwing the headboard into the bed frame at the top. Once it’s secure, you can move on to the bottom. Make sure the headboard is level before tightening all of the screws.
Otherwise, you could end up with a lopsided headboard. If you don’t have a drill, you can use a screwdriver and some elbow grease. You may also need an extra set of hands to help hold the headboard in place while attaching it.
Step 5: Add the finishing touches
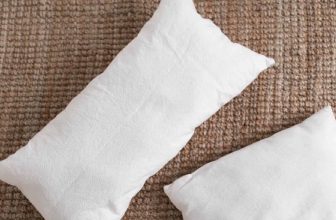
Once the headboard is attached, it’s time to add the finishing touches. This might include adding pillows or a blanket to make it more comfortable. You could also add some photos or artwork to personalize it. Whatever you decide, make sure it reflects your style. After all, your dorm room is your home away from home!
You can now enjoy your newly attached headboard and get a good night’s sleep in your dorm bed. It’s amazing how such a simple addition can make a big difference in comfort and style. Plus, if you ever move to a different dorm or apartment, you can easily take the headboard with you.
Step 6: Enjoy Your New Headboard!
Now that you’ve followed these steps, you should have a beautiful and stylish headboard attached to your dorm bed. So enjoy it, and make sure to show it off to all of your friends! A headboard is a great addition to any dorm room and can make your space feel more like home.

That’s it! You’ve now learned how to attach the headboard to dorm bed. With this new skill, you can add comfort and style to your room. So what are you waiting for? Get out there and start shopping for the perfect headboard!
What Materials Do You Need to Attach a Headboard to A Dorm Bed
You’ll need to gather a few materials before you can attach a headboard to your dorm bed. First, you’ll need a headboard. You can either purchase one from a local furniture store or make your own online. If you’re making your own, you’ll need wood boards, saws, sandpaper, paint, and screws.
Once you have your headboard, it’s time to attach it to the bed. Again, you’ll need a drill, screwdriver, screws, and washers. Most headboards will have instructions on how to attach them to the bed. However, if there are no instructions, use the screws and washers to attach the headboard directly to the bed frame.
Once the headboard is attached, you’re all set! You can now add any finishing touches, such as pillows or a blanket, and enjoy your new piece of furniture.
How Do You Measure the Space on Your Dorm Bed for The Headboard
Most college students choose to live in dorms during their first year. Dorm living has pros and cons, but it’s most affordable, and it gives you some independence from your parents. It also allows you to meet other people going through the same experience as you – attending college for the first time.
When you move into a dorm, you’ll need to figure out how to measure the space on your dorm bed for the headboard. You’ll want to make sure that the headboard is the right size so that it doesn’t take up too much space in your room or look odd. Here are a few tips on how to measure the space on your dorm bed for the headboard:

1. Use a tape measure to measure the length and width of your mattress.
2. Add 4 inches to those numbers. This will give you enough space to accommodate the headboard without being too big or too small.
3. Once you have your measurements, find a headboard that is the right size. You can usually find headboards online or at a local furniture store.
4. Make sure to consider any additional decorations you might want to put on the headboard, such as shelves or hooks. This will ensure that you have enough space for everything.
How Do You Make Sure Your Headboard Is Secure on Your Dorm Bed
One of the most important things to do when setting up your dorm room is to ensure that your headboard is secure on your bed. There are a few different ways that you can do this. The first way is to use command strips. Command strips are very strong and will hold your headboard in place.
Another way to secure your headboard is to use screws. You will want to use screws that are long enough to go through your headboard and into the wall. This will make sure that your headboard does not move around at all.
The last way to secure your headboard is to use furniture straps. Furniture straps are great because they are adjustable and keep your headboard from moving around.
Whichever method you choose, make sure that you test it out before you go to sleep so that you know that it is secure. Keep reading for more information about how to attach headboard to dorm bed.
How to Attach a Headboard to a Dorm Bed without Nails or Screws
Attaching a headboard to a dorm bed can be challenging, as most dorm beds are not equipped with the necessary hardware. However, there are a few simple tricks that can be used to secure a headboard without nails or screws.
One option is to use command strips. Command strips are strong adhesive strips that can be easily removed without damaging the headboard or bed frame. Another option is to use Velcro. Velcro can be wrapped around the posts of the bed frame and then attached to the back of the headboard. This method is especially handy if you plan on changing headboards frequently.
With a little creativity, it is possible to attach a headboard to a dorm bed without nails or screws.
How to Make Your Own Headboard for a Dorm Bed
A headboard can add a touch of style to any bed, but it can be especially useful in a dorm room. Not only does it help to define the space, but it can also provide extra storage or a place to hang artwork.
Making your own headboard is a great way to personalize your space and add a bit of creativity to your dorm room decor. Best of all, it’s easy to do and doesn’t require any special tools or materials. Here’s how:
1. Choose your materials. You’ll need some plywood (or another sturdy material), fabric, batting, and upholstery nails or staples.
2. Cut the plywood to size. Unless you’re using a pre-cut piece of wood, you’ll need to measure and mark the wood before cutting it to size with a saw.
3. Cover the plywood with fabric. Begin by stapling or nailing the fabric around the edges of the plywood. Then, pull the fabric taut and staple or nail it in place in the center of the board. Continue until the entire board is covered.
4. Attach batting and trim excess fabric. To add extra padding, cover the fabric with batting and trim away any excess material.
5. Hang the headboard on the wall. Use nails or screws to secure the headboard to the wall above your bed. Make sure it is level before attaching it completely.
6. Add any finishing touches. If you like, you can add hooks to the back of the headboard for extra storage or hang artwork from the top. You could also add buttons or tuft for extra decoration.
Frequently Asked Questions:
Q: Can I Use Any Type of Wood for My DIY Headboard?
A: Yes, you can use any type of sturdy wood for your headboard. However, keep in mind that some types of wood may be heavier than others and may require additional support when attaching it to the bed frame. You can also use alternative materials, such as foam or cork, for a unique and lightweight headboard.
Q: Can I Add Shelving to My Headboard?
A: Yes, you can add shelves or other storage options to your headboard for added functionality. Make sure to consider the weight and stability of the shelves before attaching them to the headboard. You may also want to use furniture straps or additional screws for added support.
Q: Can I Use a Curtain Rod as a Headboard?
A: Yes, you can use a curtain rod as a headboard by hanging fabric or curtains from it. This is an easy and affordable way to add some personality to your dorm room without having to make a headboard from scratch. Just make sure that the curtain rod is securely attached to the wall and can support the weight of the fabric.
Q: Can I Paint or Stain My DIY Headboard?
A: Yes, you can paint or stain your DIY headboard to match your dorm room decor. Make sure to use a primer before painting and allow the paint or stain to fully dry before attaching the headboard to your bed. You could also add a coat of sealant for added protection and longevity. Overall, use your creativity and have fun with it! The possibilities are endless when it comes to making your own headboard for your dorm room.
Just remember to take proper measurements, choose sturdy materials, and test the stability before using it regularly. With these tips, you can create a unique and practical headboard for your dorm bed that will make your room feel like home. So go ahead and get creative with your headboard! Happy decorating! Remember to have fun and make the space truly yours.
Conclusion
So there you have it! With simple tools and supplies, you can create a beautiful and personalized headboard for your dorm bed. We hope you’ve found this tutorial helpful and that you enjoy your new headboard. Thanks for reading how to attach headboard to dorm bed.