How to Build a Loft Bed with Desk
Maximizing space in a bedroom, especially in smaller living quarters, often calls for creative solutions. A loft bed with an integrated desk is a practical and efficient way to achieve just that. Combining a sleeping area with a functional workspace, this DIY project provides an ideal setup for students, professionals, or anyone seeking to optimize room layout.
In this comprehensive guide, we’ll explore step-by-step instructions on how to build a loft bed with desk, ensuring a sturdy and stylish multi-purpose piece of furniture. From gathering the necessary materials and tools to understanding the assembly process and safety considerations, we’ll cover it all. So, let’s embark on this carpentry journey, empowering you to build a customized loft bed with a desk, tailored to your spatial and functional needs.
Benefits of a Loft Bed with Desk
One of the main reasons why loft beds with desks are becoming increasingly popular is because they offer a range of benefits. These multifunctional pieces of furniture can not only save space, but also provide numerous advantages for both children and adults.
Space-Saving Solution
The most obvious benefit of a loft bed with desk is that it saves precious space in any room. This is especially useful in smaller living spaces such as apartments, any dorm rooms, or tiny homes. By elevating the bed, you free up valuable floor space that can be used for other purposes.
Practicality and Convenience
Having a desk integrated into the loft bed design offers practicality and convenience. Instead of having a separate desk taking up space in the room, the loft bed with desk combines two essential pieces of furniture into one. This is particularly useful for students or those who work from home, as they can have a designated study area without sacrificing additional space.
Encourages Organization and Productivity
Having a loft bed with desk also encourages organization and productivity. With a designated workspace within the bedroom, it becomes easier to separate work or study time from relaxation and sleep. This can lead to increased focus and productivity, as well as keep the bedroom clutter-free.

Versatility in Design
Loft beds with desks come in a variety of designs, making them versatile for any room. Whether you prefer a minimalist style or a more traditional look, there are plenty of options to choose from. Additionally, some loft beds have the option to detach the desk, allowing for even more flexibility in design and function.
Suitable for All Ages
While loft beds with desks are often associated with children’s bedrooms, they are suitable for all ages. For children, a loft bed can be a fun and exciting addition to their room, while providing functional space for playing or studying. For adults, it offers a stylish and space-saving solution for smaller living spaces.
10 Steps How to Build a Loft Bed with Desk
1. Gather Materials and Tools:
The first step in building a loft bed with desk is to gather all of the materials and tools you will need. This includes lumber, screws, nails, saws, drills, sandpaper, and any other items that may be necessary for your project. Make sure to measure out the area where the bed will be placed so you have an accurate idea of how much material you will need. It’s also important to have a clear understanding of the tools and their functions before beginning the project.
2. Cut the Lumber:
Once you have all of your materials gathered, it’s time to start cutting the lumber into the appropriate sizes for your project. Measure twice and cut once to ensure accuracy. It is also important to wear safety glasses while cutting, as small pieces of wood can fly off and cause injury. If you are unsure of how to use a circular saw, it is best to ask for help or watch instructional videos online.
3. Assemble the Frame:
After all of the pieces are cut, it’s time to assemble the frame for your loft bed with a desk. Start by attaching two side rails to each end of a long rail using screws or nails for extra strength and stability. Then attach shorter rails between each pair of side rails at both ends for added support. Make sure to line up the rails perfectly before securing them in place.

Next, add slats along the length of the frame for extra support and to prevent the mattress from sagging. These can be attached by simply screwing or nailing them into place on top of the side rails. For added safety, consider using a metal angle bracket at each corner where two slats meet to prevent them from shifting.
4. Attach Support Braces:
To provide additional stability for your loft bed with desk, attach support braces between each pair of side rails on both ends using screws or nails. This will help keep the frame from shifting or wobbling when weight is applied to it later on in construction. However, be sure to leave enough space between the support braces and the bottom of the frame to allow for clearance when adding a desk or other furniture underneath.
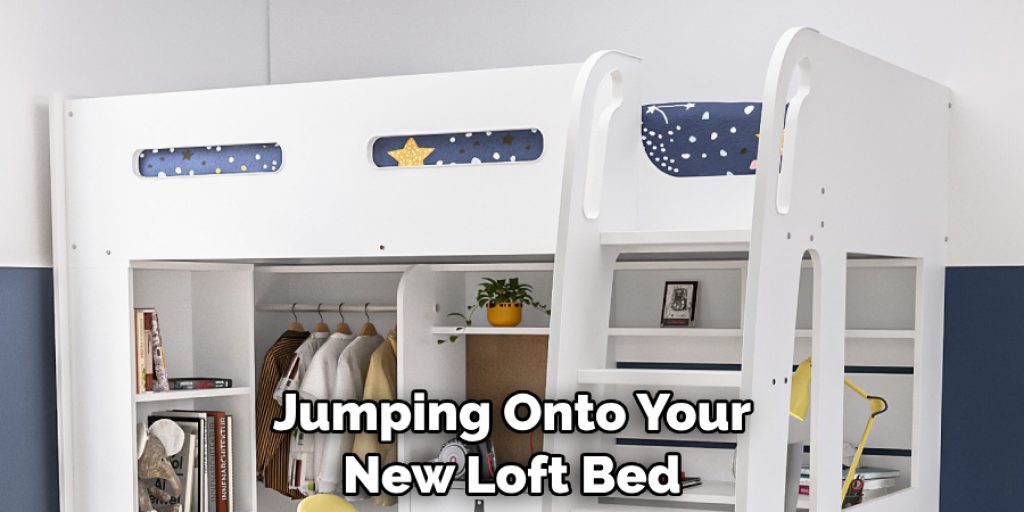
5. Build Ladder Rungs:
Now it’s time to build ladder rungs so that people can safely climb up onto their loft bed with desk once it’s complete! Start by measuring out how far apart each rung should be placed based on individual preference or safety standards (usually about 12-18 inches). Then use wood screws or bolts to secure each rung into place between two side rails on either end of the frame.
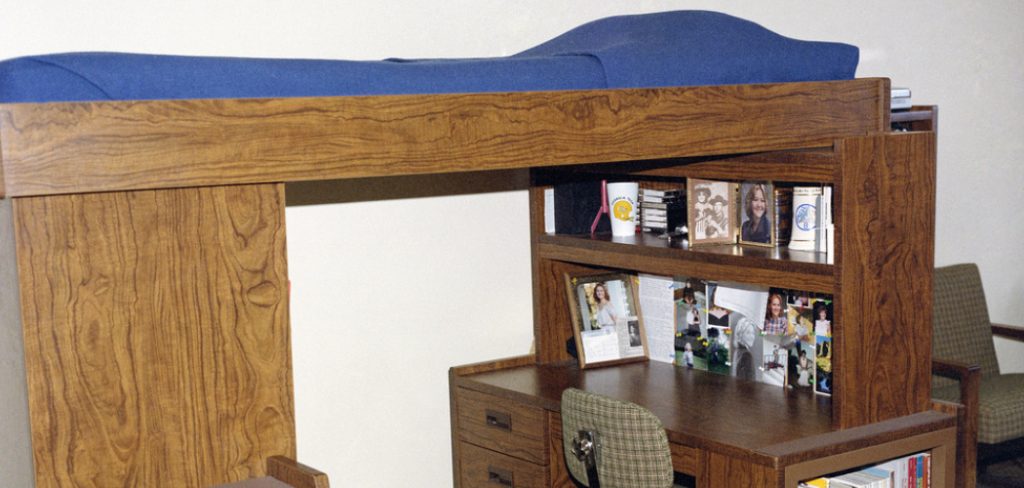
6. Attach Desk Supports:
For those who want a desk attached to their loft bed with a desk, this is where they would attach supports for it! Measure out where you want your desk supports placed along one side rail and then secure them into place using screws or nails before moving on to the next step in construction. It’s important to make sure the desk supports are securely attached as it will be holding up the weight of a desk and any items placed on top.
7. Install Slats:
To provide support for a mattress on top of your loft bed with a desk, install slats along both sides of its frame using wood screws or bolts every few inches apart from one another (depending on individual preference). This will provide even more stability when weight is applied later on in construction, as well as give users a comfortable surface to sleep on top of at night!

8. Add Finishing Touches:
Now that all structural components are complete, it’s time to add finishing touches such as paint or stain if desired! You can also add decorative trim around edges for a more polished look if desired too – just make sure not to cover up any structural components such as ladder rungs or slats while doing so!
However, if you want a more modern or industrial look, you can skip the finishing touches and leave it as bare wood. This is also a great opportunity to add some personalization to your loft bed with desk – consider adding decals, stencils, or even painting on your child’s name for a personalized touch.
9. Attach Desk Top:
If desired, attach a desktop onto one end of your loft bed with a desk by securing brackets into place along its supports before placing the desktop overtop. Make sure the desktop is securely fastened before moving on to the next step!
Although this step is optional, it can be a useful addition for those who need a study space or work area in their bedroom. To save space, consider using a smaller desk or even a folding one that can be stored away when not in use. Additionally, you can customize the desktop by painting it with your favorite color or adding decorations such as photos or vinyl stickers.
10. Place Mattress :
Finally, once everything else is finished, place the mattress securely atop the slats before climbing up onto your new loft bed with a desk! Many people choose to use a ladder or steps to get up onto the bed, so make sure you have one that will fit well for your needs. Some options include built-in ladders, movable ladders, and shelves with steps on them.
If you are using a ladder, ensure it is securely attached and can support weight without wobbling or falling over. Once everything is in place, make sure the mattress is centered and secure before jumping onto your new loft bed.
Conclusion
Building a loft bed with a desk is definitely worth the effort, as you can create a beautiful and unique piece of furniture for your home. You have just been provided with important steps that will walk you through the entire design process from start to finish. It is now time to take these steps to assemble all the needed materials and start building the loft bed yourself as soon as possible!
This way, you can quickly transform an ordinary room into one you really love. Keep in mind the construction concepts discussed in this blog post, and remember to exercise caution when using any power tools during the assembly process. Thanks for reading, and we hope this has given you some inspiration on how to build a loft bed with desk!
Angela Ervin
Angela is the executive editor of DIY quickly. She began her career as an interior designer before applying her strategic and creative passion to lifestyle and home. She has close to 15 years of experience in creative writing and online content strategy for housekeeping, home decorations as well as other niche efforts. She loves her job and has the privilege of working with an extraordinary team. She lives with her husband, two sons, and daughter in Petersburg. When she's not busy working she spent time with her family.