How to Build Outdoor Table
Building your own outdoor table can be a rewarding DIY project that adds functionality and style to your outdoor living space. Whether you want to create a table for dining, entertaining, or simply enjoying the outdoors, building an outdoor table allows you to customize the design, size, and materials to suit your specific needs and aesthetic preferences.
In this article, we will explore some tips and steps on how to build outdoor table, from selecting materials to assembling the table, to help you create a beautiful and functional addition to your outdoor space.
What Is Good Material for Outdoor Table Top?
When building an outdoor table, the material of the top is just as important as the structure. There are a few popular materials used for outdoor table tops: wood, metal, and concrete.
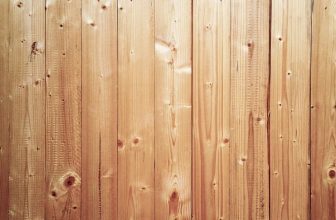
Wood tables provide a classic and natural look that can blend in with any garden style. However, they do need more maintenance than other options since it is prone to weathering and needs regular sealing or finishing to keep it looking good. Teak and cedar are two popular choices because their natural oils make them resistant to rot and insects.
Metal tops like stainless steel, aluminum, and even copper can be great for modern designs. They’re lightweight but tough enough to resist scratches. The advantage of metal is that it’s easy to clean and maintain, but the downside is that it can heat up in direct sunlight.
Finally, concrete tables are becoming popular thanks to their durability and neutral look. Concrete can be tinted or stained in various colors to match any decor.
It is also low maintenance; however, this material requires a lot of elbow grease when cleaning since it is porous and prone to staining. Whichever material you choose for your outdoor table top, make sure that it is suitable for the climate you live in. That way, you can enjoy your outdoor table for many years to come!
10 Steps on How to Build Outdoor Table
Step: 1. Plan your Design
Decide on the size, shape, and style of the outdoor table you want to build. Consider the materials you want to use, the intended use of the table, and any specific features or functionalities you want to incorporate into the design.
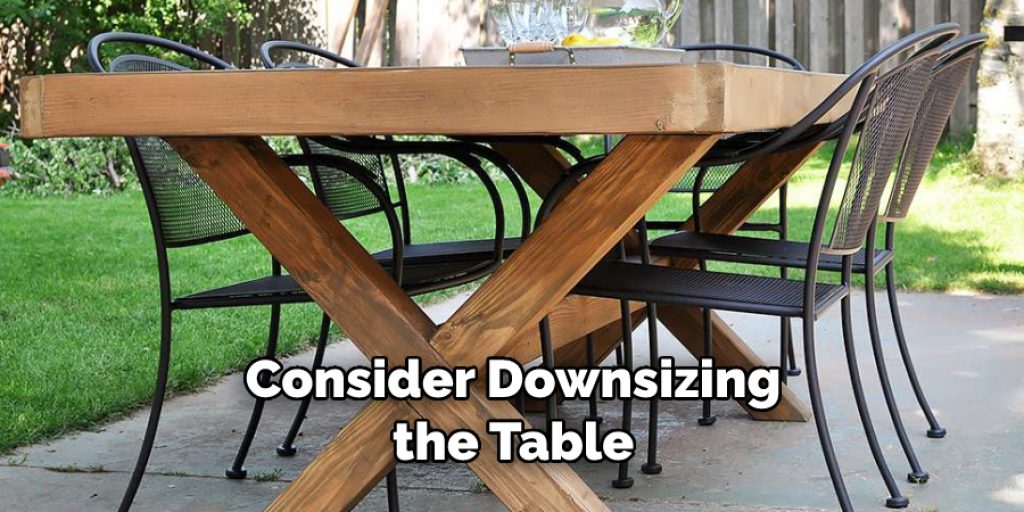
If you are working with a limited amount of space, consider downsizing the table or using materials that do not take up too much space. When planning the size of the table, consider how many chairs you want to be able to fit around it.
Step: 2. Gather Materials and Tools
Purchase or gather all the materials and tools you will need for the outdoor table construction. This may include wood planks, screws, nails, a saw, a drill, a hammer, measuring tape, and sandpaper, among others. To avoid having to make trips to the store in the middle of the project, it is best to gather everything you need beforehand.
If you are not sure what materials to use, consult with a professional carpenter who can recommend the best options for your project. Once you have all of the materials and tools ready, you are ready to move on to the next step.
Step: 3. Prepare the Wood
If using wood, cut the planks to the desired length and sand them to smooth out any rough edges or surfaces. Predrill the holes in the wood and attach them together with screws. Use a level to make sure all pieces are straight and even.
When woodworking, always make sure to wear protective equipment when working with power tools. To ensure a sturdy, long-lasting table, use waterproof wood glue for the joints. Although it is not necessary, you can also seal the wood with a polyurethane varnish to protect it from moisture and harsh weather conditions.
Step: 4. Assemble the Table Frame
Start by assembling the frame of the table, which typically consists of legs, supports, and crossbars. Use the appropriate tools and techniques to securely join the pieces together, such as using screws or dowels.
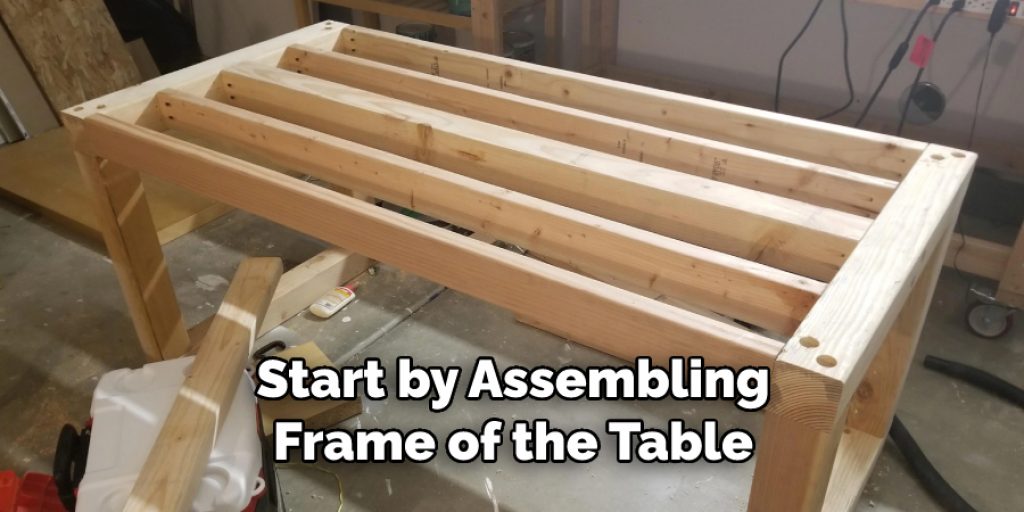
If the table has a center column, insert it into the frame. If there are arms, attach them to the frame. However, leave them loose until the top is attached. To finish the frame, attach the base of the support legs to the top. If necessary, use a level to ensure the frame is even. However, do not tighten the screws until all of the pieces are in place and level.
Step: 5. Add the Tabletop
Once the frame is assembled, attach the tabletop to the frame. Depending on the design, this may involve screwing the planks onto the frame or creating a panel with the planks and attaching it to the frame. For a panel design, use deck or pocket screws to secure the planks. To attach it to the frame, use either galvanized hardware or Lag Bolts.
Be sure to countersink the screws and fill them with wood putty if needed. For best results, drill pilot holes first before screwing planks to the frame. After adding the top, use wood glue and finish nails to secure pieces together. As a final step, sand down any rough edges and apply a wood finish such as stain, sealer or paint. With the tabletop in place, your outdoor table is complete!
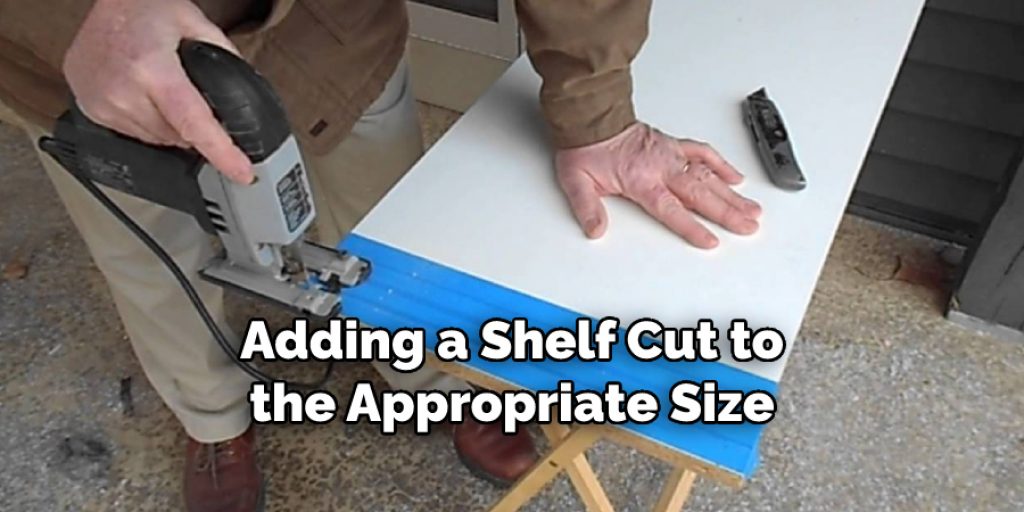
Step: 6. Install any Additional Features
If desired, add any additional features to the table, such as a lower shelf, drawers, or decorative elements. Follow the appropriate steps and techniques for installing these features based on your design.
For instance, if you are adding a shelf cut to the appropriate size and attach it to the table frame using screws or nails. If you’re adding drawers, measure and cut the wood for the drawer bottoms and sides. Use glue and nails or screws to attach the pieces together before mounting the drawers to the frame.
Step: 7. Sand and Finish
Sand the entire table to smooth out any rough spots and prepare it for finishing. Apply the desired finish, such as paint, stain, or sealant, following the manufacturer’s instructions and allowing it to dry completely. Finally, place the tabletop and bench tops onto the frame and secure them with screws. Your outdoor table is now finished! Enjoy it for many years to come.
Remember to periodically check the table for wear and tear and make repairs or refinish as needed. With a little maintenance, your outdoor table will look great for many years to come. If you ever want to make an upgrade, there are plenty of additional projects you can do with the same basic skills. Have fun building!
Step: 8. Install Hardware
Attach any hardware, such as handles, knobs, or hinges, according to the manufacturer’s instructions and your design. Make sure that the hardware is properly mounted and secure. You may also wish to attach a towel bar or bracket if desired. Finally, you can apply a finish to add more protection from the elements.
A clear, waterproof sealer can help protect your table and make it last longer. Be sure to read the manufacturer’s instructions for application and drying times before beginning. Once it is dry, your outdoor table is ready to use! Enjoy gathering with friends and family around your new outdoor table.
Step: 9. Perform Final Checks
Once the finish is dry and the hardware is installed, perform a final check to ensure that the table is level and stable and that all joints and connections are secure. If any adjustments need to be made, make them now. However, if everything looks good, the outdoor table is ready to be enjoyed and used.
Though it may take a bit of time and effort to complete, a homemade outdoor table can provide years of enjoyment. With the satisfaction of knowing that you built it yourself, you can be proud of your accomplishment. Enjoy the fruits of your labor and bask in the glory of a job well done!
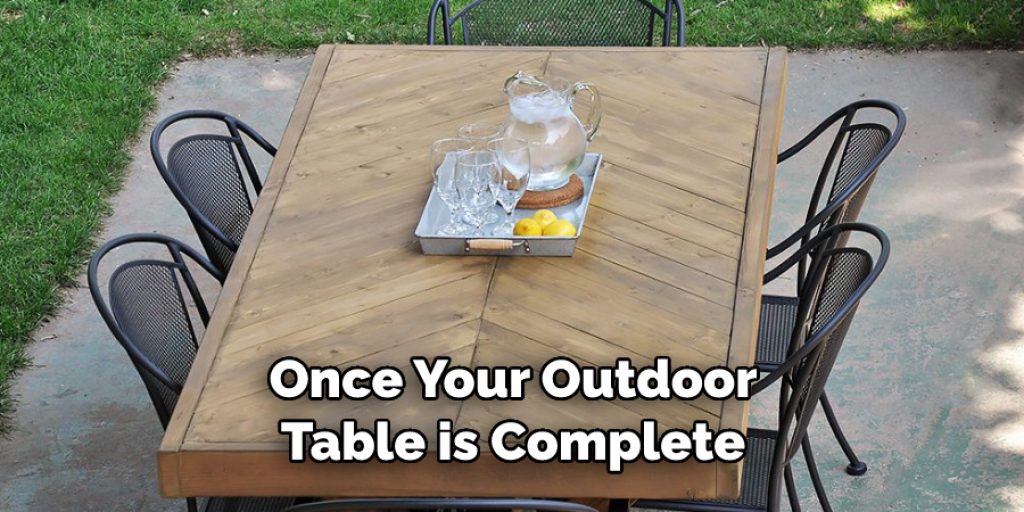
Step: 10. Enjoy Your Outdoor Table
Once your outdoor table is complete, place it in your desired location in your outdoor space and enjoy the fruits of your labor. Use it for dining, entertaining, or simply relaxing in the great outdoors. With a few simple tools and some DIY know-how, you can create an outdoor table that will last for years. Now all that’s left to do is start planning your backyard get-togethers. Enjoy!
Conclusion
In conclusion, building an outdoor table can be a fulfilling DIY project that allows you to create a customized piece of furniture for your outdoor living space. By following the steps and tips on how to build outdoor table mentioned in this article, you can confidently embark on your outdoor table-building journey.
Remember to carefully select your materials, plan your design, measure and cut accurately, and assemble the table securely. With patience, attention to detail, and some basic woodworking skills, you can enjoy the satisfaction of creating a functional and stylish outdoor table that will enhance your outdoor living experience for years to come.
Angela Ervin
Angela is the executive editor of DIY quickly. She began her career as an interior designer before applying her strategic and creative passion to lifestyle and home. She has close to 15 years of experience in creative writing and online content strategy for housekeeping, home decorations as well as other niche efforts. She loves her job and has the privilege of working with an extraordinary team. She lives with her husband, two sons, and daughter in Petersburg. When she's not busy working she spent time with her family.