How to Build Patio Cover Not Attached to House
Do you want to enjoy outdoor meals and leisurely activities without having to worry about the weather? Building a patio cover is an affordable way to create your own oasis right in your backyard. Not only does it provide shelter from the sun, but it also adds character and charm to any property.
But even if you’re handy with a hammer, building a beautiful patio cover that’s not attached to your home can be quite challenging—unless you know these tips we’re about to share! So whether you’re looking for an open-air gazebo or simply a shading structure over your outdoor living area, this post will give you all the information on how to build patio cover not attached to house.
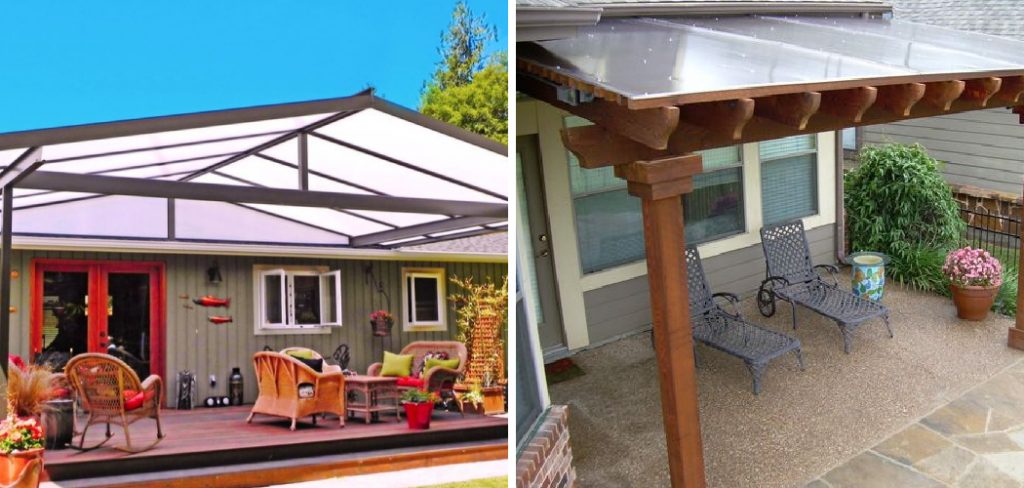
What Holds up a Patio Cover?
The structure of a patio cover is largely dependent on the type of material used. Wooden patio covers may be held up with posts set in concrete and can also feature rafters or beams for extra support. These wooden structures may also include cross members and purlins to increase stability.
Metal patio covers are often made up of aluminum and steel frames which provide strong structural support without needing any additional reinforcements. The metal frame is generally mounted onto existing walls or columns, while some can also be free-standing structures.
Vinyl patio covers typically consist of a vinyl sheet stretched across an aluminum frame, with some models including a polyester mesh screen. These types of covers are usually supported by four posts that are anchored into the ground.
Finally, fabric patio covers are usually hung from a metal frame or poles and supported by ropes and guy wires. The fabric is usually made of a durable material such as canvas which is designed to withstand the elements for years without needing repairs.
No matter what type of cover you choose, it’s important to ensure that you have the correct type of support in place for strength and safety. Consulting with an expert on proper installation methods is recommended to ensure your structure will last for years to come.
10 Methods How to Build Patio Cover Not Attached to House
1. Choose a Location
Decide where you want to build your patio cover, and make sure it is in a location that will be useful and enjoyable. Consider the size, shape, and style of your cover, as well as the amount of sun and shade you want to have in that area.
If you’re attaching your patio cover to the house, make sure it is not too close to windows or other areas where people congregate. However, if it’s going to be freestanding, you will need to choose a spot that is level and free of obstructions.

2. Obtain Necessary Permits
Check with your local government to see if you need a permit to build your patio cover and obtain any necessary permits before beginning construction. Make sure to research the local building codes and be sure your patio cover complies with all regulations.
You may also want to consult a professional contractor or a structural engineer to help you with the design and installation of your patio cover.
3. Choose Materials
Select materials that will be durable and weather-resistant. Common options include wood, metal, and vinyl. Wood and metal can provide a traditional style, while vinyl is more contemporary. Make sure the materials you choose are suitable for outdoor use and will last in your area’s climate.
Although patio covers don’t have to be attached to the house, they do need to be securely mounted. If mounting your cover to a wall or roof, you will need the appropriate hardware.
4. Measure and Mark Out the Area
Use stakes and string to mark out the area where you will be building your patio cover. Make sure that it is the desired size and shape as per your plan. If you’re building it within a few feet of your home, make sure to leave enough space for the patio cover material and that it doesn’t extend over any roof eaves or roof projections.
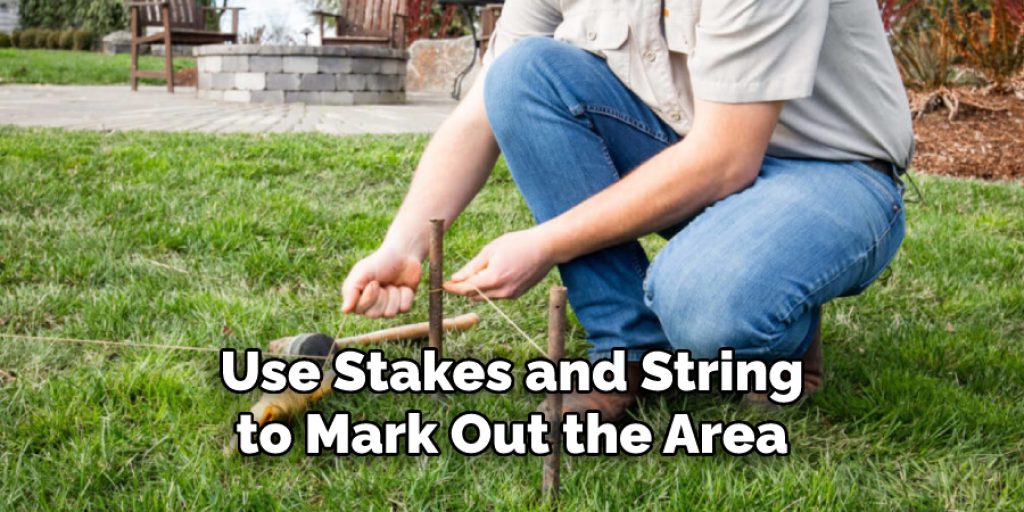
To make sure everything is square, measure the diagonals of the area and adjust until they are equal. However, it is worth noting that a non-square shape can add character to your patio cover.
5. Dig Post Holes
Dig post holes in the marked area for the support posts of the patio cover. Make sure to dig the holes deep enough and wide enough to accommodate the posts. If you are using 4×4 posts, you will need four holes that are at least 24 inches deep and 8 inches in diameter for each post.
For 6×6 posts, you will need holes that are at least 36 inches deep and 12 inches in diameter. Make sure to space the post holes 8 feet apart from each other. Although the post holes do not have to be perfectly spaced, they should still be close enough that the patio cover frame is level.
6. Set Posts
Install the support posts into the post holes and secure them in place with concrete. Make sure to leave some space between the post and the edge of the pre-existing patio. Allow the concrete to set overnight before continuing on with construction. If you are using 6×6 posts, reinforce the post-to-concrete connection with metal brackets. However, if you are using 4×4 posts, you can use post spikes instead.
7. Install Support Beams
Install support beams across the top of the support posts, making sure they are level. Use metal joist hangers to secure the support beams in place. If you are using lumber to build the patio cover, make sure you drill pilot holes prior to securing them in place.
Try to use lumber and materials that are treated for water and weather resistance. However, if you are using a metal patio cover kit, follow the manufacturer’s instructions for installation.
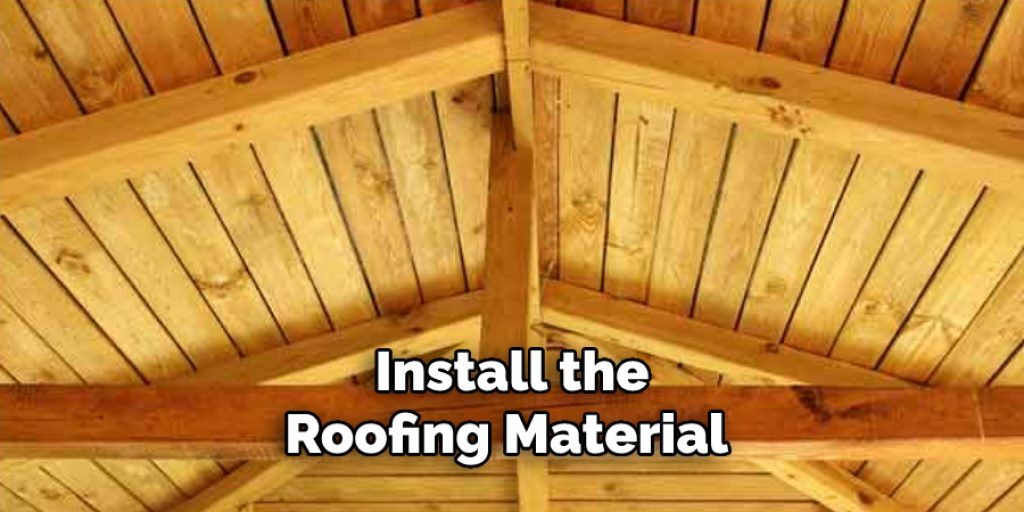
8. Install Roofing
Install the roofing material over the support beams, ensuring that it is securely attached. This can be done with roofing nails or screws, depending on the type of material used. If using shingles, make sure to overlap each one to form a watertight seal. If using metal, the panels should be placed side by side without overlapping. Ensure that all edges of the roofing material are sealed and waterproofed with the appropriate sealant.
9. Add Finishing Touches
Add any finishing touches, such as decorative elements or lighting, to complete the patio cover. These elements will help to give your patio cover a finished look and make it an inviting outdoor space.
Consider installing outdoor string lights, or adding planter boxes and hanging plants to the structure. Your patio cover should now be complete! Enjoy your new outdoor space! Additionally, you may want to consider adding waterproof covers or awnings for rainy days.
10. Maintain and Upkeep
Regularly maintain and upkeep the patio cover, such as by sealing or staining wood materials or checking for any damages or issues. While not attached to the house, the patio cover is still part of your outdoor living environment and should be taken care of accordingly.
Doing so will ensure that you can enjoy your covered patio space for years to come. To make maintenance easier, consider investing in a cover treatment product that will help protect your patio cover from the elements.
Things to Consider When Building Patio Cover Not Attached to House
1. Building Materials
Consider what type of materials will be needed for the patio cover’s construction. The most common types of materials used are wood, metal, and concrete. If you choose to use wood, make sure that it’s treated for outdoor use and sealed correctly. Metal may require some additional painting or coating to protect it from the elements.
2. Location
Decide where your patio cover will be located; this is important because certain laws and building codes vary based on where you live. Make sure to check with local authorities before starting any construction project. Additionally, consider factors such as how much sun the area gets and whether there are any trees nearby that could potentially cause shade issues.
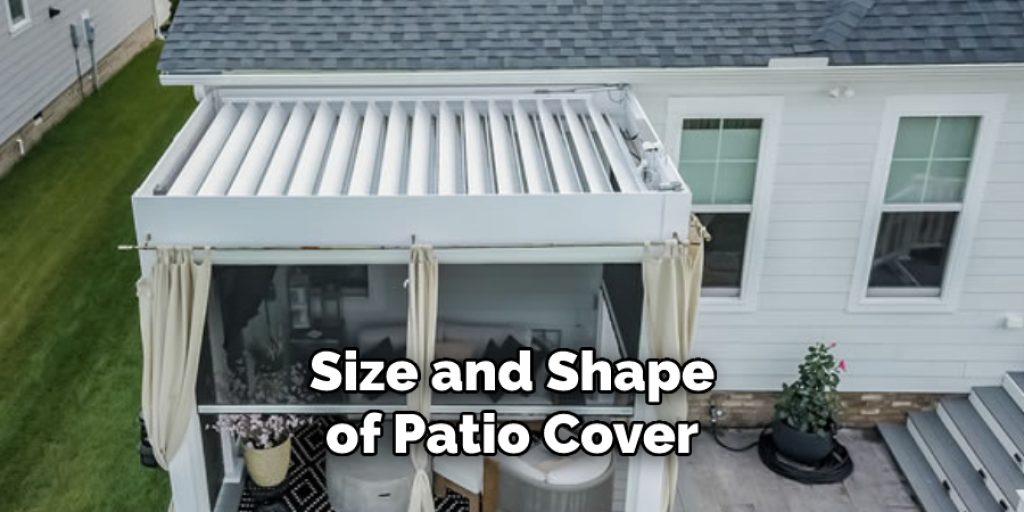
3. Design
Think about what size and shape of patio cover will best suit your needs. If you’re looking for an open-air design, consider adding a roof or partial covering to protect against rain or snow. Additionally, consider adding features such as benches, fire pits, seating walls or planters that can add aesthetic appeal and function.
4. Budget
Developing a budget is essential when building any kind of structure – especially if it’s not attached to the house. Consider what type of materials you’ll need and how much labor might be required; this should help you determine a realistic budget for the project.
Conclusion
Building a patio cover that is not attached to the house can be an intimidating task, but it’s worth it when you’re done.
If you take your time, pay attention to whatever safety guidelines or building codes apply to where you live, and plan ahead of time, you can create the perfect outdoor space for your family to enjoy for years to come. Thanks for reading our blog post on how to build patio cover not attached to house! We hope you found it helpful and informative. Happy building!
Elizabeth Davis
Elizabeth is a creative writer and digital editor based in the United States. She has a passion for the arts and crafts, which she developed from a young age. Elizabeth has always loved experimenting with new mediums and sharing her work with others. When she started blogging, she knew that DIYquickly would be the perfect platform to share her tutorials and tips. She's been writing for the blog from the beginning, and her readers love her helpful advice and easy-to-follow instructions. When she's not writing or editing, Elizabeth enjoys spending time with her family and friends.