
How to Clean G Pen Coil
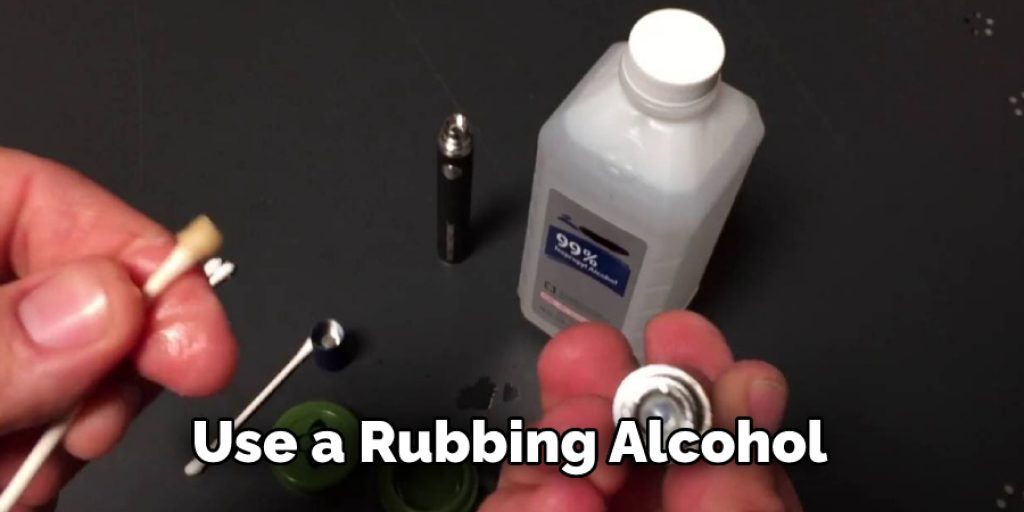
Cleaning your G Pen coil, also known as the heating chamber, is an important part of maintaining your unit. The most common way to clean a G Pen Coil is by using a cotton swab and rubbing alcohol. There are many other ways to do it, but this method is the quickest and most straightforward.
Cleaning the G Pen coil will help keep it from getting dirty faster than usual, which can lead to more frequent cleaning or, worst-case scenario, not working at all! Cleaning with rubbing alcohol will remove any leftover residue, and make sure you get that fresh taste every time! Read this full blog post to know how to clean g pen coil.
8 Ways to Clean G Pen Coil:
1. Using Rubbing Alcohol:
This is the easiest way to clean your G Pen coil. You’ll need rubbing alcohol, cotton buds, and a blunt needle. The purpose of using cotton buds is to hold down the cleaning pad while you use the tip of the needle to scrape out all that build up on your coil or other important parts. You can also use a paper napkin for the same purpose.
2. Using Cleaning Spray:
If you prefer using cleaning spray to clean G Pen coils, then prepare to rub alcohol and isopropyl alcohol in separate bottles or containers. After spraying the cleaning liquid onto your coil, wait until it evaporates and repeat the process if some sticky substance is still there.
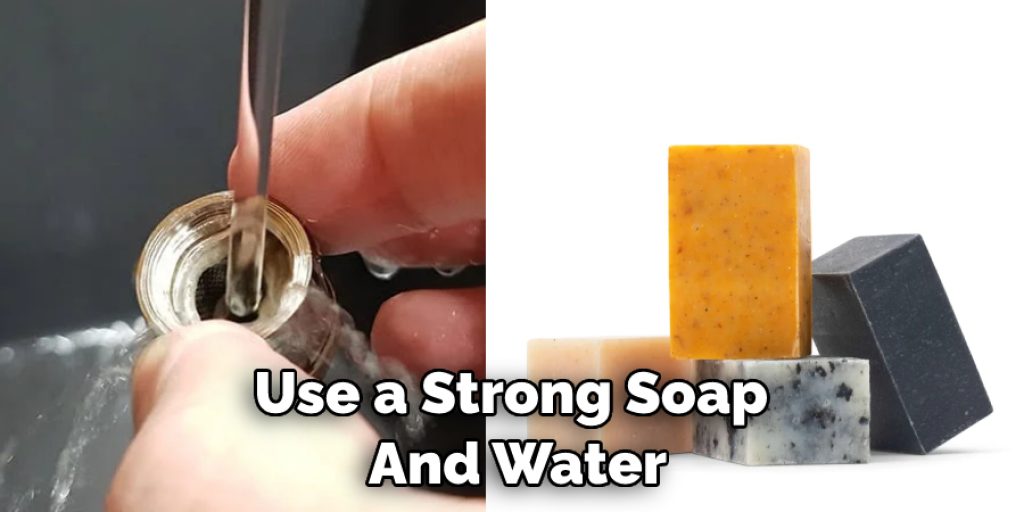
3. Using Strong Soap and Water:
If you don’t want to use chemicals, try using soap and water to clean your G Pen coil. We highly recommend that you wet the coil before making contact with the tube of the pen, or else it might break off easily due to the friction between both parts. Use your finger to clean the soap, and you can also use pipe cleaners or a thin piece of cloth to wipe out any residue or foreign substance off the coil.
4. Using Q-Tips:
When cleaning G Pen, make sure that you don’t scratch its surface as this might damage its quality over time. The best way to clean your G Pen is by using cotton swabs or pipe cleaners for a more thorough cleaning. You can dissolve the dry herbs out of the coil with rubbing alcohol and then make sure that all excess liquid has dried up completely before putting back all parts together again.
5. Using a Knife:
If you don’t want to use chemicals or cleaning products to clean your G Pen, you can use a knife instead. First, use a small and sharp blade (safe and non-serrated) to scrape out the impurities that might be stuck on the coil. Once you’ve scraped as much as possible, wipe again with rubbing alcohol or pipe cleaners so that any sticky substance is removed.
6. Using Water and Lint-Free Cloths:
Cleaning your G Pen with water is the best way to clean it because it won’t damage any part of the pen. This is the cheapest, most effective, and safest way to clean your pen. You can use pipe cleaners or cotton swabs to get a more thorough cleaning. Just be careful not to push the cloth too deep into the coil, or you might damage other parts of your G Pen.
7. Using Acetone:
You can clean your coil with acetone or nail polish remover if you’re feeling adventurous. Just be careful not to spill any on your clothes, skin, or anything else nearby. It’s best to do this in a safe area where there are no kids or pets, as it can be dangerous for them.
8. Using Isopropyl Alcohol:
There are many benefits to cleaning your G Pen coil with isopropyl alcohol. It’s a cheap and effective way to remove stubborn build-up, and it can also help strip away resin from the heating element. Just be careful not to rub too hard, as this could damage other parts of your G Pen.
Instructions: How to Clean G Pen Coil
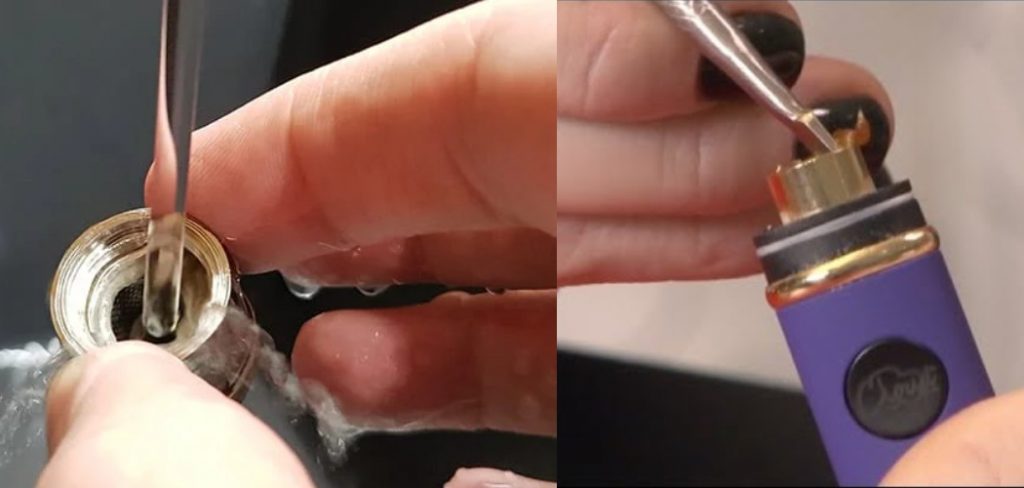
Step 1: Locate Your G Pen Coil
At the bottom of your G Pen is a circular ring that unscrews off to reveal a coil. There are so many different ways to clean this part because it’s attached with either an O-ring or a string, depending on which type you have.
Step 2: Purchase A Cleaning Tool
You will need a cleaning tool that works well with whatever type of G Pen you have. You can purchase one online or at your local smoke shop, herb store, or other location where smoking paraphernalia is sold.
Step 3: Remove The Coil From Your G Pen
To clean your O-ring style coil, simply place the cleaning tool inside the ring and twist it in a counter-clockwise direction to unscrew. If your coil uses string, simply untie the circle and pull the string out.
Step 4: Open the Metal Cover Over the Coil
This part of the cleaning process is a matter of preference. Some people prefer to use the cleaning tool that’s designed for their coil type, while others find it easier to unscrew the metal cover by hand.
Step 5: Begin Cleaning Your Coil
The bottom of your coil should look like this, with a lot of build-up on it. If this is what your coil looks like, then you’ll want to run the cleaning tool along the sides multiple times until all of that build-up has been broken off.
Step 6: Scrape Off The Remains
After using your cleaner tool on the sides of your coil head, you will probably still have some build-up on the bottom. If this is the case, take your tool and run it over the coil multiple more times to get rid of whatever’s left.

Step 7: Reassemble Your G Pen
Finally, you put everything back together in reverse order screwing in your O-ring or tying your string around it, closing the metal cover back up, and screwing on your G Pentop. Now you’re ready to start using your G Pen again!
Final Thoughts
When you are cleaning the G Pen Coil, take care not to get any water in the mouthpiece. Instead, use a lint-free cloth that is moistened with alcohol or rubbing alcohol and wipe down the metal parts of your device. Afterward, make sure to dry off all surfaces before putting it back together again for use!
We hope you found this guide on how to clean g pen coil helpful and informative. If you have any questions or comments about the process, please feel free to get in touch with us! Have you tried this? Let us know how it went!


