
How to Connect Led Strip Lights to 12v Power Supply
Are you looking to add some extra light and a unique touch to your space? Consider using LED strip lights. These versatile lighting solutions can be used indoors or outdoors, and they require less energy to operate than conventional lighting.
Whether you’re creating a custom lighting setup or looking for ways to dress up your home, LED strip lights are an easy and convenient way to make any space glow with vibrant colors. From creating dynamic accent walls and ceilings to highlighting artwork or other decor items – the options are almost limitless! But before you can get started on your project, understand the basics of how to connect led strip lights to 12v power supply.
In this blog post, we’ll cover all the components needed for safe connection and explore some creative design ideas for incorporating these versatile lighting fixtures into any space. So let’s dive in!
What Will You Need?
To get started, you will need the following components:
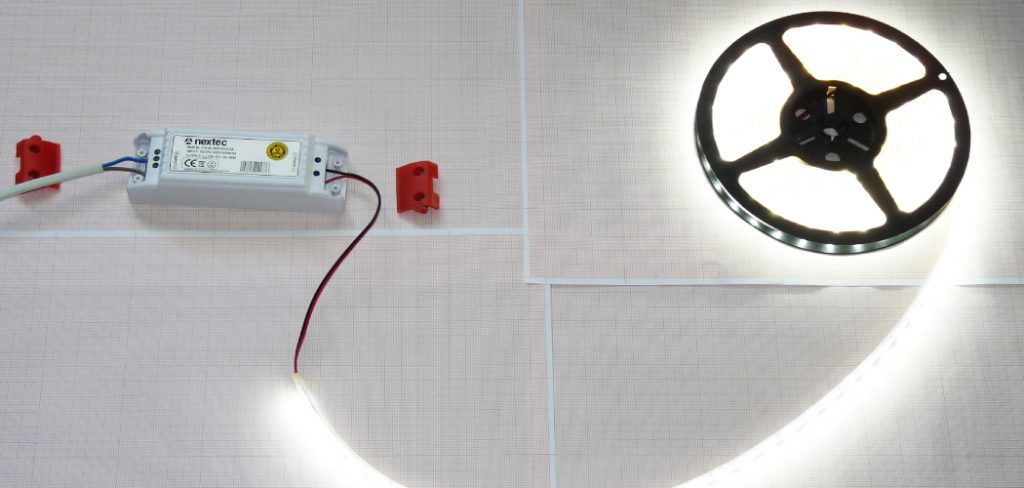
- LED strip lights
- 12v power supply
- Electronic dimmer
- Connector clip (optional)
- Wire nuts/cables.
Once you have all the components, it’s time to get connecting!
10 Easy Steps on How to Connect Led Strip Lights to 12v Power Supply
Step 1: Prepare the LED Strip Lights and Power Supply.
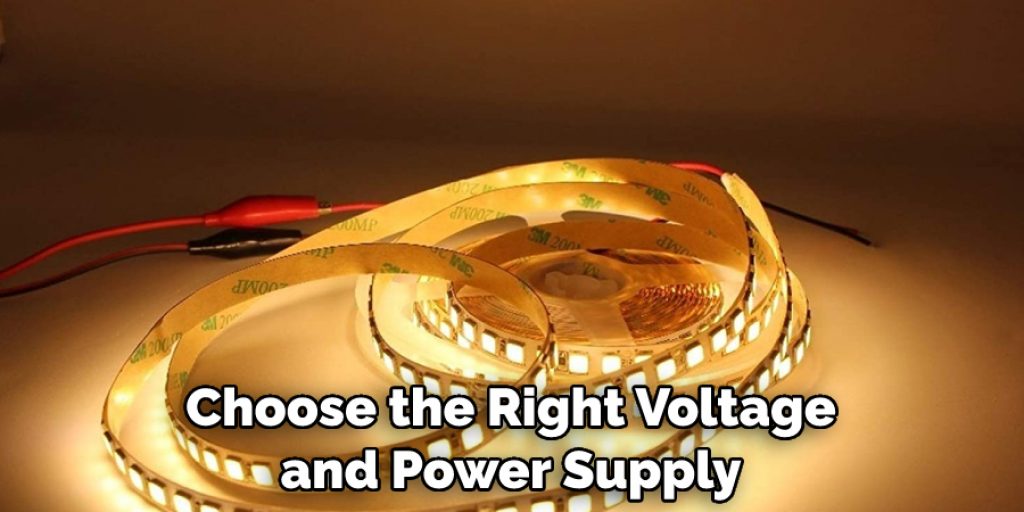
Before connecting any wires, it is important to make sure that your power supply is rated to match the power needs of your LED strip lights. If the power supply does not meet the requirements, it can cause damage to both components. As a general rule of thumb, the power supply should be at least twice as powerful as the LED strip lights.
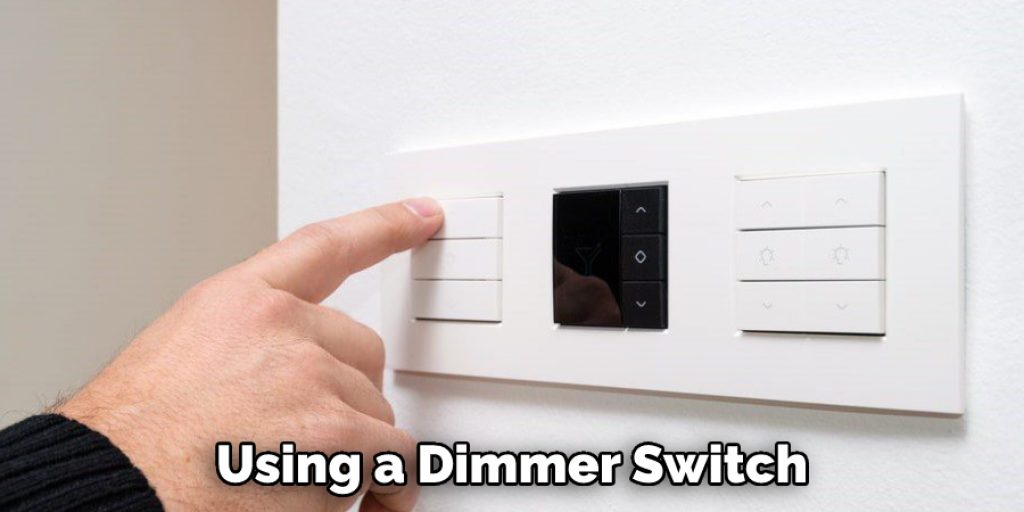
Step 2: Connect the Strip Lights to the Dimmer Switch.
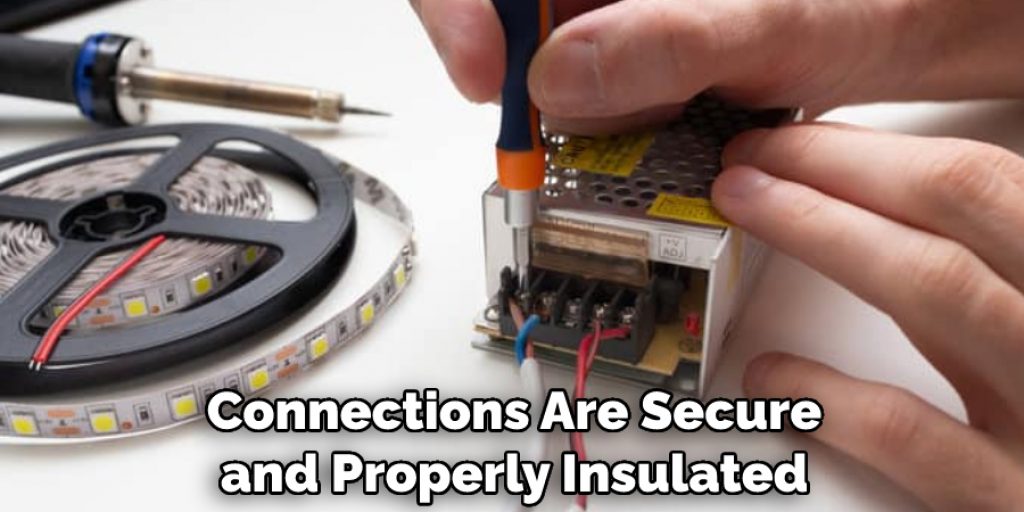
Connect the wires from the dimmer switch to the appropriate input/output ports on the LED strip lights using the connector clip. Make sure these connections are secure and properly insulated. You can also use wire nuts for extra protection.
Step 3: Connect the Power Supply to the Dimmer Switch.
Connect one end of the power supply to an appropriate input port on the dimmer switch using a wire nut or cable. Make sure that this connection is also securely insulated with electrical tape. If you are using a connector clip, ensure that the power supply pins match up with the appropriate ports on the dimmer switch.
Step 4: Test Your Setup.
Once all connections have been made, it’s time to test your setup and ensure everything works correctly. Turn on your power supply and adjust the brightness settings on the dimmer switch until you reach your desired lighting levels. Be careful not to exceed the power ratings of your LED strip lights.
Step 5: Secure Your Connections.
Once you’ve tested your setup and everything is working properly, it’s time to secure the connections with electrical tape or heat shrink tubing. This will help ensure that all wires stay in place and that no moisture can get into the system and cause damage. Don’t forget to label the connections as well properly – this will help you keep track of where everything should go in case something needs to be adjusted or replaced in the future.
Step 6: Check the Voltage and Amperage Ratings.
Before plugging your power supply into the wall outlet, make sure to check the voltage and amperage ratings of the power supply and LED strip lights. This will help you avoid any potential damage caused by overloading the system. Keep in mind that most 12v power supplies should never exceed 15 amps of current.
Step 7: Plug in Your Power Supply.
Once everything is ready, plug your power supply into an appropriate wall outlet and turn on your LED strip lights! You’re ready to start creating dynamic lighting solutions with your new setup. Ensure that the outlet is switched off when not in use and unplug any unused power supplies.
Step 8: Adjust Brightness Settings as Needed.
If necessary, adjust the brightness settings on the dimmer switch until you reach your desired effect or level of illumination. Be sure to double-check that all connections are secure before adjusting any settings. Otherwise, you may end up damaging your system.
Step 9: Incorporate Your Lights Into Your Design.
Now it’s time to get creative and incorporate your lights into your design. Whether you’re creating accent walls or highlighting artwork, the possibilities are almost limitless with LED strip lights! Just remember to have fun and don’t be afraid to experiment.

Step 10: Enjoy!
Once everything is installed, sit back, relax, and enjoy the vibrant colors of your new LED lighting setup. Always remember that safety comes first, so follow the installation instructions and double check your connections before powering on any device. With these tips in mind, you can create amazing lighting effects with your LED strip lights.
We hope this blog post has given you all the information you need to get started on connecting your LED strip lights to 12v power supplies. With a little bit of creativity and some basic wiring knowledge, you can create dynamic lighting solutions for any space in no time.
5 Additional Tips and Tricks
1. Make sure to use the proper voltage for your LED strip lights. 12V is the most common, but some models require more or less, so make sure to check the specifications on your LED strip lights before connecting them.
2. When connecting more than one LED strip light together, use a power splitter or parallel connection to ensure that each strip has enough current for optimal performance.
3. If your LED strips are not waterproof, be sure to connect and seal them in an outdoor-safe enclosure to protect them from moisture damage.
4. Always disconnect the power supply when working with the lights or changing connections for safety reasons.
5. If you’re using a dimmer switch with your 12V power supply, ensure it is rated for DC voltage to avoid damaging the LEDs or blowing fuses in the circuit breaker box.
With these tips and tricks, you’ll have no trouble connecting your LED strip lights to a 12V power supply safely and successfully. If you’re ever uncertain about a step in the process, it is best to consult an electrician or other professional for additional guidance.
5 Things You Should Avoid
- Never exceed the recommended voltage for your LED strip lights.
- Avoid connecting more than three LED strips in series, as this can lead to power shortages and cause the LEDs to dim or flicker.
- Never use an indoor-rated power supply outdoors, as this can create a fire hazard if exposed to moisture or other weather conditions.
- Do not connect LED strips directly to wall sockets – always use a 12V VAC or DC adapter for safety reasons.
- Do not overload circuits – if you’re not sure how much power your LED strips are drawing, consult an electrician for help estimating your total wattage draw and adjusting appropriately.
Follow these tips and tricks when connecting led strip lights to a 12V power supply, and you’ll be sure to get the most out of your LED strip lighting setup.
Do 12v Led Lights Need a Transformer?
No, 12V LED lights do not need a transformer. However, it’s important to use the correct voltage for the type of LED light you are using. The most common voltage for LED lights is 12 volts DC (direct current). If your LED lights require a different voltage (such as 24V), then you will need a compatible power supply or transformer.
Additionally, some LED strips may require additional components, such as an ethernet controller or dimmer switch to achieve desired effects. It’s always best to consult an electrician when dealing with electricity and power supplies. With the correct setup, you can easily connect 12v led strip lights directly to a 12v power supply without needing any additional parts or accessories.
Overall, 12v LED lights do not need a transformer to function properly. However, make sure to choose the right voltage and power supply for your LED strip lights, and consult an electrician if you have any questions or concerns. This way, you can ensure that your setup is safe and effective. Happy lighting!
Conclusion
Connecting LED strips to a 12v power supply is not as hard as it looks, and with the right materials and a little bit of know-how, you can have your new light show up in no time. Whether you’re doing it for fun or for something more professional, this task can be done by DIYers of all experience levels. With various color options, styles, and lengths available, the possibilities are endless when it comes to bringing dramatic displays to life.
Be sure to do your research on the best supplies for your project and follow the steps outlined above. And don’t forget safety first! Once everything is set up properly you’ll be able to enjoy your beautiful led strip lights for many years to come.
Hopefully, the article on how to connect led strip lights to 12v power supply was helpful. Thanks for reading!


