
How to Cut a Hole in a Plastic Storage Bin
Introduction:
Plastic storage bins are quite common in our household. You will find it everywhere, and we know the importance of bin boxes. However, sometimes it becomes difficult to open and close the box lid. For this reason, we often try to make a hole in the plastic storage bin. This makes the work more straightforward, and you can also clean the box easily.
Processes on How to Cut a Hole in a Plastic Storage Bin:
Process One
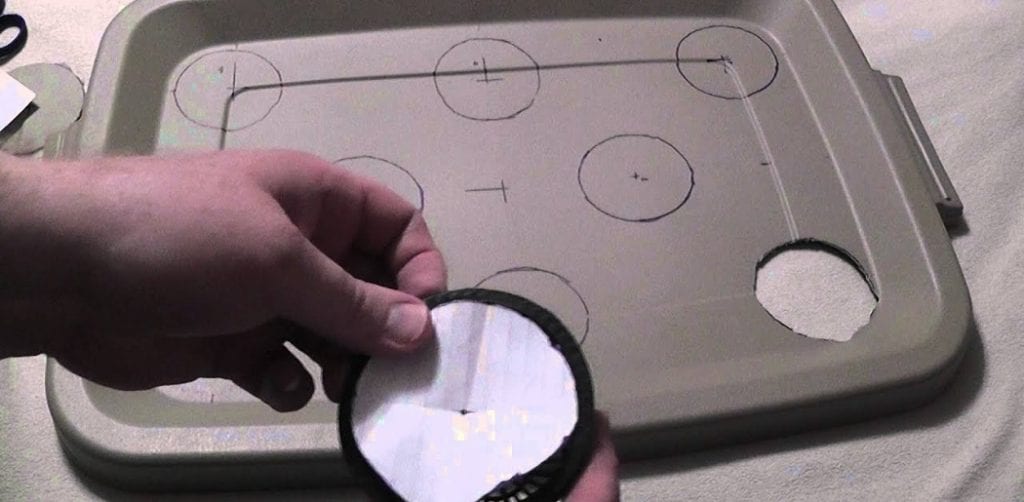
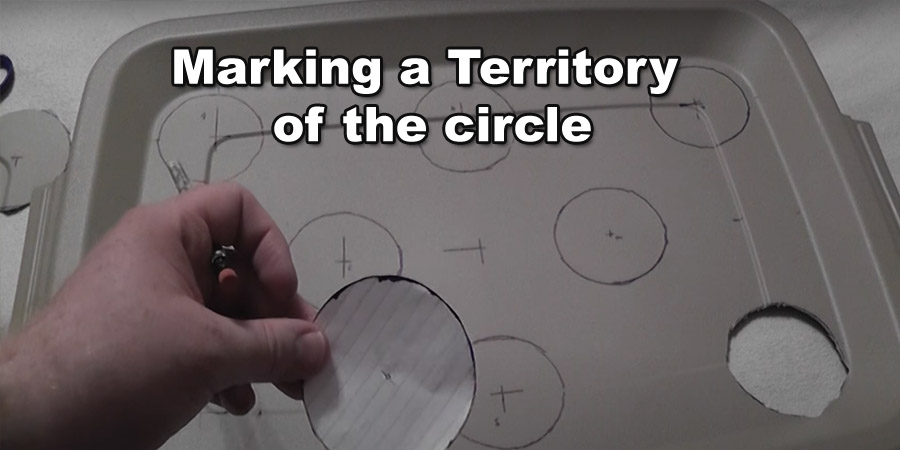
For making a hole in a plastic storage bin, you will need some essential elements. First, you will need a piece of the object which is circular. It is better to take the lid of a circular container.
You will need an Exacto knife to cut into the plastic. You have to make the tip sharp and learn how to use it properly. You will also need a marker. To make the edges smooth, you have to use ordinary sandpaper.
After you have managed all these elements, you can start the process. You have to start by marking the territory of the circle. Next, you must place the container lid on the top of the plastic bin; then, you must draw the box’s circle. After marking the ring, you must start cutting the box with the Exacto knife’s help.
You have to trim through the circular line, and then you have to take off the unnecessary portion. Now you will observe that the edges around the cut are quite sharp and uneven. First, you have to take sandpaper, which will be of minimum grit, and then you have to make the circular portion smooth.
After you can take a cloth and rub the opening, this will clear off the small plastic pieces. This way, you can easily cut a hole in a plastic storage bin using straightforward tools.
Process Two
- Make sure that there are no sharp edges on either side of the opening using scissors or an electric knife (if you feel brave). Thoroughly clean the area you’re going to be cutting and make sure it’s safe for children or pets.
- Measure your knife blade lengthwise against the crack of the lid where your opening will go, then mark with a pencil (you can also use masking tape). This is how wide your hole should be on both sides – narrower than that, making it hard to get items inside.
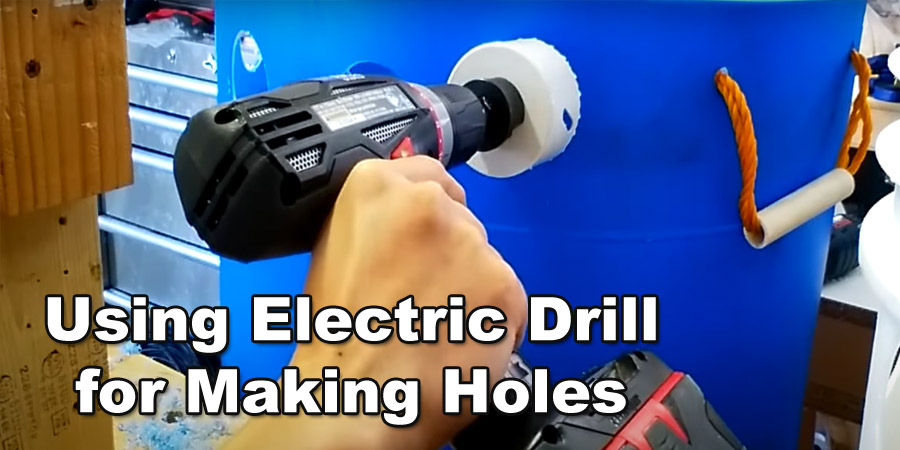
- Use an electric drill and appropriate size bit (usually ¼ inch) to create two holes at each end of the space you marked out earlier. Then, suppose using scissors, cut from one side all across until reaching the other edge, not leaving any sharp edges on either side. Again ensure there are no loose edges by cleaning thoroughly after each cut.
- Use a hammer and nail to create one hole on each side of the space you marked out earlier – this will be where your string is attached for easy opening.
- Cut two lengths of heavy-duty nylon rope, about 12 inches long each, with scissors or wire cutters (if using metal clips, choose pieces that are no more than ½ inch so as not to scratch).
- Attach the two ends of the rope by looping it through the holes twice and knotting it securely (you can also use pliers if necessary). Fold over any excess rope length for safety purposes before tying it off again tightly. This makes it easier when closing up the bin later too!
- Push one piece of the rope through one of the holes on either side and make a loop, pulling it tight to create an “O” shape. Thread one edge of this piece under itself, so there is no loose end sticking out from underneath.
- Do the same for the other hole (on your opposite corner) – threading the second length of rope through both holes, then threading each edge over itself as you did before.
- Knot together tightly using basic fishing knots or square knotting techniques at either end to secure them properly. Cut any excess rope ends with scissors if necessary.
You Can Check It Out to Drill Holes in Plastic Bin
Final Thoughts:
In conclusion, cutting a hole in a plastic storage bin is not hard. Storage bins are cheap and easy to find at your local hardware store or online. The tools necessary for the project can be found around most homes, or you could easily purchase them with just a few clicks of your mouse.
You may also read – How to Make Vinyl Stick to Plastic
Elizabeth Davis
Elizabeth is a creative writer and digital editor based in the United States. She has a passion for the arts and crafts, which she developed from a young age. Elizabeth has always loved experimenting with new mediums and sharing her work with others. When she started blogging, she knew that DIYquickly would be the perfect platform to share her tutorials and tips. She's been writing for the blog from the beginning, and her readers love her helpful advice and easy-to-follow instructions. When she's not writing or editing, Elizabeth enjoys spending time with her family and friends.


