
How to Dim Led Lights Without a Dimmer
There are a few ways to dim LED lights without using a dimmer. One way is to use a lower-wattage LED bulb. Another way is to use an LED light strip with a controller that allows you to adjust the brightness. Finally, you can also buy specialty LED bulbs with their built-in dimming feature.
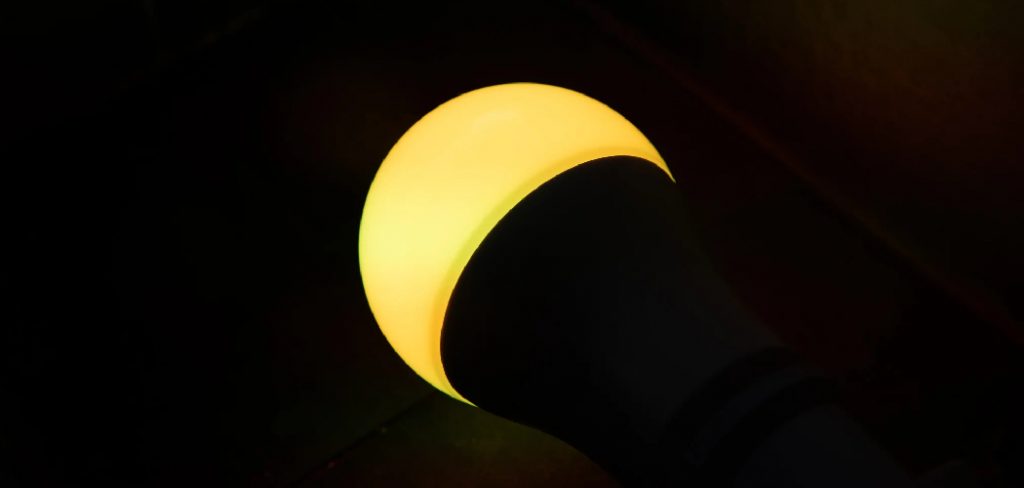
Led lights are a popular choice for lighting these days because they are energy efficient and long-lasting. However, sometimes you may want to dim them to create a more relaxing or romantic atmosphere. This blog post will show you how to dim led lights without a dimmer.
Step-by-Step Process for How to Dim Led Lights Without a Dimmer
Step 1: Turn Off the Power
Make sure to turn off the power to the light fixture at the breaker box. You will need to remove the globe or shade from the fixture to access the bulbs. Be careful not to break any glass. Then gather your supplies:
- led light bulbs
- a power drill
- electrical tape
- a screwdriver
Step 2: Locate the Fuse Box
Most homes have a fuse box located in the basement, garage, or utility room. The fuse box will have a diagram that tells you which fuse corresponds to which circuit in your home. Find the circuit that controls the lights you want to dim.
Once you have identified the correct circuit, turn off the power to that circuit at the fuse box. Remove the fuse from its socket and set it aside.
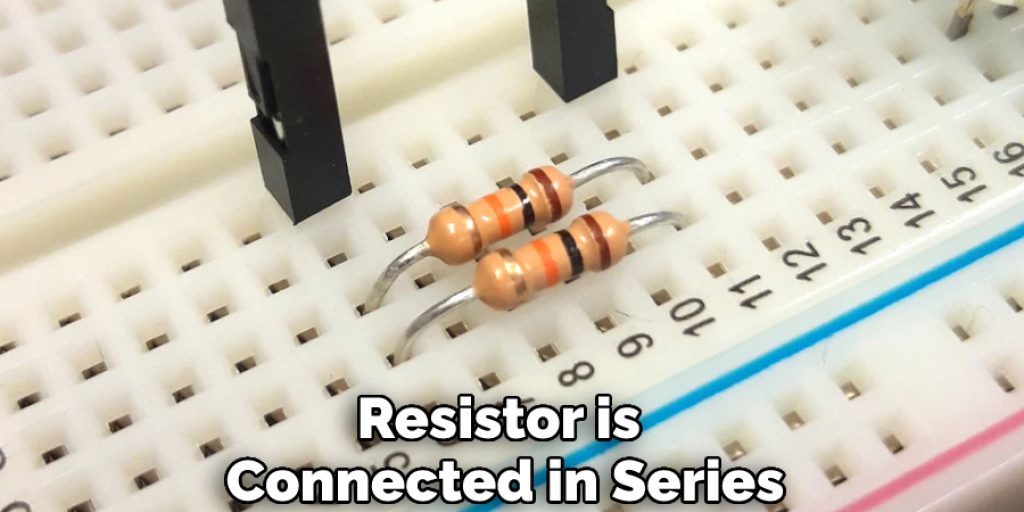
Step 3: Insert the Resistor
Now take your resistor and insert it into the socket where the fuse was removed. Ensure that the resistor is connected in series with the circuit (that is, between the live wire and the load).
Step 4: Identify the Circuit Breaker for the Lights You Want to Dim
Turn the power back on at the fuse box and test the lights. If they are dimming correctly, you successfully installed a resistor in parallel with your LED lights! If not, check your connections and make sure that the resistor is properly inserted into the circuit.
To dim your LED lights, you will need to find the circuit breaker that controls the power to those lights. Once you have found the correct circuit breaker, flip it to the “off” position.
Step 5: Remove the Light Switch Plate
Use a screwdriver to remove the screws that secure the light switch plate to the wall. Carefully remove the plate and set it aside. There will be two sets of wires connected to the light switch.
One set will be connected to the “live” or “hot” wire, which provides power to the switch. The other set will be connected to the “neutral” wire. Use a screwdriver to loosen the screws that secure the wires to the switch, and then carefully disconnect the wires.
Step 6: Remove the Switch
Use a screwdriver to remove the screws that secure the light switch to the electrical box. Carefully pull the switch out of the box and set it aside.
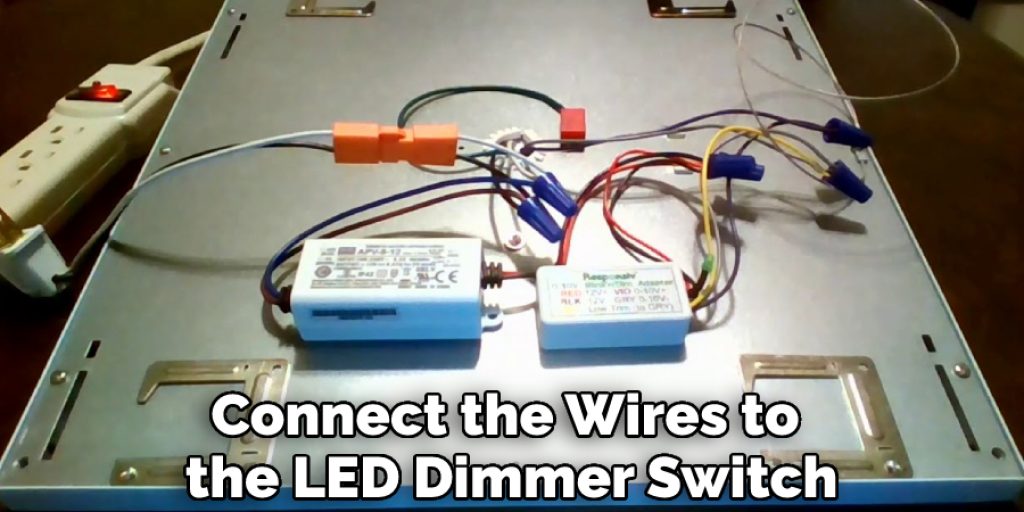
Step 7: Install the Led Dimmer Switch
Carefully connect the wires to the LED dimmer switch, connecting the “live” or “hot” wire to the correct terminal. Once all the wires are connected, carefully insert the switch into the electrical box and secure it with the screws.
- Use a drill to make pilot holes in the wall for the screws that will hold the plate in place.
- Screw the plate into place.
- Turn on the circuit breaker or restore power to the area.
- Test the switch by turning on and off the light fixture it controls.
Step 8: Locate the Wires Leading to the Light Bulbs
There will be two sets of wires coming from the light switch. One set of wires will be connected to the “live” wire, which supplies power to the light bulbs. The other set of wires will be connected to the “neutral” wire, which returns the power back to the fuse box.
Step 9: Reattach the Light Switch Plate
Screw on a wire connector (or cap) to secure the connection. Make sure the connector is tight to prevent the wires from coming apart. Carefully replace the light switch plate and screw it back into place.
Step 10: Turn on the Power
Now that you have successfully dimmed your LED lights, you can turn the power back on by flipping the circuit breaker back to the “on” position. Turn on the power to test your connection. The light should come on at its dimmest setting. If it doesn’t, check your connections and ensure the power is on.
Safety Tips for How to Dim Led Lights Without a Dimmer
- Do not look directly at the LED light when it is on & do not stare at the LED light for long periods of time.
- If you are using an LED light dimmer, make sure that it is turned off when you are not using it.
- Be aware that some LED lights can produce a flickering effect. If you are susceptible to seizures, it is best to avoid using LED lights.
- Never leave an LED light on for long periods of time without supervision.
- Make sure that the area around the LED light is well-ventilated.
- Do not touch an LED light when it is on & do not use water to extinguish an LED light.
- Never look into an optical fiber while it is lit & be sure to recycle any broken or damaged LED lights.
- Do not dispose of LED lights in regular trash cans & do not use LED lights near flammable materials.
- Do not use damaged or broken LED lights & Keep LED lights away from children and pets.
- Follow all manufacturer’s instructions when using LED lights.

Is It Possible to Dim Led Lights Without a Dimmer?
Yes, it is possible to dim LED lights without a dimmer. There are a few different ways to do this, depending on the type of LED light and the type of dimming you want to achieve.
Pulse-width modulation (PWM) is one common method of dimming LEDs. This involves rapidly turning the LED on and off at a specific frequency. The longer the LED is on compared to the off time, the brighter it will appear. Another way to dim LEDs is by using a constant current driver. This regulates the current flow to the LED, affecting the brightness.
Finally, some LEDs can be dimmed by simply reducing the voltage supplied to them. This is typically done with a resistor, although some LEDs have built-in resistors that can be used for this purpose. The method you use to dim your LEDs depends on the type of LED and the type of dimming you want to achieve. Experiment with different methods to find the one that works best for your needs.
How Can You Achieve the Desired Light Level With Your Led Lights Without Using a Dimmer?
There are a few ways that you can achieve the desired light level with your LED lights without using a dimmer. One way is to use a lower-wattage LED bulb. Another way is to use an LED light fixture with a built-in dimming feature. Finally, you can also wire your LED lights in series so that they can be dimmed without a dimmer.
What Are Some Alternatives to Using a Dimmer to Dim Your Led Lights?
If you want to dim your LED lights without using a dimmer, there are a few ways that you can do this. One way is to use a lower-wattage LED light bulb. Another way is to use a LED light strip with a lower voltage. You can also get a LED light fixture with a built-in dimming feature. Finally, you can use a LED light bulb with a built-in dimming feature. These methods will allow you to dim your LED lights without a dimmer.

Conclusion
You can use several methods to dim your LED lights without a dimmer. You can buy a special LED light bulb that has a built-in dimmer, or you can use a regular LED light bulb with a compatible dimmer switch. You can also use a simple resistor to create your own makeshift dimmer.
Whichever method you choose, dimming your LED lights can be a simple and effective way to create the perfect ambiance in any room. You can purchase a quality LED dimmer for under $25 or use a remote control to get the perfect light every time. With these tips, you’ll be able to understand how to dim led lights without a dimmer.


