
How to Extend Led Strip Lights
Are you looking to extend your LED strip lights? Rather than replacing all your lights, you can extend them with the right tools and wiring.
If you’re looking for an easy way to add edgy lighting effects to almost any living space room, LED strip lights may be just what you need. These sleek and versatile LED light strips are affordable and durable, making them the ideal accessory for setting up a mesmerizing atmosphere in the comfort of your home or apartment.
Whether installed as under-cabinet lighting, indirect wall accent lighting, or used to decorate other items such as musical instruments or furniture, you can quickly extend and customize your strip illumination setup with a few simple steps!
Read on to learn more about how to extend led strip lights to create distinct designer atmospheres for all reasons.
What Will You Need?
To successfully extend your strip lighting setup, you’ll need to assemble the right tools. Gather together the following:
- Male and female connector cables
- Soldering iron and solder
- Heat shrink tubing
- Electrical tape
- A wire stripper
- An LED strip light extension kit (if required)
Once all of the necessary supplies have been gathered, you can move onto the steps below.
10 Easy Steps on How to Extend Led Strip Lights
Step 1: Disconnect and Prepare Your Wires:
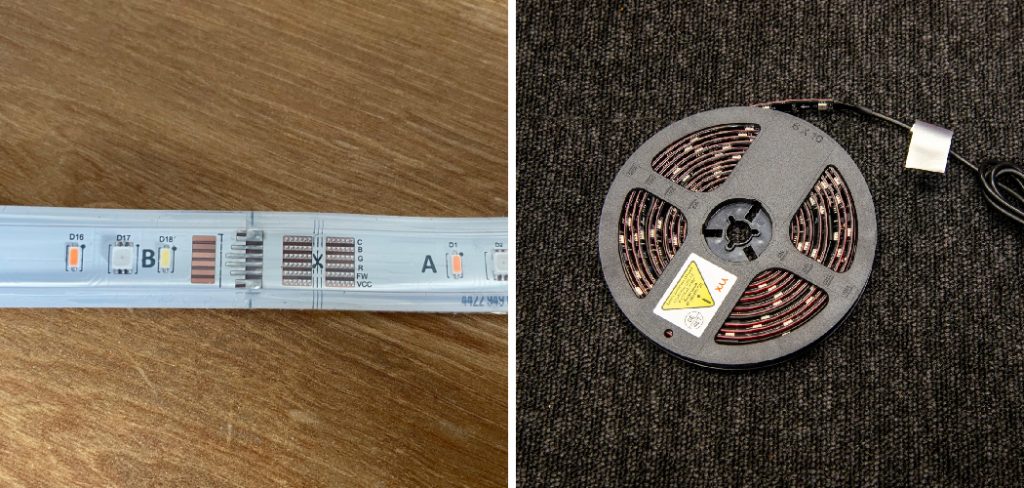
Start by carefully disconnecting the power connection and data connection at either end of the existing LED strip light. If the data connection is not present, you will need to use an LED strip light extension kit. As a precautionary measure, it is recommended that you also disconnect the power supply from your mains electricity.
Step 2: Use a Wire Stripper to Strip the Wires:
Using your wire stripper, carefully strip away a small portion of the insulation at both ends of the wires. Make sure that only the required amount is removed and that there is no exposed wiring. Additionally, ensure that the bare wires on each side match in length and size.
Step 3: Install Your Connectors:
Insert each of your connectors into their respective slots in the existing LED strip light. These are usually located at either end of the strip. Make sure they are firmly secured before moving on to the next step.
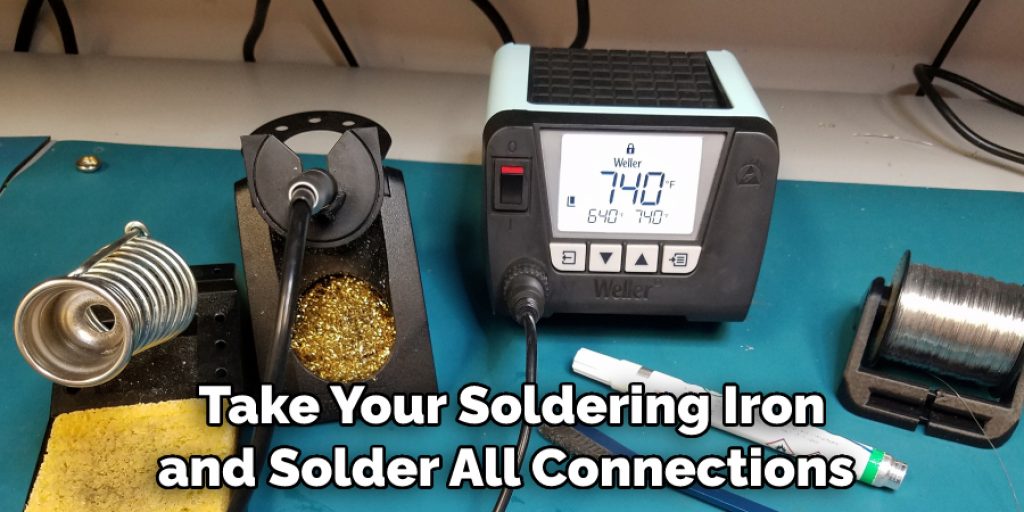
Step 4: Solder Your Wires Together:
Take your soldering iron and solder all connections together so that it is possible for them to conduct electricity effectively. Take care not to overheat or bend any of the connections. Don’t forget to add some electrical tape for insulation.
Step 5: Cover Your Connections with Heat Shrink Tubing:
To ensure that your connections are secure and well insulated, use heat shrink tubing to cover them up. This will help protect against electric shocks and also prevent dust from entering the connection area. Additionally, it will provide a neat and professional look.
Step 6: Secure Your Connections With Electrical Tape:
Once you are satisfied that all connections have been soldered together properly and covered with heat shrink tubing, take some electrical tape and wrap it around the entire length of the wiring. This will provide added protection against moisture or other contaminants which could potentially cause damage to your LED strip lights. Moreover, it will also help keep all wires neatly in place.
Step 7: Connect Your Wires to an Extension Cable:
Take your extension cable and connect the wires from your LED strip light to it. Make sure both connections are secure and firmly in place before moving on to the next step. If you are using an LED strip light extension kit, ensure that all connections match up correctly between the two components.
Step 8: Connect Your Extension Cable to a Power Outlet:
Carefully plug your extension cable into an appropriate power outlet and ensure that all connections are properly secured. Try to avoid any potential sources of interference or disruption. Because this could potentially cause damage to your LED strip lights.
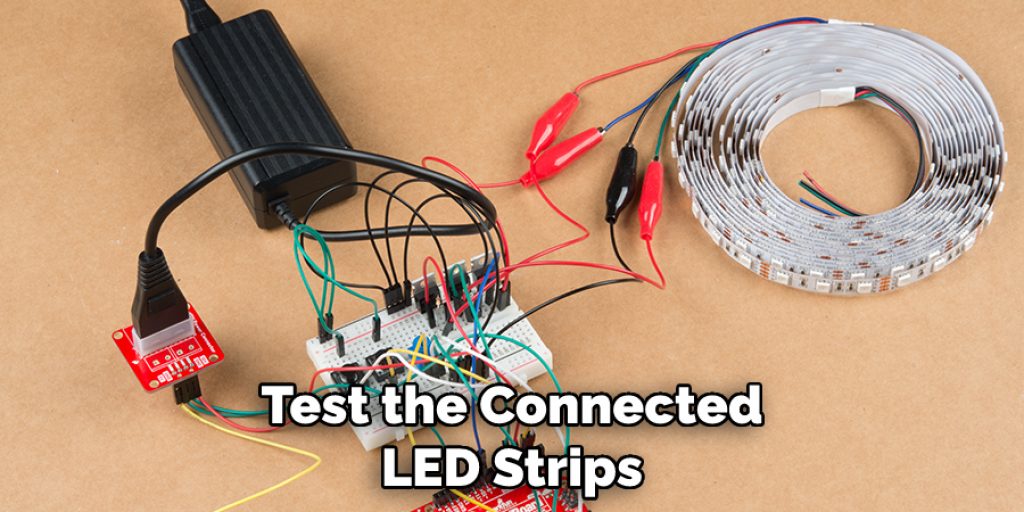
Step 9: Test Your Connections:
Once you have connected all your wires, take a voltmeter and test to ensure there is current running through them. Make sure that everything works as expected before turning the power back on. Be careful when doing this, as incorrect connections can lead to electric shocks and other risks.
Step 10: Turn On The Power Supply:
Now that you have successfully extended your LED strip lights turn on the power supply and enjoy the new lighting setup. Ensure that all the connections are tight and secure before turning on the power. Remember to respect any safety precautions when working with electricity.
By following these simple steps on how to extend LED strip lights, you can add a unique dimension to your home or business lighting setup. Time spent customizing your illumination setup will be enjoyable and result in an impressive and efficient design that stands out from the rest. With LEDs continuing to be popular in both commercial and residential applications, there is no time like the present to begin incorporating them into your decorating plan.
5 Additional Tips and Tricks
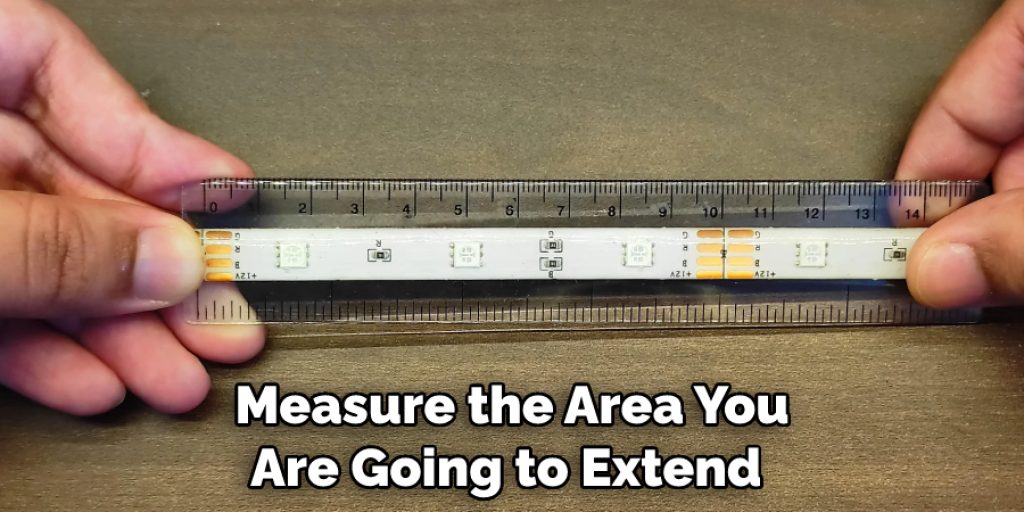
1. Measure the area you are going to extend before purchasing additional LED strip lights. It is important to be aware of the total length of the strips and the power supply needed.
2. Ensure your LED strip lights are compatible with the connectors you are using for an extension. This can be done by checking the type of connector and wattage ratings on both strips.
3. If your LED strip lights are not compatible, use a bridge connection or adapter to extend them. This will also help protect your LED strip lights from any power surges.
4. Take extra steps when extending your LED strip lights outdoors, as exposure to water can cause corrosion. Make sure to waterproof all connections and secure the LED strip lights with zip ties and adhesive clips for added protection against the elements.
5. To ensure efficient operation and reduce heat build-up, place an aluminum sheet behind the extended portion of your LED strip lights so that heat is dissipated properly throughout the entire system. Doing this will also help preserve its longevity and keep it running at its full potential.
Extending LED strip lights can be daunting, but with careful planning and a few additional tips, anyone can do it safely and successfully. With the right supplies and some helpful guidance, you’ll be able to extend your LED strip lights to suit your needs perfectly.
5 Things You Should Avoid
1. Do not purchase cheaper, lower quality strips for extension. These may be unable to handle the same wattage and might cause a power surge or even a fire hazard.
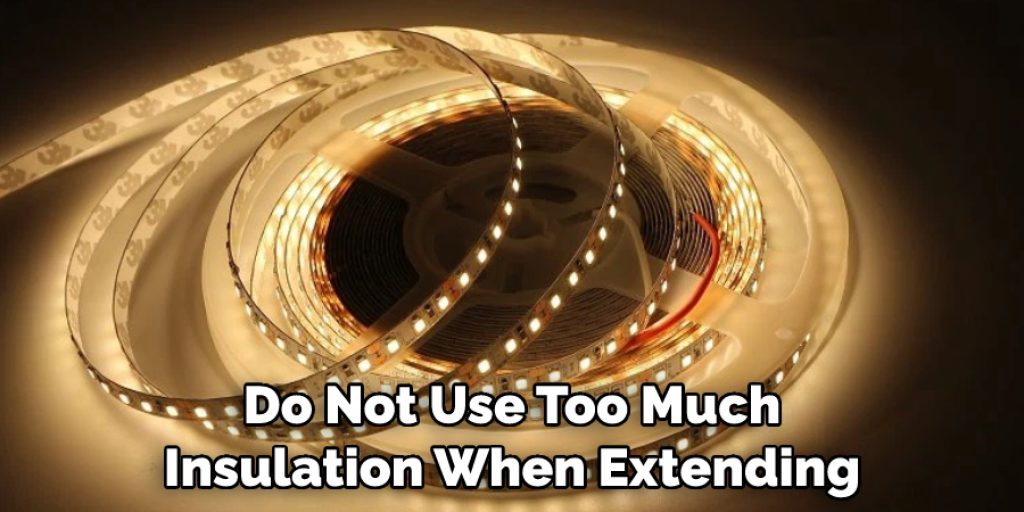
2. Don’t use too much insulation when extending your LED strip lights outdoors, as this can lead to condensation accumulation and reduce its effectiveness.
3. Never attempt to do any soldering work on your LED strip lights unless you are confident that you know what you are doing. It is best to contact an experienced electrician if any soldering needs to be done on the extended portion of the LEDs.
4. Avoid cutting through the adhesive backing of your LED strip lights, as this will damage them irreversibly and make it difficult to splice and extend them.
5. Don’t forget to test the extended portion of your LED strip lights before fully installing it to ensure it is working properly. This can be done by plugging the power supply into a surge protector and testing each section individually with a multimeter.
Follow these tips and tricks carefully when extending your LED strip lights for optimal performance, safety, and efficiency!
Can You Connect 3 Led Strips Together?
Yes, it is possible to connect up to three LED strips together. However, this should only be done if the LED strips are compatible and have the same wattage ratings. To ensure a secure connection between them, you will need to use an appropriate splicing connector/adapter as well as zip ties to keep each strip in place.
Additionally, when connecting multiple LED strips, make sure they are aligned correctly; otherwise, they may not light up properly or damage the power supply.
Finally, always test the connected LED strips before fully installing them to ensure everything is working properly.
Conclusion
Thanks for reading our guide on how to extend led strip lights. We hope you found the information provided useful and now have the confidence to take on such a project yourself. If you decide that this isn’t a task best suited to your skill set, that’s ok too!
There are many professionals out there who can help get it done right. Additionally, we suggest looking into dimming or using multiple colors with your extended LED strips to customize your space’s look and feel.
With all the possibilities available, never forget that lighting fixtures can make or break a room, so no matter what steps you choose to take with your installation process, be sure to keep functionality and aesthetic in mind at all times.


