How to Extend Wall Framing to Raise Ceiling Height
Do you ever feel as if your walls have become like a prison, trapping you in with little to no room for yourself to move around and get creative? If so, then it could be time to try something new; something that can help take your space from feeling stale and constricting to open and vibrant. It may be daunting at first but don’t worry!
With a few basic steps on how to extend wall framing to raise ceiling height, you can learn how to extend wall framing and raise ceiling height for maximum effect—all while staying within budget! So come along on this journey of DIY home improvement where we’ll provide the necessary tools & details on how to give your room an unbeatable boost of luxury without sacrificing style or comfort.
Needed Materials
- Measuring Tape
- Wall Studs (2×4)
- Circular Saw
- Level
- Safety Glasses and Gloves
- Hammer
- Nails and Screws
10 Step-by-step Guidelines on How to Extend Wall Framing to Raise Ceiling Height
Step 1: Measurements are Key
The first step in extending your wall framing to raise ceiling height is taking accurate measurements. This will help determine the amount of lumber needed for the project. Use your measuring tape to measure the length of the walls you plan on extending. Make sure to note any wall sockets or built-in features that may affect the framing process. It’s always best to double-check measurements before making any cuts.
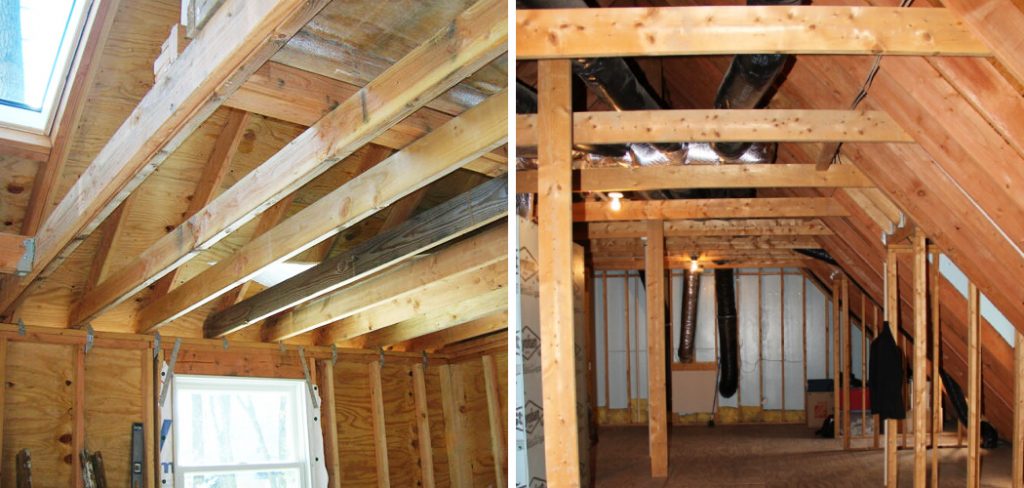
Step 2: Remove Existing Drywall
Use a hammer to carefully remove the existing drywall from the wall you plan on extending. This will expose the studs and allow for easier access when attaching new framing. But be careful not to damage the existing studs as they will still be needed for support. You can also use a drywall saw for more precise cuts. This step can be skipped if you are working on a new build or an unfinished room.
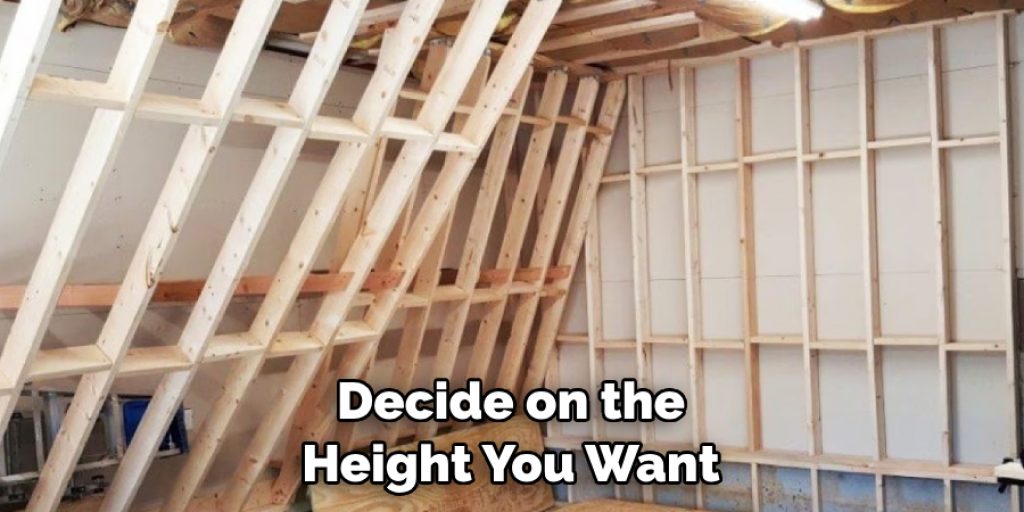
Step 3: Determine the Desired Ceiling Height
Decide on the height you want your ceilings to be. Standard ceiling heights range from 8-9 feet, but this will ultimately depend on personal preference and the size of your room. Keep in mind that raising ceiling height also means adding height to doorways and windows, so take those measurements into consideration. It’s always better to have more than enough height rather than not enough.
Step 4: Cut and Install New Studs
Using your circular saw, cut new studs (2×4) to the desired length based on your measurements. Place them vertically along the wall, making sure they are properly aligned before attaching them with nails or screws.
Keep a level handy to ensure the studs are straight. Repeat this process for all walls you plan on extending. It’s important to note that any walls with electrical wiring or plumbing may require additional framing for support. This should be done by a professional.
Step 5: Add Horizontal Plates
Horizontal plates are used to connect the top and bottom of the new studs. Measure and cut them to fit between each stud, then attach them using nails or screws. This will provide additional support for the extended wall framing. It’s important to make sure these plates are level with each other and the existing wall framing. You can also add insulation between the studs at this point for added energy efficiency.
Step 6: Secure Top Plates
Next, secure the top plates to the ceiling joists using nails or screws. These will provide extra stability to your extended wall framing. Make sure to measure and cut the plates accordingly before attaching them. It’s important that they are tightly secured to prevent any future shifting. But don’t forget, you will still need to leave space for windows and doorways.
Step 7: Add Door and Window Framing
When extending wall framing, it’s important to also extend the framing around any doors or windows. Measure and cut the wood accordingly before attaching them. Make sure to use a level to ensure all frames are straight and properly aligned. This is another step where it’s best to double-check measurements before making any cuts.
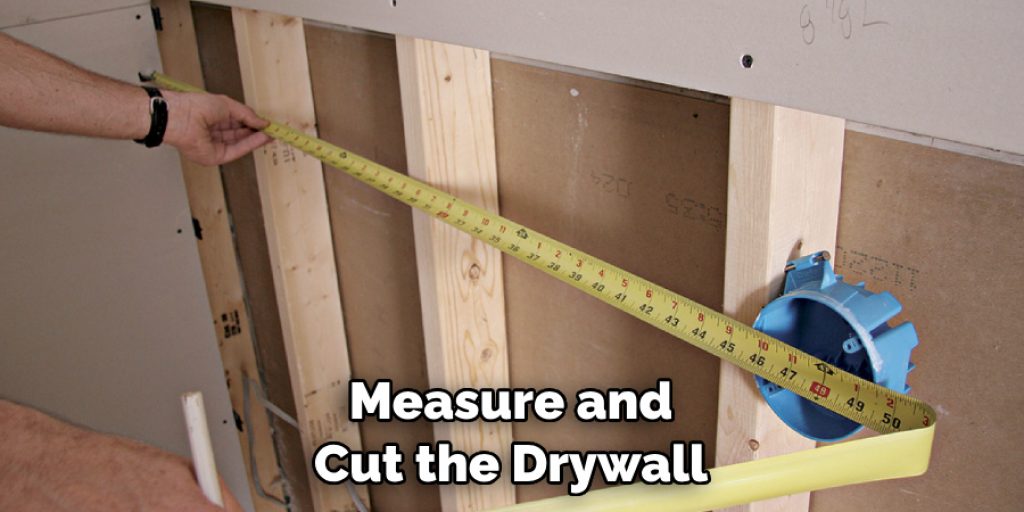
Step 8: Install Drywall
Once all the framing is complete, it’s time to install a new drywall. Measure and cut the drywall to fit around any features like windows or doorways. Attach them using screws or nails, then cover any gaps with drywall compound. Let it dry completely before sanding and painting. It’s important to note that electrical outlets and switches may need to be moved, so consult a professional if necessary.
Step 9: Finishing Touches
Now comes the fun part – adding those finishing touches! You can add crown molding or trim around windows and doors for added elegance. This is also a great time to install new light fixtures or ceiling fans, taking full advantage of your newly raised ceiling height. But don’t forget to add a fresh coat of paint to tie everything together.
Step 10: Enjoy Your New Space
Congratulations, you’ve successfully extended your wall framing and raised your ceiling height! Take a step back and admire the transformation. Not only does it give the illusion of more space but it also adds an element of luxury to any room. So go ahead, enjoy your newly elevated space and let your creativity run wild! Who knows, this may just be the beginning of many more DIY home improvement projects to come. So have fun and happy remodeling!
Following these 10 simple steps on how to extend wall framing to raise ceiling height can provide a major upgrade to any room in your home. It’s an affordable and effective way to add both aesthetic and functional value to your living space. So why settle for average ceiling height when you can have soaring ones? Give it a try and see the difference it can make!
Tips
- If You Are Not Confident in Your DIY Skills, It’s Always Best to Consult a Professional for Help With This Project.
- Remember to Wear Safety Glasses and Gloves When Handling Tools and Building Materials. Safety Should Always Be a Top Priority.
- Take Accurate Measurements Before Making Any Cuts or Attaching New Framing. A Little Extra Time Spent Double-checking Can Save a Lot of Frustration in the Long Run.
- Don’t Forget About Any Built-in Features That May Affect the Framing Process, Such as Electrical Wiring or Plumbing. It’s Important to Plan and Account for These Beforehand.
- Adding Insulation Between the Studs Can Help With Energy Efficiency and Soundproofing. Consider This During Your Wall Framing Extension Project. There Are Endless Possibilities When It Comes to Home Renovation and Improvement Projects.
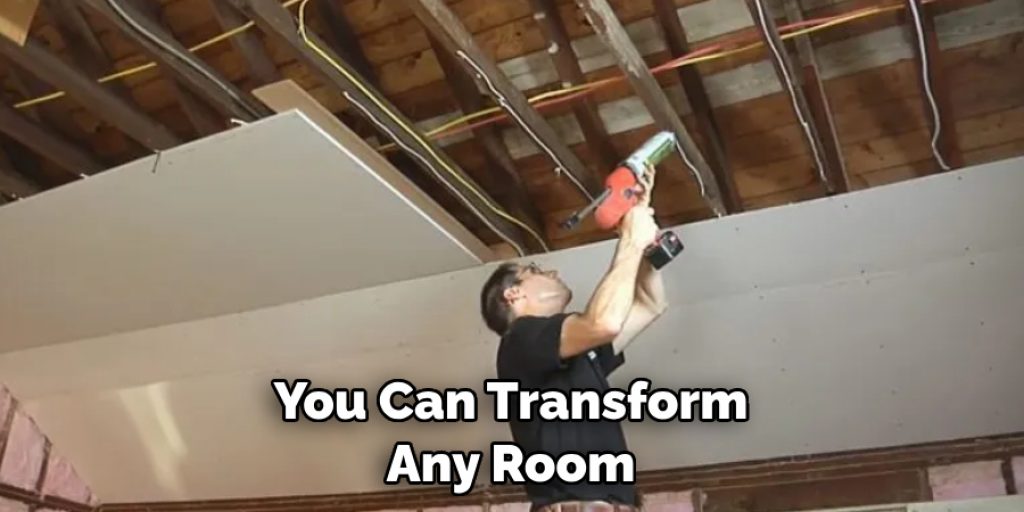
- So Why Not Start With Something as Simple Yet Impactful as Extending Wall Framing to Raise Ceiling Height? With Just a Few Tools, Some Planning, and a Bit of Elbow Grease, You Can Transform Any Room Into a More Spacious and Luxurious Living Space.
Frequently Asked Questions
Q1: How Much Does It Cost to Extend Wall Framing and Raise Ceiling Height?
A1: The cost will vary depending on the size of the room and materials used, but it can range from $500-$3000. You may also need to factor in professional labor costs if you are not comfortable with DIY projects.
Q2: Can I Raise Ceiling Height on My Own?
A2: While it is possible to do it on your own, it’s important to have some knowledge and experience in carpentry and construction. It’s always best to consult a professional if you are unsure about any part of the process.
Q3: Will Raising Ceiling Height Require a Building Permit?
A3: It’s best to check with your local building department as regulations may vary. In some cases, raising ceiling height may require a permit since it involves altering the structure of your home. So make sure to do your research before starting any renovations. Trust us, it will save you time and potential headaches in the long run.
Q4: How Long Will It Take to Extend Wall Framing and Raise Ceiling Height?
A4: The timeline will depend on the size of the room, but it can take anywhere from 2-5 days to complete. This includes measuring, cutting, and installing the new framing, as well as adding drywall and finishing touches.

Conclusion
So why wait? If you’re looking to improve the appearance of a room using cost-effective remodeling methods, consider attempting to extend wall framing and raise your ceilings. Starting with minimal prepping and planning, and just a few materials, you can see large improvements in no time. To ensure your project is as successful as possible, make sure you take the tips outlined above into extra consideration.
If you decide that this kind of project may be outside of your comfort zone or expertise, there’s no shame in bringing in expert help to get the job done – they’ll likely have tips on how to extend wall framing to raise ceiling height to offer which would actually save you more money and time! In all cases, the best way to improve ceiling height is by making every effort to understand all aspects of the job before forging ahead. Good luck and happy remodeling!
Angela Ervin
Angela is the executive editor of DIY quickly. She began her career as an interior designer before applying her strategic and creative passion to lifestyle and home. She has close to 15 years of experience in creative writing and online content strategy for housekeeping, home decorations as well as other niche efforts. She loves her job and has the privilege of working with an extraordinary team. She lives with her husband, two sons, and daughter in Petersburg. When she's not busy working she spent time with her family.