
How to Fix a Candle Wick That Won’t Burn
If you’ve ever tried to light a candle wick and it won’t burn, this blog post will teach you what not to do, as well as the steps for fixing your wick. With just a few household items and tools, you’ll be able to fix that stubborn candle in no time. However, if your wick is too short or has been crushed by the glass of an open jar of wax, here are some easy fixes.
The first and easiest way is to trim the wick down to 1/4 inch. This will ensure that the flame doesn’t get too high and blow out or go out easily because of too much heat. Another way would be to remove any wax from inside the jar that could cause problems with airflow. Continue reading this blog post to know how to fix a candle wick that won’t burn and other tips and tricks about burning candlewick.

Reasons Why Your Candle Wick Won’t Burn
1. Improper Wick Size:
This is the most common candlewick problem that I personally encounter. Wick size should always match the diameter of your candle. If you use a wick that is too small for your candle, it will not burn properly. Also, always make sure that your wick has enough space between it and the sides of the jar or tin can base; this will allow air to flow into the wax properly, which will help your candle burn properly.
2. Wrong Wick Position:
If you want your candle to burn properly, the wick has to be in a position where it can be lit at all times. Only allow the flame to burn on one side of the wick. Otherwise, you will end up with a flickering candle that does not burn evenly. Also, avoid having the flame come in contact with the sides of your jar or tin can base.
3. Incorrect Wick Density:
A highly dense wick will leave lumpy black carbon deposits along your candle’s glass surface, which is not attractive at all. A low-density wick will create holes in the sides of your jar or tin can base, as well as other kinds of damage. Always keep your wick nice and dense to prevent these kinds of problems from happening.
4. No Air Holes in the Container:
It would help if you allowed your candle to breathe freely, or it will create problems. Make sure that you leave several air holes in the sides of your container. The wick is what allows the wax to burn properly; without a place for oxygen, it cannot burn well and may even cause your jar or tin can base to cave inward on itself.
5. Container Too Small:
Make sure that you choose a large container to allow the wax to burn properly. If your container is too small, then it will create problems for you. The wick will have no place to be positioned in the wax, and it will not draw air into the container properly. When choosing your candle’s container, always make sure that there is enough space for a proper flame.

6. Brass, Aluminum, or Zinc Wick:
Some metals will interact with your candle’s wax and change its physical properties. These types of wicks are not safe for clear, paraffin-based candles; they can create bubbles that the heat cannot iron out from the flame. Any metal should be avoided; this includes brass, aluminum, and zinc.
7. Excessive Heat:
Never allow your candle to burn in excess heat. If you do this, it will end up in a melted clump at the bottom of its container. This is aesthetically unappealing and a safety hazard due to glass breakage that can occur as a result of excessive heat.
8. Improper Burn Time:
Make sure that you burn your candle for the correct amount of time. If you keep it lit for too long, then the excess heat may cause permanent damage to its container. Also, make sure that your candle burns evenly; otherwise, it will not retain its shape.
You Can Check It Out to Make Ear Candle
8 Steps to Follow: How To Fix a Candle Wick That Won’t Burn
After you have a candle burning and it looks like the wick is all burned out, it might actually just be the wick. If this happens to you regularly, then try these steps. This will fix your candle from letting the smoke out and help keep costs down as well.
Step 1: Make Sure That Your Wicks Are Long Enough.
If your wicks are not long enough, the flame can go out. This will give you a false impression that the candle is burned out and allow smoke to escape. You can use a marker or permanent marker on a cotton swab to lengthen your wick.
Step 2: Check the Diameter of the Wick Carefully.
If your wicks are not the right size for the candle you are using, it can be dangerous to light them. Be cautious of this, and make sure you read the directions before lighting any candles. Lighter or thinner wicks work for some candles, while thicker ones need heavier ones.

Step 3: Make Sure That Your Wicks Aren’t Too Damp.
If your wicks are too damp, your candle won’t burn well. In fact, it might not even be light at all. If you notice that your wick gets wet after burning for a while, then it may be time to trim the end of the wick so that it doesn’t get wet as much.
Step 4: Clean Your Wicks and Your Candle Holders.
You can burn candles better if the candle holder is clean (for instance, you can use bleach to ensure it does not have any strange or bad odors). In addition, a clean candle holder will help keep the flame burning longer because nothing will get in the way of it keeping a steady light.
Step 5: Let Them Dry Out if Necessary.
If you live in a humid environment, let your candles dry out after they have been burning. If not, the moisture will build up and can affect how they burn.
Step 6: Trim Your Wick to the Appropriate Length.
If your wicks are too long, it won’t be as easy for the wax to reach the flame. If they are too short, they can let the smoke out and not light very well. Make sure that you keep them about a quarter of an inch long (the length of an eraser on your pencil).
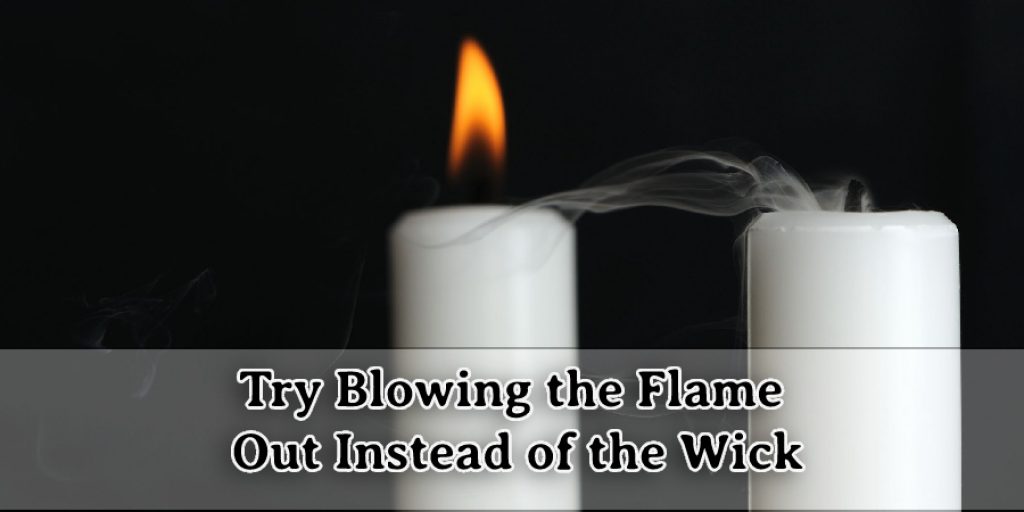
Step 7: Understand How to Blow Out Your Candles.
If you want to get the most out of your candle and keep it lit longer, try blowing the flame out instead of the wick. This will help you save money on candles and time because it is not difficult or takes forever to relight a candle that has been blown out.
Step 8: Just Let Go.
Your last and final step is to use a candle that has the right consistency. The type of wax you use can affect how well your wicks burn. If they are too soft, it may not light because it doesn’t hold, like what would happen if it was made out of butter. On the flip side, if they were too hard, it might not burn a nice flame because the wax would sit there and be burned slowly. Experiment with different types of candles or wicks until you find something that works for your household.
Final Thoughts
In this blog post, we have provided some helpful tips on how to fix a candle wick that won’t burn and what might be going wrong with your wick. Once you have the wick fixed, try to light it again with a lighter or match.
If this doesn’t work, then your candle may be too old and needs replacing. You must use caution when burning candles so they don’t start fires or cause any harm to yourself or others in the home!


