How to Frame a Pressed Flower
Framed pressed flowers offer a captivating way to preserve nature’s beauty and infuse your space with a touch of elegance. Each flower tells its own story, and when encased in a frame, it serves not only as decoration but also as cherished memories that evoke emotional connections. The benefits of framing pressed flowers are abundant: they provide a unique means of preservation that allows you to enjoy their colors and shapes for years to come, add a personal aesthetic to your home, and serve as sentimental keepsakes from special moments.

Understanding how to frame a pressed flower involves a series of straightforward steps, from selecting the right materials to arranging and securing your blooms, ultimately leading to a beautiful display that showcases your artistic touch.
Materials and Tools Needed
To successfully frame your pressed flowers, you will need the following materials: pressed flowers, a picture frame suitable for your design, a backing board to support the flowers, and either a glass or acrylic sheet to protect them. Also, gather adhesive or mounting squares to secure the flowers and a mat board to add depth and contrast to your presentation.
In terms of tools, make sure to have scissors for trimming, tweezers for precise positioning, glue or mounting squares for attachment, and a ruler to ensure everything is evenly spaced. For optional enhancements, consider decorative elements like ribbons, additional plant materials, and acid-free tape to ensure longevity without damaging your flowers.
Preparing the Pressed Flowers
Before framing your pressed flowers, it’s essential to ensure they are fully dried and pressed to preserve their beauty for years to come. Begin by selecting fresh flowers that are free of blemishes and wilting. Once you have chosen your flowers, remove any excess foliage and stems to achieve a cleaner look. This enhances the visual appeal and prevents any unnecessary bulk in the frame.

After trimming, place the flowers between sheets of absorbent paper or newsprint, and then press them using heavy books or a flower press. Leave them in this position for at least a week to ensure they are completely dry. Once the flowers are adequately pressed, inspect them closely; select those with vibrant colors and pleasing shapes for framing. Remove dried flowers from the pressing materials and gently handle them using tweezers to maintain their delicate form. This preparation process is crucial as it sets the foundation for a lovely presentation, allowing you to curate a unique collection of floral memories that will last.
Choosing the Right Frame and Backing
Selecting a frame that beautifully complements your pressed flowers is crucial for enhancing their visual appeal. Consider the size of your arrangement; a larger frame may allow for a more dynamic display, while a smaller frame can create an intimate showcase of a single bloom or a few select pieces. The style of the frame should align with your décor—rustic wooden frames suit a natural theme, while sleek metal frames offer a modern touch.
When it comes to protecting your flowers, you’ll need to decide between glass and acrylic sheets. Glass offers a classic, clear finish with excellent durability, while acrylic is lightweight and shatter-resistant, making it an ideal choice for larger displays or if you plan to hang your artwork in a high-traffic area.
Additionally, using an acid-free backing board is essential to maintain the integrity of the flowers over time. Acidic materials can lead to discoloration and deterioration of the delicate blooms. An acid-free backing will provide the necessary support and ensure longevity, allowing you to enjoy your botanical masterpiece for years to come. Combined, these elements create a stunning, personalized piece of art that celebrates the beauty of nature.
Designing the Layout
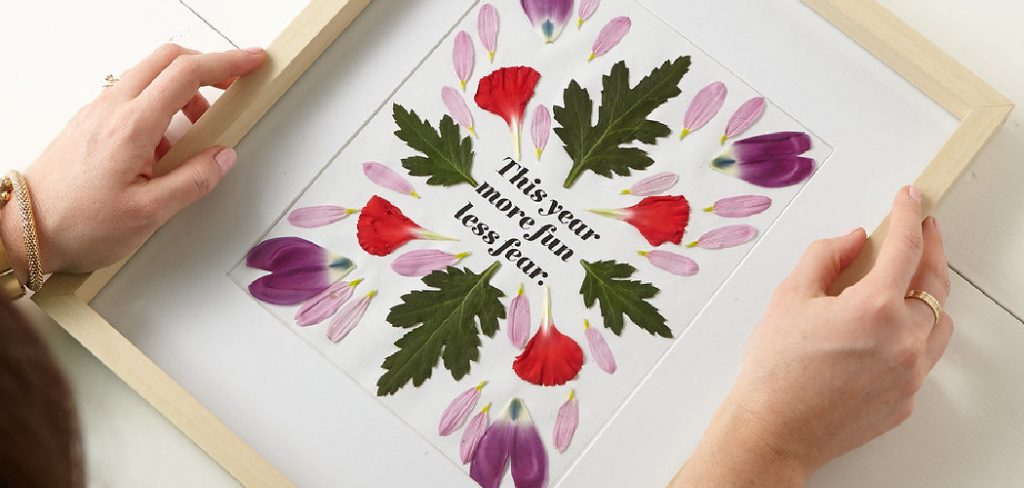
Designing the layout of your framed pressed flowers is a crucial step that will greatly influence the overall aesthetic of your finished piece. Begin by brainstorming your desired composition; consider whether you want a symmetrical arrangement or a more organic, free-flowing design. Lay the flowers out on the backing board without securing them first, experimenting with various positions to find a layout that is visually pleasing.

You may wish to group flowers by size, color, or theme, ensuring that the arrangement feels harmonious and balanced. It’s also helpful to consider the negative space in the design—leaving some areas open can enhance the visual impact of your flowers, making the whole piece more eye-catching.
Using tweezers, carefully position your flowers to achieve the desired arrangement. This will allow you to precisely place the delicate blossoms, which is especially important for smaller or more fragile flowers. Once you are satisfied with the layout, take a step back and assess the overall look. Don’t hesitate to shift elements around until you find the perfect balance, as this is your opportunity to create a unique display that reflects your personal taste.
Securing the Flowers
After finalizing your layout, it’s time to secure the flowers in place. Use adhesive or mounting squares to attach them directly to the backing board, ensuring they are firmly affixed. When applying the adhesive, do so gently to avoid damaging the delicate petals. A helpful tip is to apply the adhesive to the backing board first, then press the flowers down, ensuring they are securely mounted without excessive pressure. This method preserves the integrity of the blooms, allowing you to enjoy your beautiful creation for years to come.
How to Frame a Pressed Flower: Assembling the Frame
Once you have secured your pressed flowers on the backing board, it’s time to assemble the frame. Begin by preparing the glass or acrylic sheet, ensuring it is clean and free from any dust or fingerprints. Use a soft cloth and a gentle glass cleaner, ensuring no smudges will detract from the beauty of your display.

Next, carefully place the backing board with your flowers into the frame. Align it properly to ensure that the arrangement is centered and visually appealing. Once the backing board is in place, secure it by using the frame’s fasteners, which may include clips or screws, depending on the frame design.
Final Adjustments
After securing the backing, check for gaps or misalignments in the arrangement. If you notice any flowers have shifted during the process, gently adjust their position using tweezers to ensure they remain in their intended spots. Finally, do a last-minute cleaning of the glass or acrylic sheet to remove any fingerprints or smudges that may have appeared during the assembly. This attention to detail will enhance the overall presentation of your pressed flower masterpiece, allowing you to enjoy it in its full glory.
Displaying and Maintaining the Framed Flowers
Finding the right location to display your framed pressed flowers is essential to ensuring their longevity and visual impact. Avoid placing them in direct sunlight, as this can cause the colors to fade over time. Additionally, keep the frame out of areas with high humidity, as moisture can lead to mold growth or deterioration of the delicate blooms. A well-ventilated room with stable temperatures is ideal for preserving the integrity of your artwork.
To maintain the beauty of your pressed flowers, the frame and glass or acrylic covering must be regularly cleaned. Use a soft, lint-free cloth with a mild glass cleaner to gently wipe the surface, avoiding harsh chemicals that could damage the delicate flowers. Take care not to apply excessive pressure, which could disturb your arrangement.
It is also wise to perform periodic checks on your framed piece, looking for any changes in condition, such as discoloration or signs of wear. If you notice any iallows yousues, gently address them, whether it be repositioning a flower or replacing an aging frame. By taking these careful steps, you can ensure that your floral masterpiece remains a beautiful focal point in your decor for years to come.

Troubleshooting Common Issues
When creating your framed pressed flowers, you may encounter some common issues that can detract from the overall appearance of your artwork. One prevalent problem is flower discoloration, often caused by prolonged exposure to light or moisture. To remedy this, ensure your display is kept away from direct sunlight and humidity, choosing a room with stable climate conditions. If you notice any damaged or faded flowers, consider replacing them with fresh blooms to maintain the artwork’s integrity.
Additionally, issues may arise with the frame or backing. If the backing board shows signs of bending or warping, replacing it with a sturdier, acid-free material may be beneficial. Finally, avoid excessive frame handling for long-term preservation and ensure regular cleaning with a gentle, lint-free cloth. By addressing these common concerns promptly, you can keep your pressed flower display looking vibrant and beautiful for years to come.
Conclusion
In summary, knowing how to frame a pressed flower involves a series of enjoyable and creative steps, from selecting and arranging your blooms to securing them on a backing board and assembling a frame. Remember to experiment with different layouts and styles to discover what best showcases your taste and the unique character of your flowers. Each arrangement allows you to express your individuality while creating a stunning piece of art. Framed pressed flowers serve as beautiful decorative objects and capture moments in time, making them meaningful additions to your home. As you embark on this creative journey, don’t hesitate to try new techniques and designs; after all, the beauty of pressed flowers lies in their versatility and the personal touch you bring to each piece.


