How to Glue Mirror to Wood
Gluing a mirror to wood can be a great way to add a unique and personalized touch to your home décor. Whether it’s in the form of a wall art project or an accent piece, gluing a mirror to wood allows you to get creative and make something truly one-of-a-kind. Adding this type of unique touch to your home can also be an economical way to spruce up a room, as mirrors are often cheaper than purchasing artwork.
Gluing a mirror to wood can easily create a decorative and functional piece of furniture or wall art. This method is inexpensive and can often be done without professional help. It brings out the natural beauty of both materials, creating an eye-catching design. You can find step-by-step instructions on how to glue mirror to wood in this blog article.
Step-by-step Instructions for How to Glue Mirror to Wood
Step 1: Inspect the Mirror
Check the mirror for any signs of damage or defects. If there are any, you will need to fix them before continuing with the process. Ensure that the mirror’s surface is clean and free from dirt, dust, and debris.
Step 2: Prepare the Wood
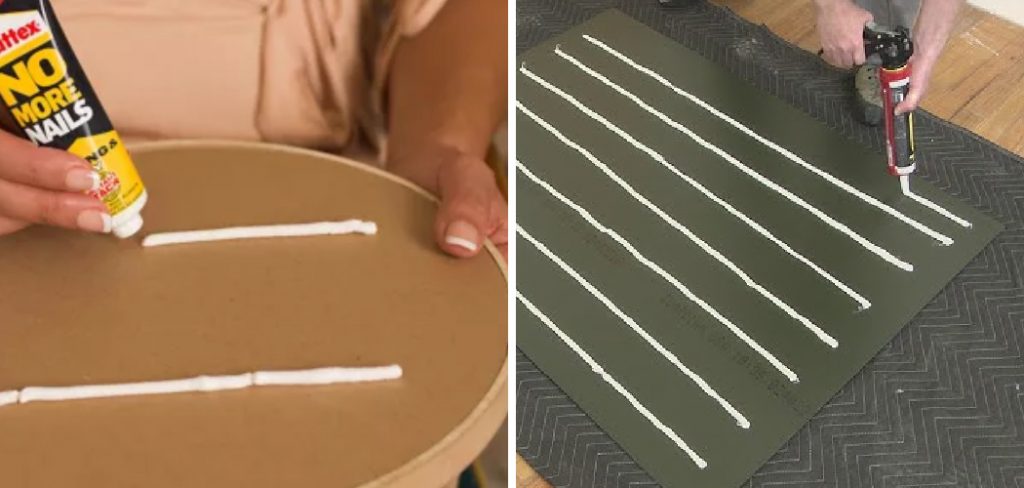
Clean the wood with a damp cloth to remove any dirt or debris, then lightly sand it to create a smooth surface for gluing. Wipe away any excess sawdust before continuing. Apply a thin, even layer of mirror adhesive to the wood. Make sure to cover the entire area that you wish to glue the mirror onto. Allow the adhesive to dry completely before proceeding.
Step 3: Attach Mirror
Carefully position the mirror on top of the wood, ensuring it is in the desired position. Press down firmly to ensure that it is securely attached. Use a caulking gun to apply a line of mirror adhesive along the mirror’s edges, where it meets the wood. This will help create an additional layer of protection over time.
Step 4: Wait for the Glue to Dry
Allow the adhesive to dry completely before proceeding. This process could take several hours, depending on factors such as humidity and temperature. Once the glue is dry, check that there are no gaps between the mirror and the wood. If there are any, fill them with a clear adhesive.
Step 5: Secure the Mirror
Secure the mirror with nails or screws, making sure that they are evenly spaced apart. This will help to keep the mirror in place and provide added protection against movement over time. Once the glue has dried, use a damp cloth to remove any excess adhesive that may have seeped out from between the mirror and the wood.
By following these steps, you can easily and successfully glue a mirror to wood.
Safety Tips for How to Glue Mirror to Wood
- Wear safety goggles. Gluing a mirror to wood produces heat and splinters that can be hazardous to the eyes, face, and hands.
- Put on protective gloves to protect your hands from sharp edges and hot glue.
- Cover any exposed skin with long clothing or other protective gear as necessary.
- Ensure you are working in a well-ventilated area to avoid breathing in any glue fumes or vapors.
- Place the mirror on a flat and stable surface before applying the adhesive.
- Use the appropriate glue for your specific type of wood and mirror, such as epoxy resin or silicone-based glue.
- Secure the mirror and wood in place with clamps until the glue dries completely (which can take up to 24 hours).

Following these safety tips will ensure that the process of gluing a mirror to wood goes smoothly and safely. With proper preparation, you can achieve a beautiful result that will last for years.
How Should You Store the Glued Mirror and Wood So That It Remains Secure Over Time?
When gluing a mirror to wood, it is important to store it in a location that ensures that the bond remains secure over time. Ideally, you should store the glued item in a cool and dry area with minimal vibration and movement. Additional measures may be necessary in high-humidity areas to prevent warping or other damage to the wood-mirror bond due to moisture.
To protect the item from accidental damage while in storage, it is a good idea to cover it with a cloth or bubble wrap and store it on a flat surface without any sharp objects nearby. If possible, try to find an area that stays consistently dry and preferably at about room temperature.
For added safety, securing the glued item to its storage surface may be a good idea. This can be done by using furniture straps or other similar fasteners. Doing this will help prevent any accidental shifting or dropping during transport and help ensure that the glue bond remains intact.
How Can You Prevent the Mirror From Cracking While Being Glued to the Wood?
One of the most important steps when gluing a mirror to wood is ensuring that the mirror does not crack. This can be done by ensuring that your surface is clean and free of dirt, dust, and debris before applying any kind of glue to it. Additionally, you should use as little adhesive as possible- too much adhesive can put too much pressure on the mirror and cause it to crack.
It is also important to ensure that the wood has a flat surface so as not to leave any gaps or uneven spaces between the mirror and the wood. If there are any bumps, ridges, or other imperfections in the wood, use sandpaper to smooth them out before applying any adhesive. Finally, you should use a flexible, clear adhesive that is designed for mirrors and wood surfaces to ensure the strongest bond possible with minimal risk of cracking.
How Can You Prevent the Mirror From Cracking While Being Glued to the Wood?
When gluing a mirror to a piece of wooden furniture or any other surface, it is important to take steps to prevent the mirror from cracking. To prevent such an issue, start by preparing the wood with sandpaper and primer to have a smooth finish for the adhesive to attach properly.
Additionally, you can use spacers or shims between the mirror and the wood to ensure that the surface is even before applying glue. Depending on the type of adhesive used, it might be necessary to use a clamp to secure the mirror in place while it dries.

Furthermore, you can also cover any exposed edges with molding tape or rubber gaskets, which will help protect the mirror from cracking or splitting. Following these steps will help ensure that your mirror is securely glued to the wood and prevent any damage to it.
In conclusion, gluing a mirror to wood can be done safely when considering all of the necessary precautions. By prepping the surface of the wood properly, using spacers or shims, using the right adhesive and clamp, and protecting any exposed edges with molding tape or rubber gaskets, you can prevent your mirror from cracking while being glued to the wood.
Doing these steps correctly will result in a successful glue job that will leave your mirror securely attached.
How Can You Avoid Getting Glue on Your Hands While Gluing a Mirror to the Wood?
- Prepare the area you will be working in by covering any nearby surfaces with a drop cloth or newspaper.
- Wear protective gloves to avoid getting glue on your hands while handling the mirror and wood pieces.
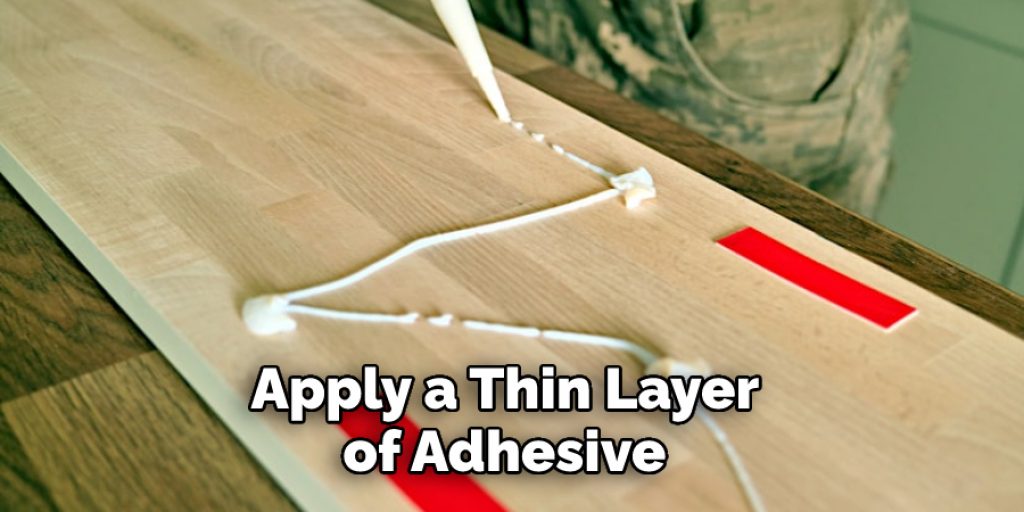
- Apply a thin layer of adhesive to one side of the mirror and then place it onto the wood surface.
- Secure the mirror to the wood using masking tape or clamps, and ensure that it is firmly in place with no air bubbles or gaps.
- Apply a thin layer of adhesive onto the mirror’s edges and then press them against the wood surface.
- Remove any excess glue with a damp cloth and allow the adhesive to dry completely before removing the masking tape or clamps.
- Clean up any remaining glue on your hands by washing them thoroughly with soap and warm water.
By following these steps, you can avoid getting glue on your hands while gluing a mirror to wood. You can successfully adhere a mirror to any wooden surface with the right tools and safety precautions.
Conclusion
In conclusion, gluing a mirror to wood doesn’t have to be difficult. Follow the steps outlined and ensure that your mirror will remain firmly attached to the wood surface. Things to consider include ensuring both surfaces are clean and using an adhesive specifically designed for mirrors, such as epoxy or urethane glue.
Be sure to apply pressure evenly across the entire surface area to ensure a tight bond, and let the glue cure for 24 hours before using. I hope this article has been beneficial for learning how to glue mirror to wood. Make Sure the precautionary measures are followed chronologically.
Angela Ervin
Angela is the executive editor of DIY quickly. She began her career as an interior designer before applying her strategic and creative passion to lifestyle and home. She has close to 15 years of experience in creative writing and online content strategy for housekeeping, home decorations as well as other niche efforts. She loves her job and has the privilege of working with an extraordinary team. She lives with her husband, two sons, and daughter in Petersburg. When she's not busy working she spent time with her family.