How to Ground a Metal Junction Box
Metal junction boxes provide a reliable and sturdy way to ground electrical wiring. These boxes can help protect your home from potentially dangerous electrical shocks when properly grounded. There are a few different ways to ground a metal junction box. One is to use screws and clamps to attach the grounding wire to the box.
Another way is to use a bonding jumper. A bonding jumper is a piece of metal connected to the grounding screw on the box and then attached to the ground electrical system. This method is more common in new construction but can also be used in existing homes. The third way is to use a pigtail connector.
A pigtail connector is a short piece of wire used to connect two pieces of wire together. Depending on what type of connector you have, it can be used with either screws or clamps. This post will show you how to ground a metal junction box using a few simple tools and supplies. Let’s get started!
Tools and Supplies Needed:
- Grounding wire
- Screws or clamps (depending on connector type)
- Pigtail connector (if using screws)
- Bonding jumper (if using clamps)
- Wire strippers
- Wire cutter
Step by Step Guide: How to Ground a Metal Junction Box
Step 1: Determine Which Grounding Method You Will Be Using.
If you are using screws, you will need to purchase the appropriate type of screw for your metal junction box. Make sure that the screw is long enough to go through the box and contact the bare metal inside. If you are using clamps, you will need to purchase the appropriate clamp type for your metal junction box.
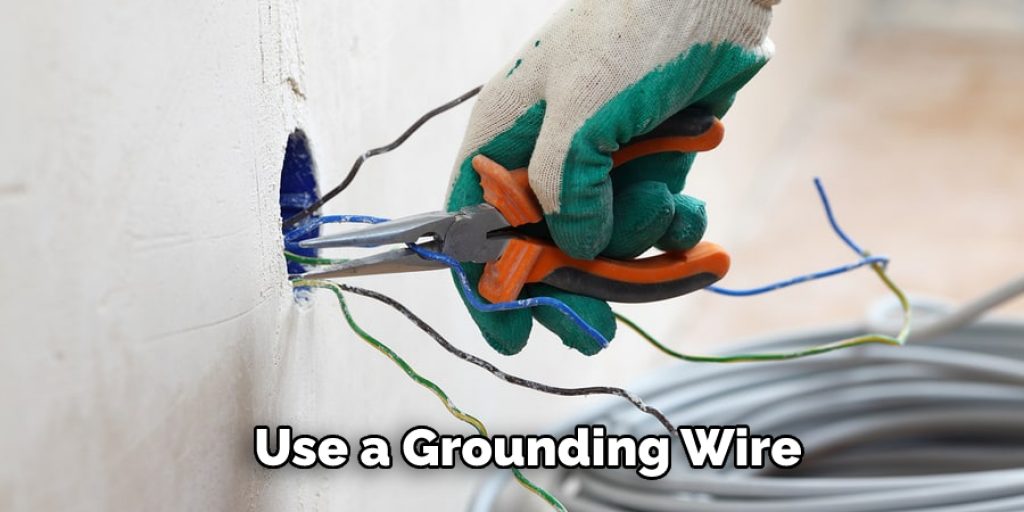
Step 2: Cut the Grounding Wire to the Appropriate Length.
Using wire strippers, strip away about 3/4 inch of insulation from each end of the grounding wire. Then, use a wire cutter to cut the wire to the appropriate length. The length will vary depending on the grounding method you are using.
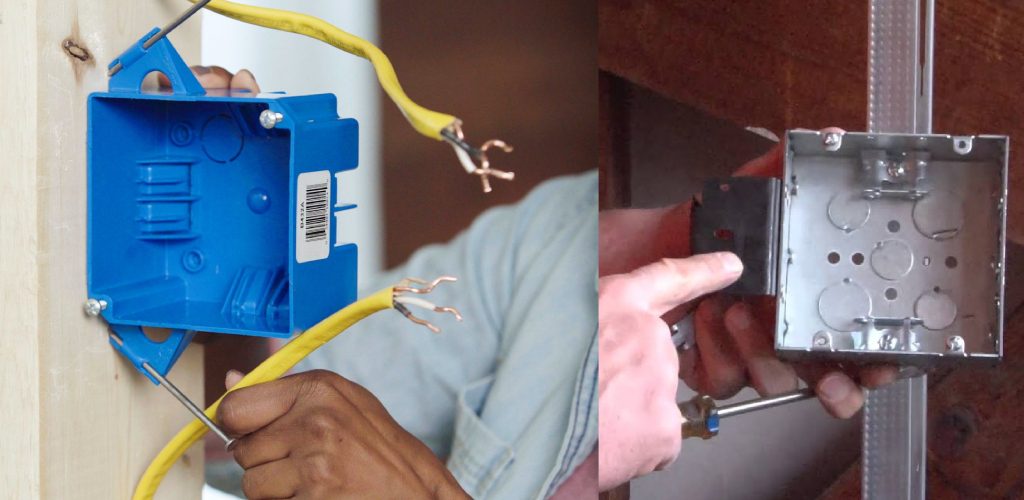
Step 3: Attach the Grounding Wire to the Metal Junction Box.
If you are using screws, insert the screw into the pre-drilled hole in the junction box and tighten it until snug. Then, attach the grounding wire to the screw. If you are using clamps, attach the clamp to the junction box and attach the grounding wire to the clamp.
Step 4: Connect the Grounding Wire to the Electrical System Ground.
If you are using a pigtail connector, strip away about 3/4 inch of insulation from the end of the grounding wire that is not attached to the junction box. Then, twist the pigtail connector around the grounding wire and tighten it until it is snug. Finally, attach the pigtail connector’s other end to the ground electrical system. If you are using a bonding jumper, attach one end of the jumper to the grounding screw on the junction box and the other end to the electrical system ground.
Step 5: Test the Grounding Connection.
Use a multimeter to test the continuity between the grounding wire and the electrical system ground. The reading should be zero ohms. If it is not, then you will need to check your connections and make sure that they are tight.

Some Helpful Tips and Suggestions:
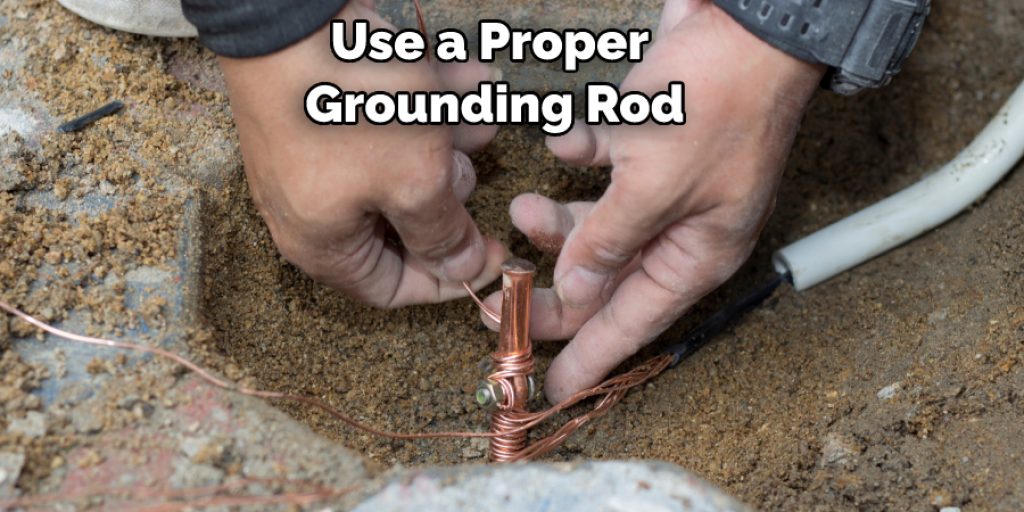
- Always use a proper grounding rod and associated clamps when installing or repairing a grounding system.
- Use only properly rated and sized wires and connectors when making electrical repairs.
- Be sure to turn off the power before beginning any work on an electrical system.
- Use only properly insulated tools when working on electrical projects.
- Never work on an energized circuit.
- Follow all local building codes when installing or repairing grounding systems.
- Have a licensed electrician check your work before energizing the circuit.
- Never attempt to repair or install grounding system components while standing in water.
How Does a Metal Junction Box Work?
A metal junction box is used to ground electrical wiring. These boxes can help protect your home from potentially dangerous electrical shocks when properly grounded. There are a few different ways to ground a metal junction box. One is to use screws and clamps to attach the grounding wire to the box.
Another way is to use a bonding jumper. A bonding jumper is a piece of metal connected to the grounding screw on the box and then attached to the ground electrical system. This method is more common in new construction but can also be used in existing homes.
The third way is to use a pigtail connector. A pigtail connector is a short piece of wire used to connect the grounding wire to the box. No matter which method you use, it is important to ensure that the connection is secure and will not come loose over time.
What Happens if a Metal Box Isn’t Grounded?
First, it’s important to understand what grounding does. Grounding protects against electrical shocks by providing a path for electricity to flow in the event of a short circuit or other problem. For example, if a metal box isn’t grounded, it can become electrified if there’s a problem with the wiring inside. This can be extremely dangerous, especially if you touch the box or anything else attached to it.
In addition, an ungrounded metal box can cause interference with sensitive electronic equipment. This can damage the equipment or make it malfunction. Finally, an ungrounded box can make it difficult to find and repair electrical problems because the current will take the path of least resistance, which may not be through the wires that are supposed to carry it.
Conclusion
A metal junction box should be grounded to protect people from electrical shocks. The ground wire provides a path for electricity to escape if there is a problem with the wiring in the box. Always be sure to ground a metal junction box properly. It is the law in some states, but it’s also necessary for safety reasons.
If you’re not familiar with NEC or just need a refresher on grounding metal junction boxes, be sure to check out our latest blog post. We hope this blog post on how to ground a metal junction box has been helpful. If you have any questions or want to know more, then feel free to comment below!