
How to Hammer Metal
Learning how to hammer metal is a useful skill that can be used in various ways. Whether you’re looking to build something yourself or want to have the ability to fix things around the house, knowing hammer metal is a must. In this blog post, we’ll go over the basics of hammering metal and provide some tips on getting started.
Metalworking is an important hobby for many people. It can be a great way to relax and have some fun, or it can be a source of income. But, regardless of your reason for wanting to work with metal, there are some basics that you need to know. So, whether you’re a beginner or an experienced metal worker, read on for all you need to know about hammering metal!
Step by Step Process: How to Hammer Metal
Step 1: Prepare Your Work Area and Work Material
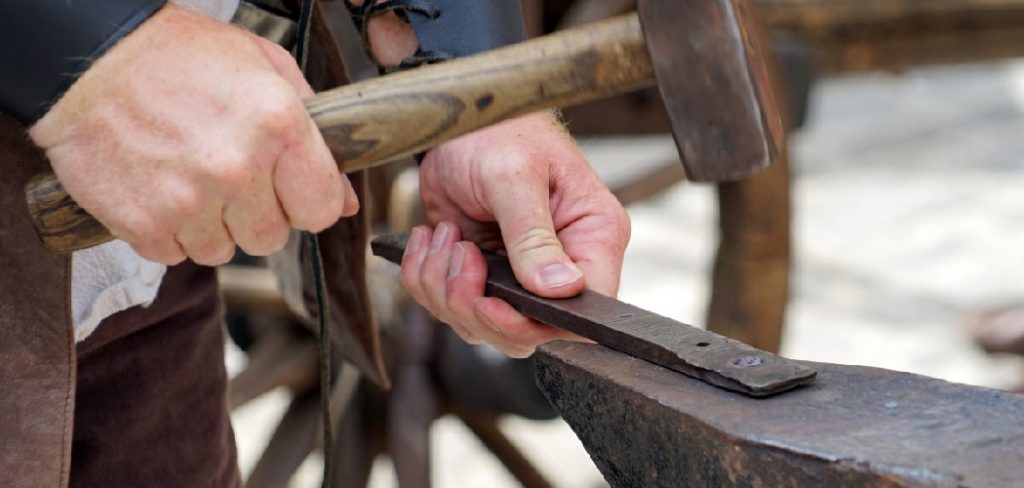
The first step in learning how to hammer metal is preparing your work area and your work material. You will want a sturdy bench with a raised anvil, preferably a hardy hole and a hardy set (two-square and six-square). The bench should be outfitted with the proper tools: two hammers (ball peen and cross-peen), a metalworking file, tap hammer, drill, etc. In addition, it should be well lit for ease of use.
The piece you are working on should be clean and free of rust or contaminants. You will want to set your anvil approximately six inches away from the edge of the bench. This will leave room for the metal to be worked and transported back and forth.
Step 2: Mark Out the Shape You Want
Before you start hammering, you will want to mark out the shape and design you want to create. This can be done on paper or freehand if it is small enough. This step is crucial for getting your desired shape and size. You can also purchase pre-made patterns of almost any conceivable shape from many online or local metal suppliers.
Step 3: Cut the Metal to Shape
This step is best performed by cutting the metal with an angle grinder using a cutoff wheel. The cutoff wheel will cut cleanly through the metal and make it easier for you to hammer out any impurities after you are done shaping it. After this, file off any burs or rough edges, and then you are ready to move on.
Step 4: Straighten the Metal
When you have your piece cut out to shape, it may be warped, twisted, or bent in certain areas. You’ll want to straighten this out before starting hammering because it will make the shaping process much more manageable. To do this, place the metal on top of a block of wood and use a rubber mallet to pound out any twists or bends.
If there are very stubborn areas that won’t seem to come loose, use pliers to gently twist the metal in the opposite direction while hammering it with the mallet. Do not apply too much pressure, as you don’t want to create any dents or deformities.
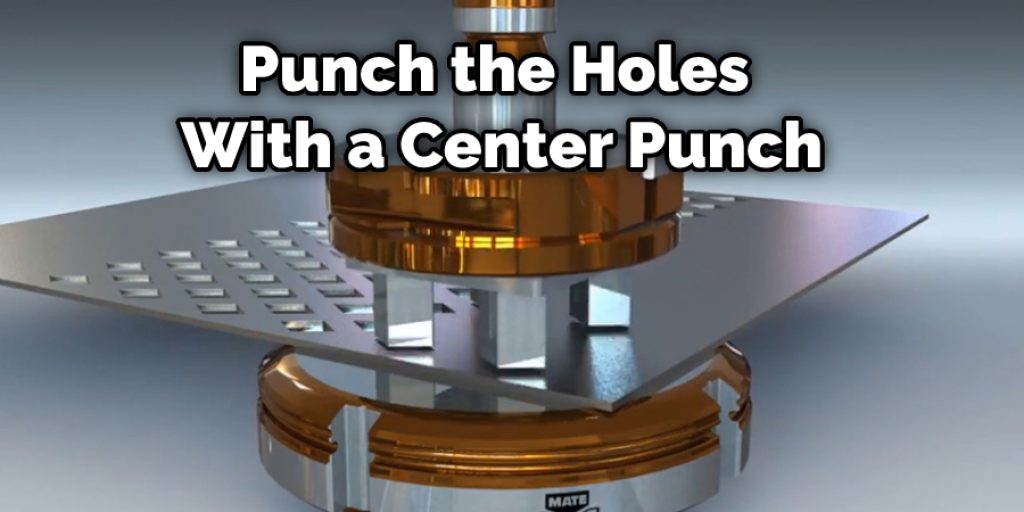
Step 5: Punch the Holes
If you are working with a pattern that requires multiple holes, punch them out with a center punch and a hammer before shaping it. This will make the process much easier. If your piece doesn’t need holes (or if you already punched them out), then move on to the next step.
If you are working with an angle grinder instead of a cutoff wheel, use masking tape to cover up any areas where you do not want the sparks. This will prevent them from cutting through your workpiece and making unwanted cuts or holes. You can also use this technique for punching or drilling holes in the metal.
Step 6: Cut Out the Shape
Now that your piece is straightened out, it’s time to cut it into the shape you want. You will need to clamp the metal down to your work surface before beginning this step. If you did not have a cutoff wheel or angle grinder for cutting out the initial shape, this would be where you would use them instead of the file.
Step 7: File the Metal Smooth
Your metal will likely have several imperfections that you need to take care of before moving on to the next step. To do this, place the metal in front of you and file it back and forth using parallel motions. Doing so will eliminate any irregularities or rough patches and allow the surface to be uniform and smooth.
Tapping metal with a hammer can get rid of sharp edges, but it can also eliminate any fine details you might have included in your pattern. So if you want to keep these fine details intact, skip this step or use sanding belts instead.
Step 8: Taper the Ends
Your piece should be straight and uniform at this point, but the ends probably aren’t. To fix this, clamp a small block of wood down vertically next to one end of the metal. Next, use a rubber mallet to tap the metal into place to flat against the wood. Remove the woodblock and repeat this step on the other end when you are done.
Step 9: Shape With a Hammer
Now that your metal is relatively smooth, you can start shaping it to give it its final form. You will want to place the metal in front of you flat against the surface, facing up the other side. Place a rubber mallet or ball-peen hammer against the top part of the metal and then tap it into place.
This will flatten out any high spots and give you a uniform shape. If there are certain areas that you want to pound out specifically, simply clamp down a block of wood to protect them from getting flattened during this process.
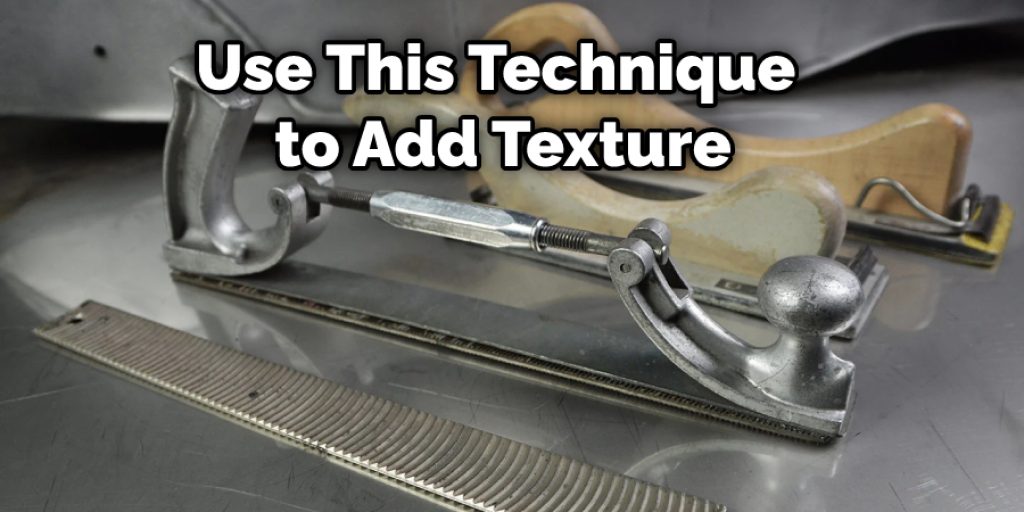
Step 10: Finish Shaping
This step is the same as the previous one, except that you are now using a cross-peen hammer instead of just a ball-peen hammer. Just place it on top of your metal and strike it with the mallet until it has reached its final shape. You can also use this technique to add texture to your piece.
How Do You Clean a Hammer After Using It to Hammer Metal?
A standard method is to wipe the head of the hammer with a rag thoroughly dipped in mineral spirits or paint thinner. You may have to repeat this process several times if the head has become dirty during use. If necessary, you can then dip the rag in Minwax and wipe the head a few more times to remove any leftover dust.
Your hammer won’t need oiling after each use if you’re lucky enough. However, when your hammer needs some TLC, dip a cloth in vegetable or mineral oil and rub it down from the handle to the tool’s head until it’s evenly coated.
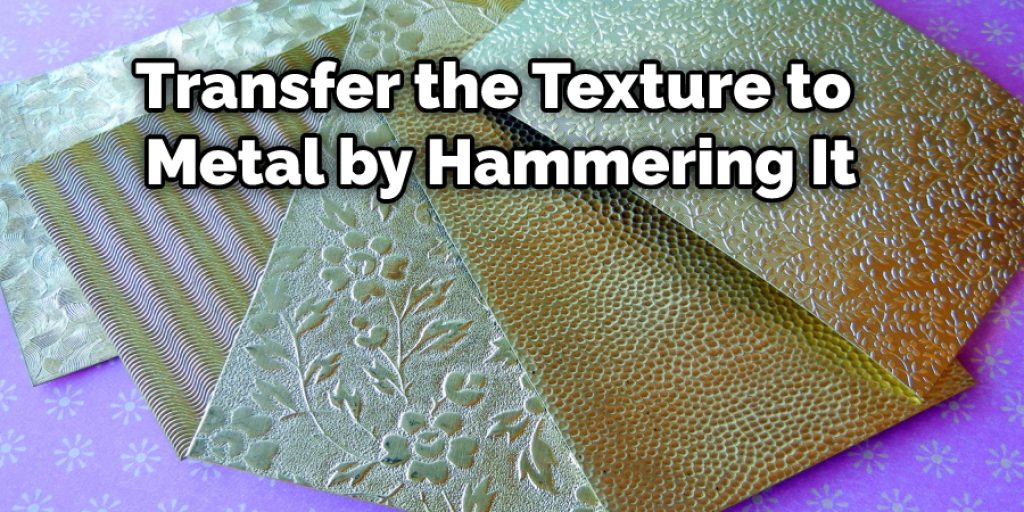
How to Transfer Texture to Metal With a Hammer?
You can transfer the texture of a drawing or design to metal by hammering it. Place your drawing on top of the metal and trace over it with your marker. Cover the whole thing with clear wax. Place another sheet of paper on top, then place two clean pieces of wood on either side about two inches apart along each edge. Using fairly heavy pressure, hit the wood to transfer the pattern onto the metal.
You can use a rubber stamp and pigment ink with watercolor paper and similar metal. First, place the metal on top of your drawing and trace it. Next, color your design with pigment ink using a brush, then place the watercolor paper over the metal and gently hit it with a hammer to transfer your design.
Final Words
The process of hammering metal is a time-honored tradition that has been used for centuries to shape and form metals into desired shapes. It can be not easy, but it’s possible to do this job well with the right tools and techniques. If you’re interested in learning how to hammer metal yourself, we recommend taking your first step by reading our blog post.
If you need to hammer metal, ensure that your power source is consistent and strong enough. This will ensure the best possible result for your project. Remember that it’s always better to work with an expert before undertaking a job like this one on your own!


