How to Install Hardie Siding Around Windows
If you’re looking for an easy and cost-effective way to upgrade the exterior of your home, then installing Hardie siding around windows is a great choice. Are you tired of dealing with outdated and inefficient siding? Does your home need a makeover, but you don’t want to break the bank doing it? Hardie siding is an excellent option for homeowners looking to upgrade their homes without going over budget.
Not only is it durable and resistant to environmental damage, but installing Hardie siding around windows can help give your home that finished look. In this post, we’ll walk through the process of installing Hardie Siding around windows so that you can get the full effect of its beauty and functionality on your own property. Read on to find out more about how to install hardie siding around windows.
What is Hardie Siding?
Before we get into the steps of installation, let’s quickly go over what Hardie siding is and why it’s such a great choice for exterior home upgrade projects. Hardie siding is a type of fiber cement siding that is made from sand, Portland cement, wood fibers, and other materials.
It’s incredibly durable, and it’s designed to withstand extreme weather conditions and last for many years. What’s more, Hardie siding is resistant to water damage, fire, and rot, so you know that your home will be safe from the elements. Plus, it comes in a variety of textures and colors, so you can find one that fits the look of your home perfectly.
Why Do You Need to Install Hardie Siding Around Windows?
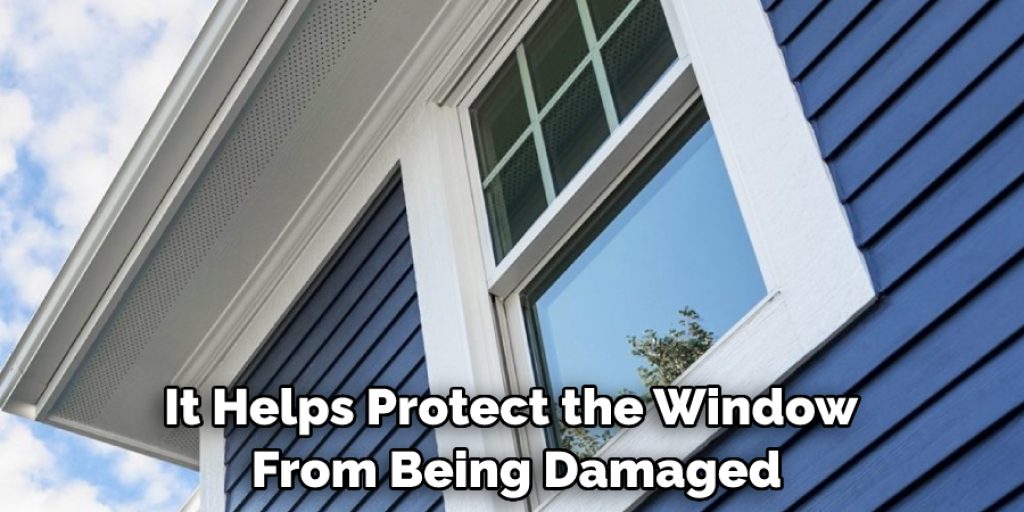
1. Gives Protection
Installing Hardie siding around windows is important for a few reasons. Firstly, it helps protect the window from being damaged by insects, weather, and other environmental factors. It will also protect the window from moisture and wind, which can lead to warping or cracking over time.
2. Improves Insulation
Another benefit of installing Hardie siding around windows is that it improves insulation and energy efficiency in your home. By providing an extra barrier against outside elements, Hardie siding helps keep your home warmer in the winter and cooler in the summer, resulting in lower energy bills.
3. Creates a Finished Look
Finally, installing Hardie siding around windows creates a finished look for your home. It adds an extra layer of protection and style that can completely change the look of your house both inside and out. And since it comes in so many different styles and colors, you can easily find one to fit the look of your home.
Now that you know why it’s important to install Hardie siding around windows, let’s look at how to do it.
Tools and Materials Needed for Installation
Before you begin the installation, make sure that you have all the necessary tools and materials on hand. Here’s a list of what you’ll need to get started:
- Hardie siding panels
- Jigsaw
- Hammer drill
- Level
- Safety glasses
- Tape measurer
- Power saw
- Utility knife
- Caulking gun
- Nails or screws (depending on the type of siding you choose)
10 Steps on How to Install Hardie Siding Around Windows
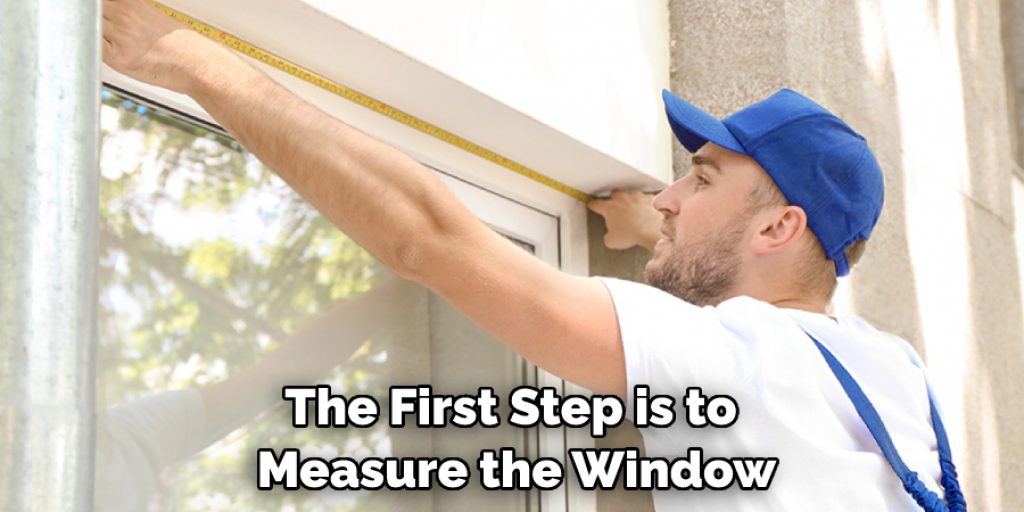
Step 1: Measure the Window
The first step is to measure the window. This will help you determine how much siding you’ll need and what size panels to get. The right measurement will also help you make sure that the panels fit snugly around the window.
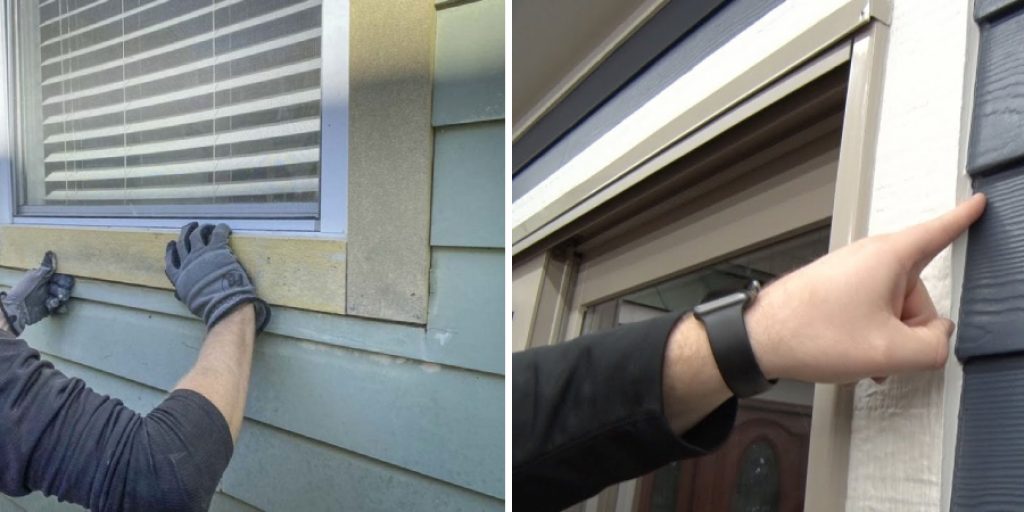
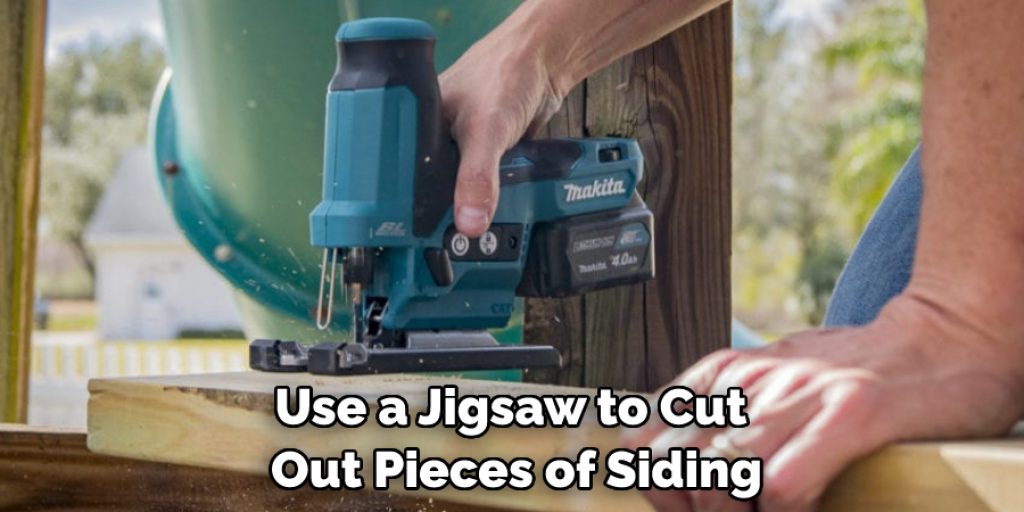
Step 2: Cut out the Siding Pieces
Once you have the measurements, use a jigsaw to cut out pieces of siding in those dimensions. Make sure that each piece is accurately measured and cut to fit perfectly around your windows. The sliding pieces should also be cut to fit along the edges of the window trim.
Step 3: Pre-drill Holes
Once you have your siding pieces, you will need to pre-drill holes for the nails or screws. Use a hammer drill on a low setting and make sure that each hole is drilled at least one inch in from the edge of the piece.
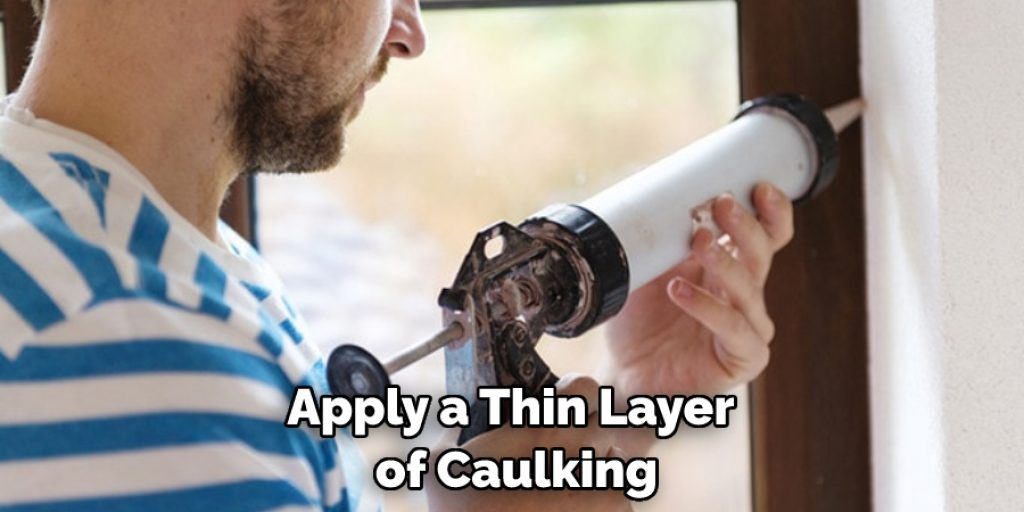
Step 4: Apply Caulking
Before you install the siding, apply a thin layer of caulking around the edges of your window trim. This will help seal any gaps and prevent moisture from getting under your siding. Applying the caulking also ensures that your siding pieces fit snugly against the window.
Step 5: Install the Siding
Now you can start installing the siding. Use a level to make sure that each piece is installed correctly, and use nails or screws (depending on what type of siding you chose) to secure it in place. While installing, be sure to leave a small gap between each piece for ventilation.
Step 6: Trim the Siding
Once you have all the pieces installed, you can use a utility knife, or power saw to trim any excess siding. This will help create a neat and uniform look around your windows. Trimming would also be the time to make any necessary adjustments if your siding pieces don’t fit perfectly.
Step 7: Apply Caulking
Once you have trimmed all your siding, go back and apply a thin layer of caulking around each piece. This will help ensure that no moisture can get in behind the siding and create a finished look.
Step 8: Remove any Necessary Nails or Screws
As you are caulking, be sure to check for any nails or screws that may have been protruding out of the siding and remove them. You can use a small hammer to gently pound them back in place if needed.
Step 9: Check for Gaps
Once you have caulked and removed any protruding nails or screws, check around the window to make sure there are no gaps. If you find any, use a bit of caulk to seal them up before moving on to the next step.
Step 10: Paint the Siding
The final step is to paint your newly installed siding. Use a paint that is designed for Hardie siding, and be sure to follow the manufacturer’s instructions for application. The painting will always help to create a finished look and protect your siding from the elements.
Installing Hardie siding around windows is an easy task that anyone can do with just a few tools and materials. It is important to make sure that you follow all the steps correctly in order for the installation to be successful. Once it is installed, you can enjoy the look of a neat, finished window for years to come.
8 Maintenance Tips
1. Clean your siding regularly. Use a soft-bristled brush and mild detergent to remove dirt and debris. Doing this will help avoid discoloring or fading of the material over time. Dirt may accumulate in the corners and along the edging.
2. Inspect your siding for cracks, holes, or loose sections each year. Repair any damage that you find immediately to prevent further deterioration from moisture or weathering. Be sure to use a product specially designed for Hardie siding when completing repairs.
3. Keep an eye out for any signs of mold or mildew growth. This can be caused by moisture buildup and should be addressed immediately by thoroughly cleaning the affected area with a mild detergent and water.
4. When caulking around windows, ensure that you use a color-matched sealant specifically designed for Hardie siding to prevent fading or staining of the material.
5. Regularly inspect your trim and any other hardware around windows and doors to ensure that they are still securely attached and in good condition. Trim pieces should be replaced as needed, using a product specifically designed for Hardie siding.
6. If painting is necessary, use an exterior paint specially formulated for Hardie siding. Always paint in the direction of the lap to reduce streaking and brush marks.
7. Ensure that you keep gutters, downspouts, and other roofing components in good repair to avoid moisture buildup around your windows. Rooftop components should be checked regularly and repaired as needed to prevent damage to your siding.
8. If you notice any warping or buckling of your siding, it could be a sign that there is too much moisture in the air or that your siding was not installed properly. This issue should be addressed immediately by a qualified professional.
These tips will help you keep your Hardie siding looking great and in good condition for many years to come. If you have any questions or concerns, be sure to consult with a professional contractor before attempting any maintenance or repairs on your own.
Conclusion
Installing Hardie siding around windows is a relatively straightforward process that offers great value for your project. With proper preparation and planning, you can save yourself time and money by choosing to install Hardie siding. While installation requires knowledge of various power tools, the inclusion of step-by-step instructions helps ensure anyone with basic abilities can complete the project correctly.
Preparation is essential when installing Hardie siding as it needs attention to detail and will require extra materials or adjustments for uneven surfaces. Additionally, be sure to make all cuts to siding carefully and accurately since it may be difficult to replace them if mistakes are made. By following these steps on how to install hardie siding around windows, you’ll have confidence knowing that you’ve installed your new Hardie siding correctly.
Angela Ervin
Angela is the executive editor of DIY quickly. She began her career as an interior designer before applying her strategic and creative passion to lifestyle and home. She has close to 15 years of experience in creative writing and online content strategy for housekeeping, home decorations as well as other niche efforts. She loves her job and has the privilege of working with an extraordinary team. She lives with her husband, two sons, and daughter in Petersburg. When she's not busy working she spent time with her family.