How to Install Pex Tubing for Baseboard Heat
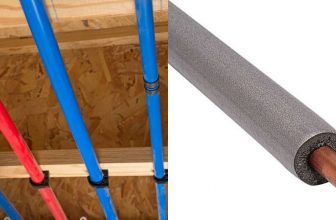
Installing pex tubing for baseboard heat has many benefits compared to other baseboard heating options. Pex tubing is an efficient and cost-effective way to provide even, consistent heat throughout the home while being easy to install and maintain.
One of the major advantages of installing Pex tubing for baseboard heat is its resistance to corrosion. This type of tubing is made from a strong plastic material that has been proven to last longer than other types of materials, such as copper and galvanized steel.
It will not rust or corrode due to moisture, making it perfect for areas that are exposed to moisture or extreme temperatures. You can find step-by-step instructions on how to install pex tubing for baseboard heat in this blog article.
Step-by-step Instructions for How to Install Pex Tubing for Baseboard Heat
Step 1: Inspect the Baseboard Heater
Before beginning any project, it is important to inspect the baseboard heater and make sure that everything is in proper working order. Look for signs of corrosion or damage and repair or replace as necessary before proceeding.
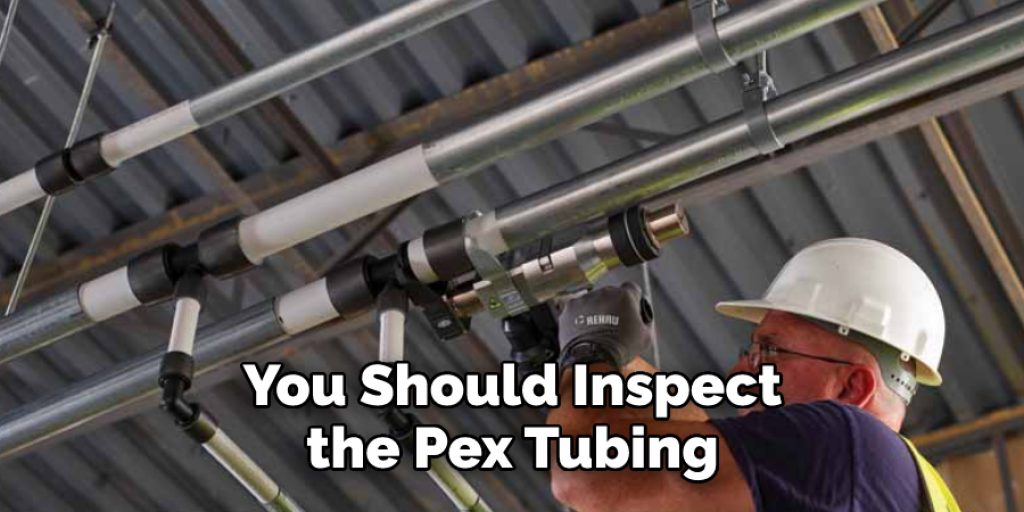
Step 2: Cut the Pex Tubing
Measure the length of pex tubing needed for the project and begin cutting it with a tubing cutter. Make sure to cut the tubing in a straight line, as any angled cuts will not fit properly. Connect the fittings to the end of the pex tubing by pressing them firmly together. Be sure to use thread sealant or pipe dope on all threaded connections, as this will give a better seal and help prevent leaks.
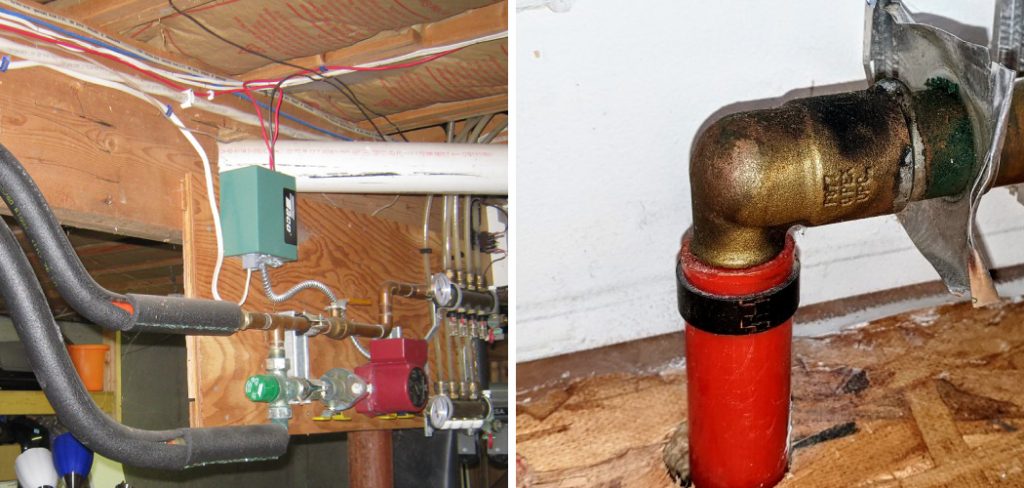
Step 3: Attach the Pex Tubing to the Baseboard Heater
Begin by placing the pex tubing on the baseboard heater. Secure it with mounting brackets and screws, then attach the fittings to the baseboard heater. Make sure that all connections are tight and secure before proceeding. Once everything is connected to the heater, connect the pex tubing to the supply line. Make sure that all connections are tight and secure before proceeding.
Step 4: Test for Leaks
Before completing the installation, test for leaks by turning on the water supply and checking all fittings for any leaks. If any are found, repair them immediately before continuing. Once all of the connections are secured and tested, install the control valve and thermostat. Make sure that these are securely attached and positioned in a place where they can be easily accessed.

Step 5: Connect to Power Source
Finally, connect the baseboard heater to the power source. Ensure all wiring is properly connected and secure before turning on the power. Once everything is connected correctly, turn on the power source to begin heating the room. Finally, adjust the temperature of the baseboard heater as needed until the desired temperature is reached.
Following these steps will ensure that the pex tubing is properly installed and securely connected to the baseboard heater, allowing for optimal heating of any space.
Safety Tips for How to Install Pex Tubing for Baseboard Heat
- Ensure you have all the necessary tools and materials for installation before you begin.
- Turn off the power supply to the baseboard heater before starting work.
- Wear safety glasses when cutting or drilling PEX tubing to protect your eyes from flying debris or splinters.
- Follow manufacturer instructions when installing PEX tubing.
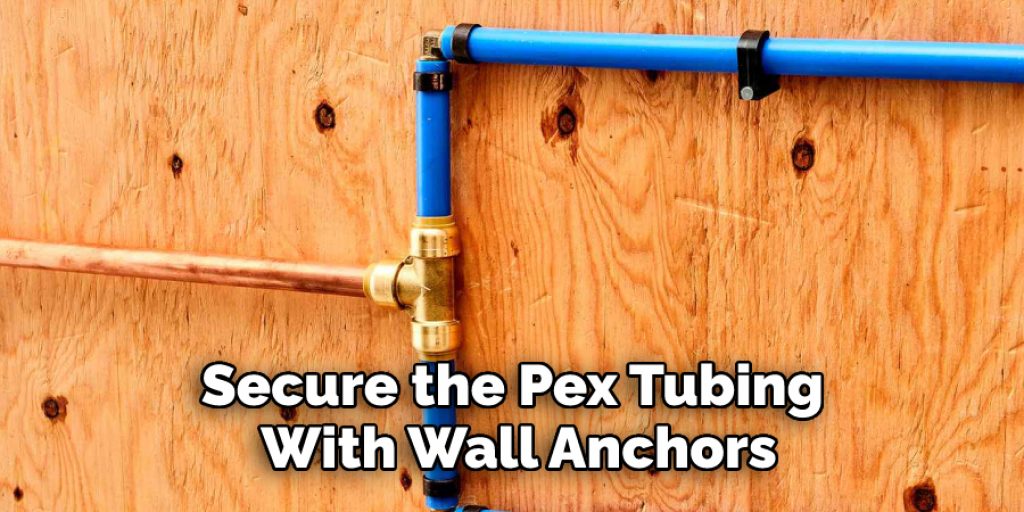
- Secure the PEX tubing with wall anchors or support brackets, especially in areas where there will be a lot of vibrations or movement.
- When working with electrical wiring, make sure to use insulated tools and wear rubber gloves for safety.
- Inspect the installed tubing for leaks before turning the power on and after running for a while, just to ensure there are no problems.
By following these safety tips, you can ensure your Installation of a Pex Tubing for Baseboard Heat project is done with minimal risk.
Are There Any Special Techniques That You Should Use When Installing Pex Tubing for Baseboard Heat?
When it comes to installing Pex tubing for baseboard heat, there are a few special techniques you should use. First, make sure that the tubing is properly secured in place. This includes using zip ties or metal straps to keep the tubing from sliding around on the floor joists and supports underneath. Secondly, when connecting two pieces of tubing together, use a crimp ring and fitting to create a secure connection.
Thirdly, ensure there are no kinks or bumps in the tubing when you lay it down, as this can cause problems with water flow. Finally, be sure to install insulation around the tubing to keep the heat from escaping. Following these steps will help ensure that your Pex tubing installation is safe and effective.
Once the Pex tubing has been installed, it’s important to regularly inspect it for any damage or cracks in the tubing. If you find any issues with your installation, make sure to address them promptly. This will help ensure that your baseboard heat stays warm and efficiently year-round. Installing Pex tubing for baseboard heat is a great way to keep your home comfortable and efficient. Following these steps will ensure that you get the most out of your installation.
How Often Should You Inspect Your Pex Tubing and Baseboard Heaters for Leaks, Wear, or Damage?
It is important to regularly inspect the Pex tubing and your baseboard heaters for any signs of leaks, wear, or damage. At least once a year, you should visually inspect each heater and ensure all its components are in good working order.
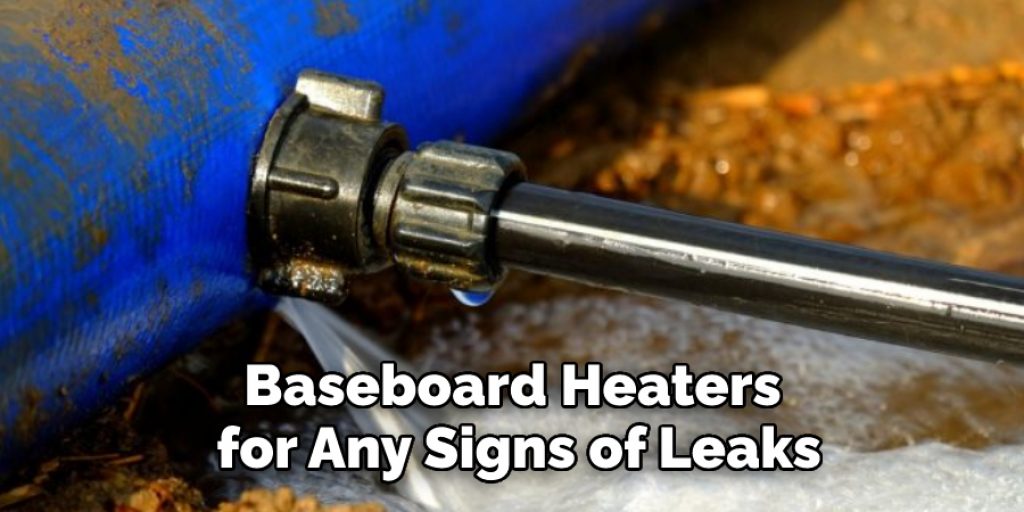
Additionally, it is important to run a pressure test on your Pex tubing to ensure it doesn’t have any weak spots or leaking joints. If you find a leak, wear, or damage in your Pex tubing or baseboard heaters, you should contact a qualified technician to repair them and return their integrity as soon as possible.
It is also important to regularly clean the Pex tubing and baseboard heaters. This will help ensure that they are functioning efficiently, as dirt and debris can reduce the amount of heat being delivered to your space.
A vacuum cleaner is usually sufficient for removing any dust or dirt from the exterior of the Pex tubing and heater. However, if there is corrosion or another buildup inside the Pex tubing or the heater, you may need to contact a professional to clean them safely.
How Can You Troubleshoot Any Problems That Arise With the Baseboard Heating System?
If the baseboard heating system is not working properly, it could be due to a number of possible issues. But before tackling any repair work, ensure that the power supply and thermostat are functioning correctly, as these are commonly overlooked problems. If one or both of these elements is not working properly, fix them first.
If the power supply and thermostat are functioning as designed, check for signs of leaks in the Pex tubing. Look along the length of the tubing to identify any cracks or holes that may be present.
If you find any damage, it can usually be repaired by replacing a single piece of tubing or tightening joints with a wrench. Check for low pressure or heat output to determine if the tubing is clogged. If there is not enough airflow or heat radiating from the baseboard heater, there may be a blockage in the Pex tubing.
How Often Should You Replace the Pex Tubing if It Becomes Worn or Damaged?
If you notice that the Pex tubing in your baseboard heating system is becoming worn or damaged, it’s important to replace it as soon as possible. Waiting too long can lead to leaks and other issues with the system. How often you’ll need to replace the Pex tubing depends largely on how well-maintained the system is, how often it’s used, and what kind of environment it’s in.
For most systems, you should inspect the Pex tubing at least once a year for signs of wear or damage. If you notice any issues with the tubing, including kinks or cracks, you should replace it immediately.
Additionally, if you live in an area with hard water, it’s important to inspect the tubing and fittings more frequently, as mineral deposits can cause significant damage. If you’re unsure about when or how often to replace your Pex tubing, contact a professional for help. They can inspect the system to assess any potential problems and advise you on the best course of action.
Conclusion
In conclusion, installing pex tubing for baseboard heat is a relatively straightforward process that can be accomplished with the right tools and materials. You’ll need to plan out your layout in advance, measure accurately, cut the tubing accordingly, secure it to the wall studs, and ensure the flow of water is set correctly.
With careful attention to detail, you should find that installing pex tubing for baseboard heat is a relatively simple and hassle-free job. Once the tubing has been installed, you’ll be able to enjoy efficient, effective heating with the peace of mind that comes from knowing it was done right. I hope this article has been beneficial for learning how to install pex tubing for baseboard heat. Make Sure the precautionary measures are followed chronologically.
Angela Ervin
Angela is the executive editor of DIY quickly. She began her career as an interior designer before applying her strategic and creative passion to lifestyle and home. She has close to 15 years of experience in creative writing and online content strategy for housekeeping, home decorations as well as other niche efforts. She loves her job and has the privilege of working with an extraordinary team. She lives with her husband, two sons, and daughter in Petersburg. When she's not busy working she spent time with her family.