How to Install Wood Flooring on Ceiling
Do you want to give your living space an extra creative boost? Then why not consider installing wooden flooring on the ceiling? Not only is it a beautiful way to add texture and warmth, but with some patient DIY work, you can create the perfect centerpiece for any room.

From choosing the right materials to taking accurate measurements, this project can seem daunting. But don’t worry – we’ll take you step by step through the process of how to install wood flooring on ceilings so that before you know it, you’ll have completed a stunning renovation!
Tools and Materials You Will Need to Install Wood Flooring on Ceiling
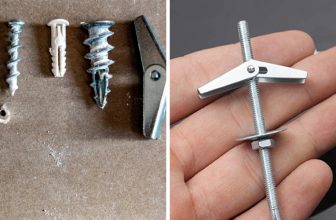
- Wood flooring of your choice (we recommend tongue and groove for a seamless finish)
- Measuring tape
- Miter saw or hand saw
- Nails or staples
- Nail gun or staple gun
- Leveler tool
- Construction adhesive
- Ladder or scaffold
Step-by-step Guidelines on How to Install Wood Flooring on Ceiling
Step 1: Decide on the Material and Finish
Before starting the project, it’s essential to decide on the type of wood flooring you want to use. There are various options like hardwood, laminate, or engineered wood. When choosing your material, consider factors such as durability, budget, and aesthetics. For a seamless finish on the ceiling, we recommend tongue and groove planks. You can also opt for pre-finished planks to save time on staining and finishing.
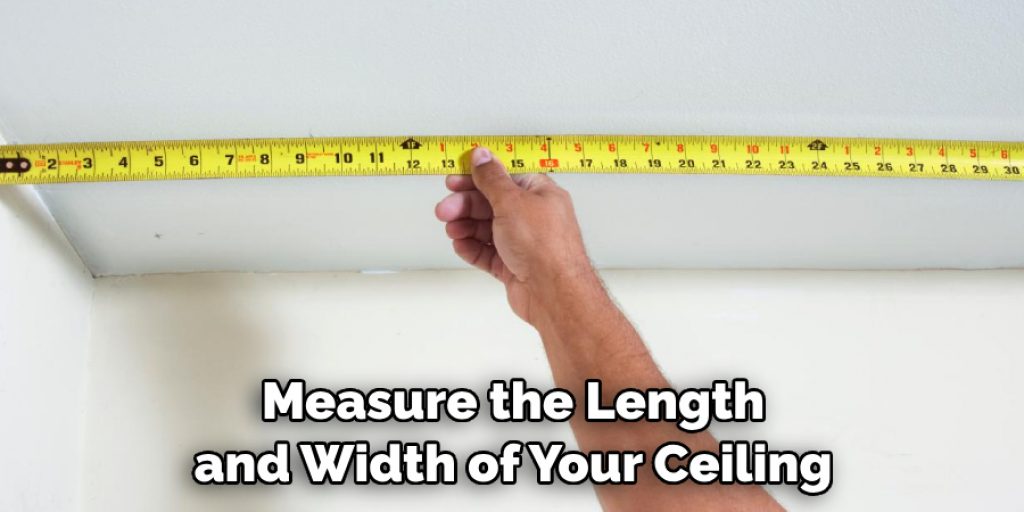
Step 2: Take Accurate Measurements
Measure the length and width of your ceiling to calculate how much flooring you need. It’s always a good idea to add an extra 10% for any mistakes or cutting errors. Additionally, consider the direction in which you want to install the planks. Installing them perpendicular to the joists will provide better support and stability. This step is crucial to ensure that you have all the necessary materials and don’t run out of flooring halfway through the project.
Step 3: Prepare the Planks
Before installation, acclimate the wood flooring planks in your home for at least 48 hours. This process allows the wood to adjust to the temperature and humidity of your space, preventing any future warping or shrinking. Next, cut the planks according to your measurements using a miter saw or hand saw. Sand any rough edges for a smooth finish. Preparing the planks beforehand makes installation more manageable and efficient.
Step 4: Install the First Row
Using a leveler tool, draw a straight line along the ceiling’s length to serve as a guide for the first row of planks. Apply construction adhesive on the back of each plank, and carefully place it onto the ceiling, starting from one corner. Use nails or staples to secure the planks in place, making sure they are flush with the guideline and each other.
Step 5: Continue Installing the Planks
Repeat step 4 until you reach the end of the ceiling, cutting any excess planks if necessary. Make sure to stagger the seams between rows for a more natural look. Use a nail gun or staple gun to secure the planks in place, ensuring they are level and properly aligned. For a more secure installation, you can also add adhesive along the seams.
Step 6: Finishing Touches
After completing the installation, fill any gaps or nail holes with wood filler. Sand down any excess filler for a smooth finish. You can then choose to stain or paint the ceiling to match your interior design. Remember to follow the manufacturer’s instructions when using any finishing products. Before finishing, make sure the ceiling is completely dry and free of dust.
Congratulations – you now know how to install wood flooring on ceilings! With some patience and precision, your ceiling will add an extra touch of elegance to your living space. So go ahead, get creative, and give your home a unique makeover with this DIY project. Enjoy the beautiful results!

Additional Tips and Tricks to Install Wood Flooring on Ceiling
- When selecting the type of wood flooring to use on your ceiling, consider factors such as the room’s humidity level, temperature changes, and exposure to natural light. This will help you choose a more durable and long-lasting option.
- Before starting the installation process, make sure to properly clean and prepare the ceiling surface. Remove any previous finishes or debris that may interfere with the adhesive’s bonding.
- To improve the acoustic insulation of the room, consider adding an underlayment layer between the ceiling surface and wood flooring. This will help reduce noise levels from above rooms and provide better soundproofing.
- If using tongue-and-groove or interlocking wood flooring planks, be sure to apply adhesive on both sides of each plank for a stronger bond and to prevent any potential gaps between planks.
- Use a chalk line or level tool to ensure the wood flooring planks are being installed in a straight line. This will help avoid any crooked patterns or asymmetrical layouts.
- Allow for proper ventilation during and after installation to prevent moisture buildup, which can lead to warping or damage to the wood flooring.
- Consider adding a sealant or coating to the wood flooring after installation for added protection against moisture and wear.
- For easier maintenance, choose a wood flooring option that is easy to clean and resistant to scratches and stains. This will help keep your ceiling looking new and fresh for longer.
- Don’t be afraid to get creative with the layout of your wood flooring on the ceiling. Consider using different wood species, and patterns or even mixing in other materials such as metal or glass for a unique and visually appealing design.
- When installing wood flooring on a sloped ceiling, be sure to use additional support and reinforcing techniques to prevent sagging or buckling over time.
- Lastly, if you are unsure about any aspect of the installation process, it is always best to consult a professional for guidance. They can provide expert advice and ensure the installation is done correctly and safely.
Remember, installing wood flooring on your ceiling can add warmth and character to any room in your home. With these additional tips and tricks, you can achieve a beautiful and long-lasting result that will impress you for years to come. Happy installing!

Benefits of Using Wood Flooring on Ceiling
- Wood flooring on the ceiling adds a unique and elegant look to any room. The warmth and natural beauty of wood can make any space feel inviting and cozy.
- Unlike traditional ceiling materials such as drywall or plaster, wood flooring is extremely durable and long-lasting. In fact, many types of wood flooring have a lifespan of up to 100 years with proper care.
- Wood flooring on the ceiling is also a great way to add acoustics to a room. The natural texture and density of wood can help absorb sound, making the space quieter and more comfortable.
- Wood flooring on the ceiling is also an eco-friendly choice. Many kinds of wood used for flooring come from sustainable sources, ensuring that the environment is not harmed in the process.
- It is relatively easy to install wood flooring on the ceiling, making it a great DIY project for those looking to add a personal touch to their homes.
- Wood flooring on the ceiling is versatile and can be used in any room of the house, including bathrooms and kitchens. It also comes in a variety of styles, colors, and patterns to suit any design aesthetic.
- Maintenance is simple and easy with wood flooring on the ceiling. Regular dusting and occasional polishing are all that is needed to keep it looking beautiful.
- Wood flooring on the ceiling can also increase the value of a home. Its durability, unique look, and eco-friendly properties make it an attractive feature for potential buyers.
These are just a few of the many benefits of using wood flooring on the ceiling. With its timeless beauty and practical advantages, it is no surprise that this trend is gaining popularity in interior design.
Whether you are looking to add a touch of warmth and elegance to your home or create a more sustainable living space, wood flooring on the ceiling is definitely worth considering. So go ahead, unleash your creativity, and transform your ceiling into a stunning focal point with the natural beauty of wood flooring. Happy designing!

Precautions Need to Be Followed for Installing Wood Flooring on Ceiling
- The first precaution is to check whether your ceiling can handle the weight of hardwood flooring. As most ceilings are built with drywall, they may not be able to support the added weight of wood flooring. It is important to consult a professional before proceeding with the installation.
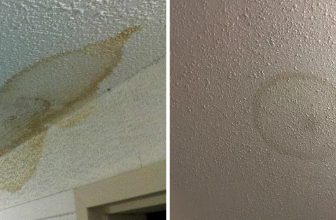
- Another precaution is to consider the climate and humidity levels in your area. Wood flooring tends to expand and contract based on the humidity, which can cause issues when installed on a ceiling. Proper moisture barriers and acclimation of the wood flooring should be considered before installation.
- It is important to carefully measure and plan the layout of your wood flooring before starting the installation process. This will help in reducing any waste and ensuring a seamless look once it is installed on the ceiling.
- Safety should always be a top priority when installing wood flooring on the ceiling. Proper protective gear, such as gloves and eye protection, should be worn at all times to prevent any injuries.
- It is important to have the necessary tools and equipment before starting the installation process. This includes a nail gun, saws, and other tools specific to wood flooring installation.
- Proper ventilation should be ensured during the installation process to prevent any buildup of fumes from adhesives or sealants.
Following these precautions will help ensure a successful and safe installation of wood flooring on the ceiling. Moreover, it is recommended to have a professional inspect the installation before using the room regularly to prevent any potential issues in the future.
Frequently Asked Questions
Can Wood Flooring Be Installed on a Ceiling?
Yes, it is possible to install wood flooring on a ceiling. However, there are some considerations that need to be taken into account before attempting the installation.
What Type of Wood Flooring Can Be Used for Ceiling Installation?
Any type of hardwood flooring can be used for this purpose, such as oak, cherry, or maple. It is not recommended to use engineered wood flooring for ceiling installation.
Can I Install Wood Flooring on Any Type of Ceiling?
Wood flooring can only be installed on flat and stable ceilings. Sloped, angled, or textured ceilings are not suitable for this type of installation.
Is It Necessary to Prepare the Surface Before Installing Wood Flooring on a Ceiling?
Yes, it is important to prepare the surface before installing wood flooring on a ceiling. This includes ensuring that the ceiling is level, clean, and free of any moisture or debris that could affect the installation.

Conclusion
All in all, knowing how to install wood flooring on ceiling can add a unique touch to any room. It provides a warmth and natural beauty that is unmatched by other ceiling materials. However, it is important to carefully plan and prepare before attempting this installation process to ensure the best results.
With proper preparation and the right type of wood flooring, you can successfully install wood flooring on your ceiling and elevate the look of any space. So, be creative, and don’t be afraid to try new things with wood flooring. Happy installing!
Angela Ervin
Angela is the executive editor of DIY quickly. She began her career as an interior designer before applying her strategic and creative passion to lifestyle and home. She has close to 15 years of experience in creative writing and online content strategy for housekeeping, home decorations as well as other niche efforts. She loves her job and has the privilege of working with an extraordinary team. She lives with her husband, two sons, and daughter in Petersburg. When she's not busy working she spent time with her family.