How to Paint Ceiling Tiles
Do you want to add a pop of color to your ceilings without spending a lot of money? Painting ceiling tiles can help you do just that! It’s a cost-effective way to revamp a room and give it a fresh look. But how do you go about doing this? If you’re scratching your head right now, don’t worry because we’ve got you covered. In this blog post, we’ll walk you through the process of how to paint ceiling tiles so that you can bring your vision to life.
Can You Paint Ceiling Tiles?
Ceiling tiles are often overlooked as a design opportunity in a room. They can be seen as functional but not necessarily attractive. However, with a little creativity and willingness to try something new, painting your ceiling tiles can transform your space. Whether you go with a fresh coat of white paint to brighten up the room or a bold color to add personality, painting ceiling tiles makes a statement.
Even stencils are available to add intricate patterns or designs for a unique touch. So, can you paint ceiling tiles? Absolutely! The possibilities are endless, and the end result can be truly stunning.
Why Should You Paint Ceiling Tiles?
When decorating a room, we often focus on the walls and the floor, forgetting about the fifth wall – the ceiling. But painting ceiling tiles can add dimension, color, and texture to a room’s design. A coat of paint can change the entire vibe of the space, giving it a fresh and modern look. Moreover, painting ceiling tiles can hide imperfections and outdated designs, making them perfect for renovation projects.
Whether you go bold with a bright hue or keep it subtle with a neutral color, painting ceiling tiles can enhance a room’s atmosphere and create a sense of visual interest. So, don’t overlook the power of the fifth wall – it may just be the key to transforming your space into a stylish haven.
Transform Your Space with These Simple Steps: How to Paint Ceiling Tiles
Step 1: Clean the Ceiling Tiles
Before you start painting, cleaning the ceiling tiles thoroughly is essential. You can do this by using a sponge or a mop with a mild cleaner, wiping away any grime, dirt, or dust. If the ceiling tiles are textured, go over them gently with a soft-bristled brush to eliminate any debris that may have settled into the grooves.

Step 2: Sand the Ceiling Tiles
After cleaning the ceiling tiles, allow them to dry completely before sanding them lightly. Sanding will create a rough surface for the paint to adhere to, making it less likely to flake or peel off. To avoid any dust particles, wear a dust mask while sanding.
Step 3: Prime the Ceiling Tiles
Priming the ceiling tiles is crucial as it helps the paint adhere to the surface better and promotes a smooth finish. Apply a thin coat of primer with a brush, allowing it to dry completely before proceeding to the next step. You can use a tinted primer that matches the color of your paint for better coverage.
Step 4: Paint the Ceiling Tiles
It’s time to paint the ceiling tiles! Begin at one corner of the ceiling and work across the room using a roller or a brush. A paint sprayer is another option for using a larger room or ceiling. Apply multiple thin coats of paint, allowing each coat to dry for about an hour before applying the next one. This process ensures that the paint dries evenly without visible brush or roller marks.
Step 5: Clean Up
Once you’ve finished painting, let the tiles dry overnight before using the room again or applying a second coat of paint. Then, replace any fixtures, furniture, or decorations that you removed before painting. Put all the equipment you used, like brushes, rollers, and paint cans, away, and clean any paint spills or stains.
Step 6: Protect the Finish
To ensure that your painted ceiling tiles look good for longer, it’s recommended to apply a sealant or varnish. This will provide extra protection and prevent any scratches or damage from dust and dirt. Make sure to choose a high-quality sealant or varnish that is suitable for use on ceilings.
Step 7: Enjoy Your Newly-Painted Ceiling Tiles!
Now you can admire your hard work and enjoy the new look of your painted ceiling tiles. Painting is a fun way to give any room an instant makeover without breaking the bank. With these simple steps, you can transform any space in no time.
If you’re looking for more ideas to give your home a new look, why not paint your walls or floor? Or add some decorative wallpapers to give a unique touch. The possibilities are endless! From painting furniture to adding accessories and artwork, there are plenty of ways to refresh the aesthetics of any room. So go ahead and make your dream interior come to life.

5 Considerations Things When You Need to Paint Ceiling Tiles
1. Surface Preparation
Before painting ceiling tiles, it is important to ensure that the surface is properly prepared. This includes removing any dirt, dust, or debris that may be present on the tiles and filling in any cracks or holes with spackle or joint compound. Additionally, it is important to sand down the tiles before painting to create a smooth and even surface for the paint to adhere to.
2. Paint Type
When selecting a type of paint for your ceiling tiles, you will want to choose one specifically designed for ceilings. Ceiling paints are typically thicker than regular paints and contain special ingredients that help them stick better and resist moisture buildup from condensation. Additionally, these paints usually have a low sheen finish which helps reduce glare from overhead lights.
3. Primer
Using a primer before painting your ceiling tiles can help ensure better adhesion and longer-lasting results. Primers provide a layer between the tile and paint that helps fill in any imperfections on the surface while providing an additional layer of protection against moisture damage. When selecting a primer, choose one specifically designed for use on ceilings, as this will provide the best results.
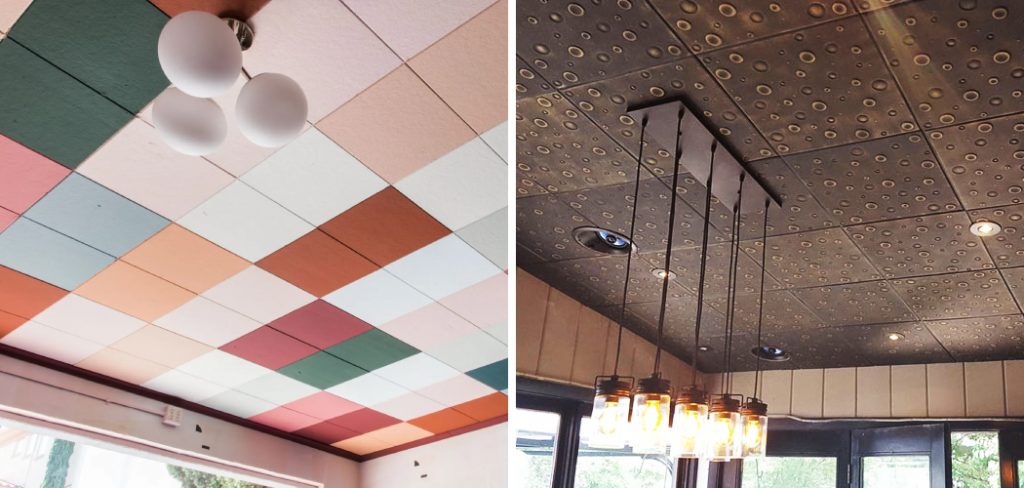
4. Color Selection
When choosing a color for your ceiling tiles, it is important to consider how much light each color reflects off its surface and how much it absorbs heat from lamps or other light sources in the room. Lighter colors, such as white or cream, tend to reflect more light, while darker colors, like navy blue, absorb more heat from lamps or other light sources in the room.
Additionally, lighter colors can make small rooms appear larger, while darker colors can make large rooms feel cozier and more intimate.

5. Finish Type
When painting ceiling tiles, the final step is selecting a finish type for your project. The most popular finishes include flat (matte), eggshell, satin, semi-gloss, and high-gloss finishes, all offering different shine and durability depending on their sheen level and resin content. Flat finishes are best suited for low-traffic areas.
In contrast, higher gloss finishes are ideal for areas with more wear and tear, such as kitchens or bathrooms, due to their increased durability and resistance to moisture damage.
Benefits of Paint Ceiling Tiles
When it comes to renovating or updating a room, the ceiling is often overlooked as a key element to freshen up. But, by simply painting the ceiling tiles, you can drastically transform the overall look and feel of the room. Not only does it create a more cohesive and polished appearance, but it can also increase the value of your property.
Plus, painting ceiling tiles can be more cost-effective than installing new ones. Beyond aesthetic benefits, painting ceiling tiles can also offer practical advantages such as reducing glare and adding insulation. Don’t underestimate the power of a fresh coat of paint on your ceiling tiles – it just might be the update your room needs.
Some Common Mistakes People Make When Trying to Paint Ceiling Tiles
Painting ceiling tiles can be daunting for some, and making mistakes during the process can be frustrating. One of the most common mistakes people make when painting ceiling tiles is applying too much paint at once, often resulting in the paint running and dripping. Another common mistake is improperly preparing the tiles before painting, such as cleaning them thoroughly and applying a primer.
A lack of patience can also lead to errors, as rushing the drying process can cause the paint to crack or peel. It’s important to take your time and follow the proper steps to ensure a successful paint job on your ceiling tiles. Remember, patience and attention to detail can go a long way.

Conclusion
Painting ceiling tiles is a simple DIY project that can add style and character to your home without breaking the bank. Following the abovementioned steps, you can paint your ceiling tiles like a pro and achieve a stunning finish.
Just remember to take precautions, like wearing protective gear and preparing the area, to avoid accidents or mistakes. With a little creativity and persistence, your ceilings will be the talk of the town. Thanks for reading our post about how to paint ceiling tiles.
Angela Ervin
Angela is the executive editor of DIY quickly. She began her career as an interior designer before applying her strategic and creative passion to lifestyle and home. She has close to 15 years of experience in creative writing and online content strategy for housekeeping, home decorations as well as other niche efforts. She loves her job and has the privilege of working with an extraordinary team. She lives with her husband, two sons, and daughter in Petersburg. When she's not busy working she spent time with her family.