
How To Make A Butcher Paper Tree

Are you familiar with butcher paper? If you cannot recognize it by its name, you will surely know what we are talking about once we tell you the usage of such paper. For example, when you buy some meat, the meat will be wrapped in thick paper, which does not get soaking wet. This type of brown-colored paper is called butcher paper. Here we are going to tell you a DIY method of how to make a butcher paper tree.
If you’re looking to add a touch of nature to your room or classroom, consider adding a tree. Unfortunately, real trees aren’t always possible, so people come up with innovative ways to make them out of other materials. These trees can be just as accurate and refreshing as the real thing.
One of the most exciting ways to create a realistic tree trunk and branches is using butcher paper. As you already know, that tree trunk and branches have a brown color, and fortunately, the butcher paper has quite a brown tone to the tree. Therefore, it could be easy to use as a prop for making trees. But how to incorporate this element into turning a real tree is the main question. So, if you are curious to find the answer, keep reading ahead as we will tell you in detail how to make a butcher paper tree.
Summary: Instructions:
1. Start by folding a sheet of butcher paper in half, so that it is roughly A4-sized.
2. Draw a tree on the front side of the paper, using a pencil or a broad brush.
3. Paint the trunk of the tree green and the branches a light brown.
4. Use a smaller brush to add some details to the tree, such as leaves and small branches.
5. Once the tree is finished, cut out the parts that you want and glue them onto the tree.
6. If you want, you can also add a branch Garland to dress up the tree.
Things You Will Need:
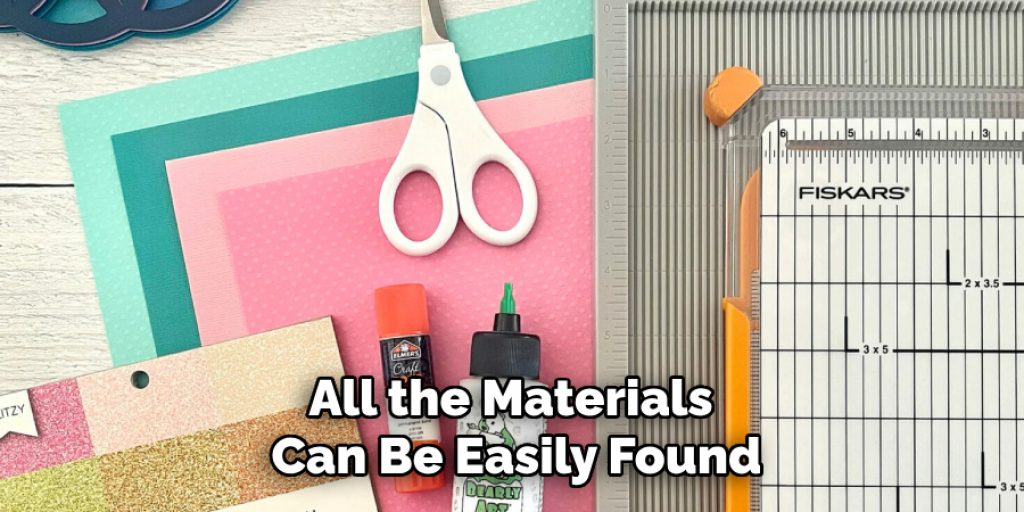
Before starting the whole process, you need to find all the required materials and bring them together to make things easy. You do not need to be discouraged as all the materials can be easily found in stationery shops. The items you will be needing are-
⦁ Cardboard
⦁ Butcher paper
⦁ Glue
⦁ Craft knife
⦁ Posterboard
⦁ Colored tissue paper
Steps to Follow:
With all the necessary equipment in hand, you can start making your butcher paper tree. Here we will describe how to make one in an easy way, so keep reading ahead.
Step 1 :
First, you need to decide how big you want your tree to be. Are you going for a small one to plaster on the wall, or a life-size one to hang on the wall? Depending on the size, you’ll need to make measurements and decide where you want to put the finished product.
Step 2 :
Now that you have decided on the tree’s size, you have taken a measurement of the placement area and make the tree according to that measurement.
Step 3 :
The first thing you have to do is find cardboard as big as the measurement of the tree trunk that you have decided. If you cannot find big cardboard, you can glue together few pieces. Now, draw the tree branch and shape it according to your liking on the board.
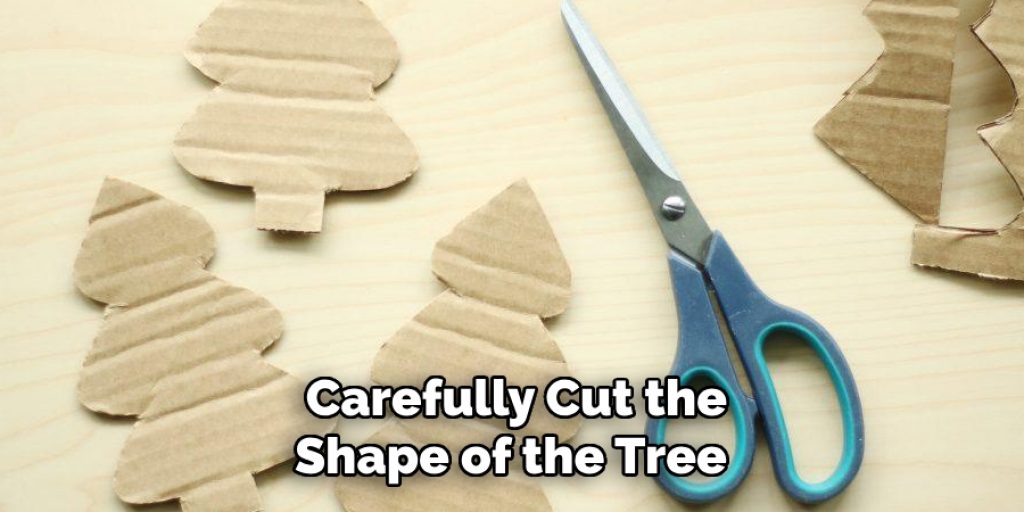
Step 4 :
Take the craft knife and carefully cut the shape of the tree that you have drawn on the board. You need to be very careful to make the tree shape as realistic as possible if you really want to make a life-size tree. You also have to make sure the edges are smooth and not sharp.
Step 5 :
Now that you are done with the cardboard shape, you can start with the work of butcher paper. First, you have to take a few amounts of butcher paper and cut them in medium length.
Step 6 :
Once you have collected enough paper that can cover up the whole cardboard, you can start gluing them there. To glue them, you need to wet the paper with water before to make them soft and easy to wrinkle.
Once the paper is wrinkled, you can glue them on the cardboard to give the tree some texture like a real tree. You need to put a good amount of glue to make the paper stick on the board firmly. It is always better to use glue that will become transparent after drying.
Step 7 :
Now that you have the tree branches, you can work on the leaf as well. For that, you need to make a cloud shape pattern on a poster board and make a few of them. After the poster board is ready, you need to take the tissue paper to make the leaf.
Step 8 :
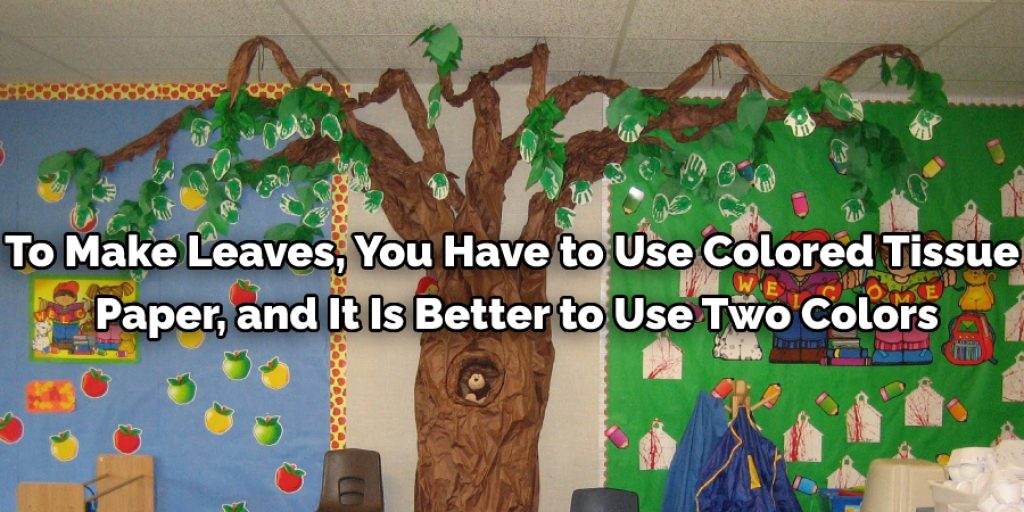
To make leaves, you have to use colored tissue paper, and it is better to use two colors. One color could be deep green, and another one is lighter. To make the leaves, you have to wait for the tissue paper like the butcher paper, stick them on the poster board with glue, and let it sit for drying. Once it is dried, the board will look like a bunch with lots of leaves. Make a few of them decorate the tree with leaves.
Step 9 :
Now that you have the body and leaves of the tree ready, you can do some color correction. To give the tree a more realistic look, you can add some shading on the body with some brown color according to some references. You can do the same with the leaves, but you have already added two colored tissue pieces of paper to bring the shading effect.
Step 10 :
It’s time to connect the tree. You can glue the leaves on the tree body before you put it on the wall, or you can put the tree’s body on the wall first and then glue the leaves on it. Both ways will work.
Conclusion:
That was all for how to make a butcher paper tree. We hope that all the instructions and methods we have mentioned will help you figure things out, and you can make your dream tree to decorate your room or classroom.
Elizabeth Davis
Elizabeth is a creative writer and digital editor based in the United States. She has a passion for the arts and crafts, which she developed from a young age. Elizabeth has always loved experimenting with new mediums and sharing her work with others. When she started blogging, she knew that DIYquickly would be the perfect platform to share her tutorials and tips. She's been writing for the blog from the beginning, and her readers love her helpful advice and easy-to-follow instructions. When she's not writing or editing, Elizabeth enjoys spending time with her family and friends.


