How to Make a Cargo Net From Rope
Introduction:
Cargo nets are a great way to create an enclosed space for storage and organization. The options for what you can store in them are endless – from clothing to sports equipment, or even just about anything else that needs to be stored. But cargo nets might not seem like they’re the most aesthetically pleasing option available.
That’s where this tutorial comes in! In this article, I will discuss how to make a cargo net from rope. So let us get started.
Parts of a Cargo Net:
A Basic Cargo Net Consists of Three Parts:
vertical and horizontal pieces and meshes. Upright and flat pieces are made from rope, while the meshes can be either twine or small-gauge wire mesh (which is much stronger than twine). You can make your cargo nets more durable by adding some metal rings on the edges; these rings ensure that more pressure is put onto the ropes instead of onto the knots, which could slip more easily.
Cylinders such as tin cans also make an excellent addition to the cargo net, as they prevent it from being pulled through sharp corners and thus prevent it from being damaged. Cargo nets can be made in almost any shape and size, but for the sake of simplicity, we will only discuss how to make a net that is six squares long and six yards high (not including the knots).
Diameter:
The diameter of your vertical and horizontal pieces should be slightly smaller than the width between two mesh wires. A good starting point is 25cm, but you might want to go up or down with this number, depending on your rope thickness and quality.
Width:
The width of a cargo net’s squares depends on its application. In this case, our example cargo net has a side length of 29cm/11 inches per square; if you would rather have more space vertically instead of horizontally, increase the side length (try 36cm/14 inches).
Length:
The easiest way to make sure that your net is square is by measuring two adjacent sides and cutting them to the same amount. The long ropes can be left dangling; they will eventually end up holding together the meshes. If you want more precise measurements, try making a mesh out of string or paper first!
Basic Knots You Need To Know:
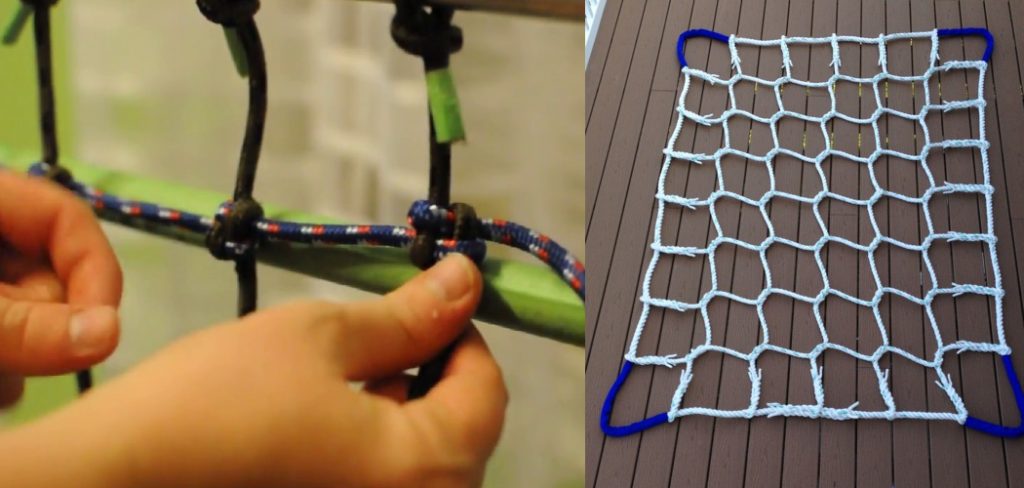
Hitching knots are among the most common knots used in cargo nets; there are many different hitching techniques, but this particular article will focus on taut-line hitches. This knot holds onto its load with equal pressure coming from all directions. To tie it, make a loop with the rope, put it over your load, wrap it around one side of your cargo net and pass the end through the bight.
To make the rest of your knots, keep in mind that cargo nets are made out of meshes; every mesh needs two rows of vertical ropes on either side to be held together. The first row is tied at each corner along three edges (one edge without any horizontal strings), while the second row only needs to be connected on adjacent sides.
The intersections can then be closed with hitching knots or rectangular hitches. If you want more symmetrical patterns, try tying multiple crossing points instead!

A Detailed Stepwise Guide on How to Make a Cargo Net From Rope:
Step 1:
Obtain a piece of rope from any source. Most household items such as clothes, sheets, and pants provide you with the material to make the rope. The four-stranded coreless variety can be bought from a hardware store. Next, stretch out your string on the floor with all the ends lying in the same direction.
Step 2:
Take your second length of rope and tie it up with one end where two adjacent lengths of rope intersect each other. Assemble all seven pieces of yarn into three groups by tying them together where they cross each other. Make sure you have three separate groups, not five or six! Arrange these three separately in ascending order according to their length.
Step 3:
Now, you will start making the squares. At every intersection, make sure you are tying all the ropes together with an overhand knot. The order of the strings in the knot is important. Make sure your final overhand knot ends up at one end of your rope formation.
Continue to tie knots systematically across intersections. Once done, pull on either end of each group of ropes to tighten up your net. You can slide diagonal corners into place if needed by shifting some lines around (do not undo any knots). Pressing down on any stretches of rope should cause it to stretch out tautly without creating slack areas.
Step 4:
Take your next length of rope and tie it up with one end at the opposite end of where two adjacent lengths of rope intersect. Continue to make square knots across intersections until you reach the opposing back of the net. Use the same pattern of overhand knot placement as you did earlier, except move in reverse.
On this second row, when tying knots on top of another, be sure to place each knot slightly above the previous one, so it sits beneath the first row’s knots. You can also try to stagger them if that makes sense.
Step 5:
Repeat Steps 3 & 4 for a third and final row.
Step 6:

Trim off any excess rope, but try to keep as much of it as you can so the net has more sturdiness. Use a lighter or candle flame to melt through the center of any loose ends sticking out. This will fuse them and provide your cargo net with extra durability.
If, by chance, you end up with any loose edges that do not seem secure enough, fasten them together using some scrap pieces of rope. If done correctly, this should add structural support to your net and prevent it from coming apart after multiple uses.
Precautions While Making a Cargo Net From Rope:
Cargo nets are used to secure cargo onto vehicles. They are designed to keep the vehicle’s contents steady and prevent them from moving around or spilling during transit, reducing wear on the cargo and car alike. Cargo nets also act as safety measures; if the trap is fastened too tightly, it could cause serious injury by squeezing a person between cargo pieces.
Cargo nets can be made out of various materials, but this article will focus solely on making one using twine or rope. Making a cargo net with rope is an easy task that requires few supplies and no special equipment.
All you need is some twine–which you may already have lying around your house–and access to either a boat or wheelbarrow (if you need to transport the finished cargo net). However, don’t use twine for carrying weight until you learn how to secure it properly.
Usage of Cargo Nets:
Cargo Nets can be used to suspend items from your vehicle, including both objects and living beings. Therefore, cargo Nets should only be attached to cars that will not move under their power.
Some larger ground-based vehicles such as tractor-trailers can support the weight of other vehicles riding on top of them, while others such as forklifts or small jeep wagons are too weak for this purpose. If you attach a cargo net to a large vehicle that is incapable of supporting its weight, the cargo net and any creatures inside it will fall and take damage upon impact with whatever surface they collide with.
You may choose to tie down something like an experimental aircraft or spaceship using the cargo net; in this case, if your vehicle is even slightly capable of movement, you must first disengage the cargo net before you can drive away.
Which Rope is Suitable for Making a Cargo Net?
A cargo net can be made from various ropes; however, we will focus on nylon rope like this is the most common type.
Nylon is made up of several strands bound together to increase its strength. It has a smooth surface and remains flexible when tied tightly. Nylon rope does not stretch very much under load, and therefore it is preferred for making cargo nets.
A drawback of this type of rope is that once it has been used to lift heavy objects, if left slack, it can become quite stiff, which makes tying knots difficult, so they need to be done immediately after the cargo net has been removed unloaded. Another negative aspect lies in the fact that nylon rope may sometimes fray at the ends, leading to decreased strength.
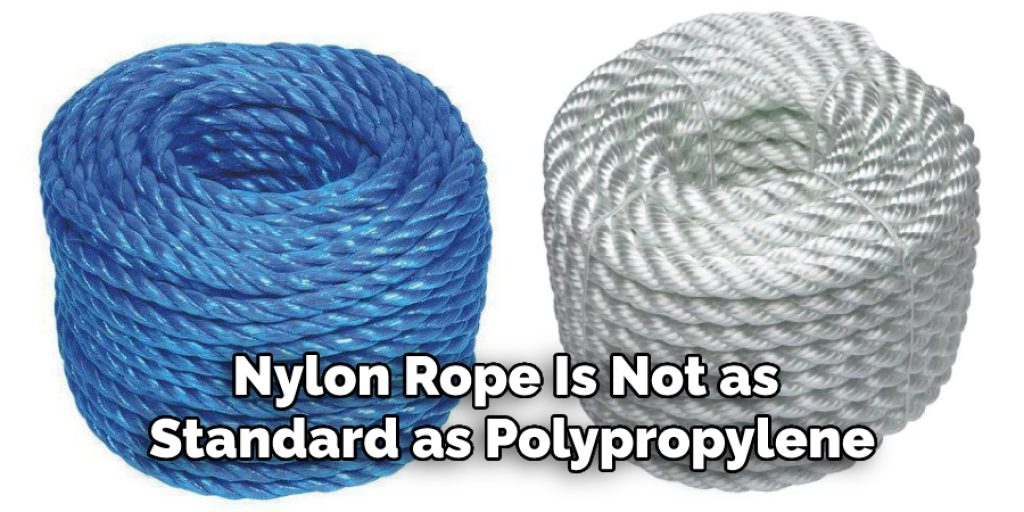
Nylon rope is not as standard as polypropylene, but it is still readily available in various colors and lengths. Nylon ropes come in three different constructions: single braid, triple braid, and double braid. The single braided rope appears very similar to a piece of string, with each strand visible.
It has good abrasion resistance and high tensile strength, making it suitable for lifting heavy objects such as cargo nets. The triple-braided rope consists of three intertwined strands tightly bound together, giving it a smooth finish. Its recognizable feature lies in its higher elasticity compared to single or double braided nylon ropes making it more flexible when tied tightly.
The two most common types of triple-braided nylon ropes are marline and hawser laid, which have a round cross-section though other variations are available, such as flat lays.
Double braided rope is the most expensive of the three constructions, but it has twice the number of strands resulting in a smoother finish and greater flexibility. Its smooth outer surface also provides extra protection against abrasion when used for cargo nets.
However, it is pretty soft compared to single or triple braid ropes, so care should be taken to avoid chafing damage from rubbing on sharp edges when using this type of rope for making cargo nets or any other type of netting for that matter.
Conclusion:
I hope this article has been beneficial for learning how to make a cargo net from rope. Ensure all the precautions while performing the process. Thank you and have a nice day!