
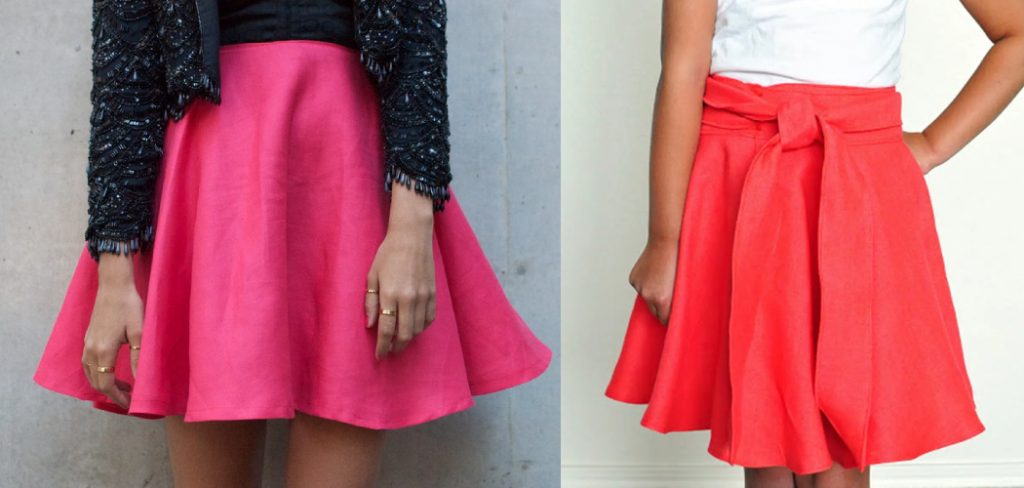
How to Make a Half Circle Skirt
A half-circle skirt is a great way to add some flair and style to your wardrobe. This particular type of garment has been gaining popularity in recent years as it can be worn with just about anything from high heels, boots, or even flats. So if you’re looking for a new addition to your closet this season, try making yourself one!
It’s pretty easy to make a half-circle skirt. All you need is some fabric, scissors, and sewing supplies! It may take you an hour or two to complete the project, but it will be worth it in the end.
And if you are not confident with your sewing skills, try altering an old skirt to fit your needs. In addition, it’s more economical because you can choose what fabrics you want for a fraction of the cost. Read this full blog post to know how to make a half circle skirt.
5 Ways to Make a Half Circle Skirt:
1. Use a Pattern:
When looking for a half-circle skirt pattern, remember that they’re usually designed to fit a specific size and shape. To make the pattern more unique, look for details like darts, frills, or ruffles. And when you’re buying the fabric, always go for a slightly heavier weight than what the pattern instructions recommend. You can ask your local sewing store if they have any half-circle skirt patterns to buy or look online.
2. Have a Skirt Custom Made:
If you are interested in wearing a specific style of half circle skirt and cannot find it in any store, or if the design is very complicated, consider having one made for you by a local tailor. Before going to your tailor, bring a sample of the fabric or a photo of an existing dress with the design you want.
3. Draft Your Own Pattern:
To draft your own half-circle skirt pattern, take a piece of paper and measure the width at the bottom edge (A). Then create a mark for each inch up to 18 inches. Once you reach this point, add 3 inches. This will give you the length for the back of your waistband (B). Cut along your marks.
4. Use a Pajama or Nightgown Pattern:
This is convenient for those who want to make simple skirts, like children’s nightgowns, and do not require much effort. To use this method, measure the waistband length on your nightgown. Then, add 3 inches to obtain the length of the back waistband.
5. Use a Sheet or Tablecloth Pattern:
Measure the size of the bottom edge and back waistband from a sheet or tablecloth. This works well if your fabric is similar to that used in the original pattern. Then, carefully draft, measure, and cut out the half-circle skirt according to this formula.
Steps To Follow: How to Make a Half Circle Skirt

Step 1:
Measure around your waist and determine how long you want the skirt to be. The bottom should reach approximately 1 inch below the knee. Make sure that it will fit both of your legs comfortably because, after all, it is a half-circle skirt.
Step 2:
Next, measure Step 1 and multiply by 8 (to get the circumference). Record this number.
Step 3:
Take this measurement and add 2 inches to it (just a rough estimate). This will be the length of your “arc” on which you will draw your half circle skirt. The reason for adding an extra 2 inches is that this part will not be sewn (unless you want to sew it).
Step 4:
Draw a half-circle skirt on the paper. Try not to make the arc too wide or too narrow. It will change how your skirt looks at the end. The sides of this arc should be parallel with each other throughout.
Step 5:
After you are satisfied with your arc, measure 1.5 inches from the top of the arc and make a line perpendicular (or rather, at a 90-degree angle) to the same side you measured from. This will be your cutting guide (ensure this is on both sides). I drew one for my reference in case it was hard to follow.
Step 6:
Cut out the arc and place it on your fabric (right side down). Cut a hole in the middle big enough to fit your leg comfortably (it will be easier to do this if you cut two-hole. One for each leg, just like a jean skirt). Once again, try to make sure that the holes are big enough for both of your legs but not too big, or it will be too baggy.
Step 7:
Sew a line straight down each side of the skirt. Make sure that these lines do not have any gaps between them and the fabric. This will keep the skirt from being too baggy.
Step 8:
Turn your fabric right side out and try it on! Make sure that you are satisfied with how the skirt looks because now, there is no turning back. Also, ensure you can get both legs through the hole in front without any trouble.
Step 9:
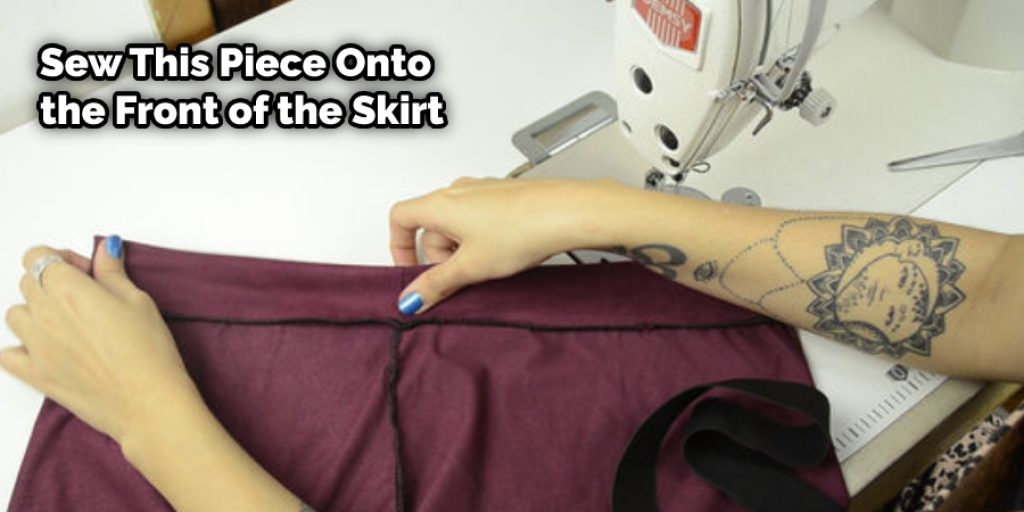
Once you are satisfied with your skirt, take it off and measure from the hole to the bottom of the skirt (for my skirt, for example, I measured 1 inch). Now, add 2 inches to this measurement. This number is how long you want your ties to be. For your ties, I recommend measuring at least 3 inches from the hole in the back and tying a loop big enough to fit both legs through comfortably.
Step 10:
Sew this piece onto the front of the skirt (when you are done cheering for yourself with a high-five). Then, tie it up around your waist, ensuring that the ties don’t slip out of place.
Step 11:
Now it’s time to decorate! First, cut a strip about half an inch wide (or however thick you want your waistband) and sew it around the top part of the skirt. I would suggest using something with some stretch to it to be comfortable. You can also use a ribbon or any other kind of decorative material that you would like around the waist.
Step 12:
If you have made it this far and are satisfied with your skirt, all you need to do is add a few finishing touches. You can either finish the edge of your fabric in some decorative trim (like lace), or you could hem it and add a hanging belt.

Conclusion:
Making a half-circle skirt is easy and can be done in less than an hour. You will need some fabric, scissors, a sewing machine or needle, thread, and pins. First, measure your waistline, divide by 2 for how wide of a hem allowance you want on each side.
Cut out two pieces that are 4 inches wider than this measurement all around the edge but not quite as long as your desired length, plus 5 inches long from top to bottom, so they have enough room to gather at the center when sewn together. We hope you enjoyed this tutorial and found it helpful. If you have any questions about making a half circle skirt, feel free to comment below or reach out to us on social media. Happy sewing!
Nancy Behan
Nancy is an embroidery artist, fashion blogger and a full time editor at DIY quickly. Nancy edits the fashion section on DIY quickly, focusing on the embroidery and cross stitch articles, alongside with fabric and other costume design elements. She graduated from the University of Michigan with a Bachelor of Arts in Art History. She loves to work on her own projects, read books and watch romantic movies in her spare time.


