
How to Make a Soap Stamp
Are you quite excited to learn about the perfect procedure of how to make a soap stamp? If your ultimate answer is yes, we must say you need to read this entire article because the whole content is mainly dedicated to the readers just like you! Please try to believe us as we are telling you the truth! But before we begin, you should be known to the fact that soap stamping is a pretty cool and unique way of decorating your soaps.
In order to start with an appropriate approach to make a soap stamp, we require to follow some fundamental tips and tricks. Again, there is an entirely possible chance that if we failed to maintain those tricks accordingly, then we may not hope to have our work done correctly. There are two types of soap stamps available out there. So, you can go for the one which you think is more suitable for your individual need.
Not only this but when we are planning to get started with any specific method, then we also need to follow some safety measures to avoid sudden messes and troubles. But in most cases, we forget about these points. So, in this post, we will be sharing some very important points that you must keep in mind while planning to install the driveway with concrete.

Considering all these factors, we have performed several types of research and finally found an effective soap stamp process. In the next sections of the content, we will discuss the process. Buying Guide for Soap Stamp In order to get the best performance from your product, you need to be very careful while choosing it. We have prepared a buying guide which will help you with this process.
We believe after reading the whole article; you will quickly understand the topic. If you are willing to know in more depth about the subject, then read the rest of the context for your own benefit! The best time to start a business is when your life situation makes it possible. If you have enough resources, time, and money, then you can easily go for it.
An Overall Overview of the Topic
You might need to customize it with a stepped impression on the off chance you make a cleanser. This instructable will tell you the best way to make a gummed stamp! It takes a shot at newly cut homemade bars, yet would not chip away at locally acquired cleanser or bars that matured.
It is much the same as store-bought soap, yet it is hand-made with a coat of glycerin so it makes the bars more slippery and smoother. I got a hold of some handmade soap at an open market, and determined to attempt my hand at this! This instructable will give you the capacity to make a decent quality bar of your own! The glycerin gives another level of moisture as well.
The Process of How to Make a Soap Stamp
1. Cut a hunk off and damage it. At that point, make a foil plate to preserve the pieces. It can make it sufficiently delicate to border it after you are fulfilled placed it into the cooler for a couple of moments to solidify it up. The glue ought to be suited for the item. Silicone is a decent alternative for plastic and stone, however it won’t work with wood.
2. This progression is not fundamental on the off chance that you are doing a theoretical plan or on the off chance that you are a friend in your imaginative capacities. Presently test your ink’s adaptability by setting your picture topsy turvy onto another bit of paper and putting a couple of Goof Off or comparative cleanser drops.
Try not to agitate the paper. Try not to apply any additional liquids and get it done quickly. On the off chance that you can’t pull off this step with no harm to your drawing, you may need to a greater extent than contemplate the presentation of your picture.
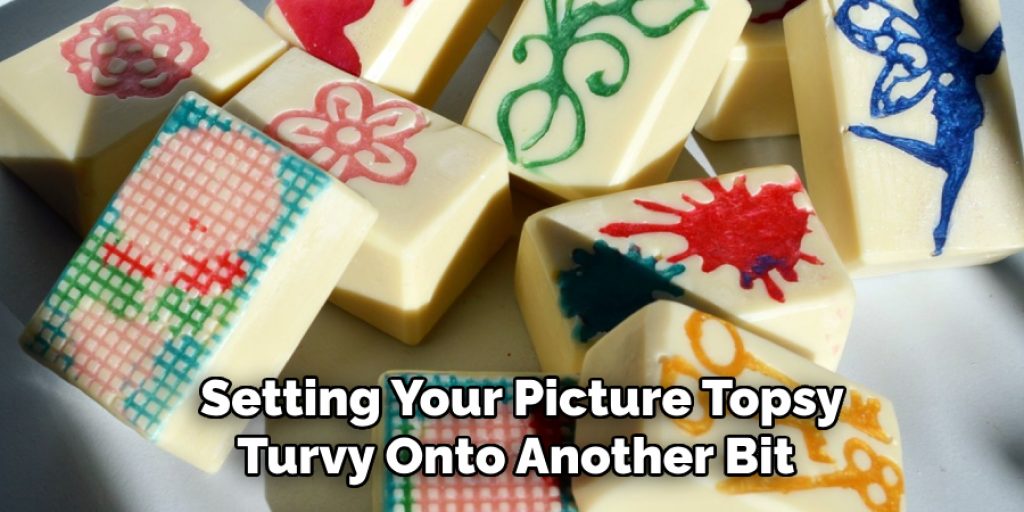
Take off the pinnacle paper if the picture moved incredibly! If now not, you may want to utilize a manual ball pen in the direction of shading in your image’s vicinity that you want to move.
3. While you are glad about the capacity to transport your plan onto your showing dust. It does not need to be ideal; it is only a manual for your cutting. This is the most challenging part of the job. Woodworking projects are generally not incredibly hard to make, but it requires time and effort. If you do not have enough time, then this is not for you. On the other hand, if you’re only starting out as a beginner woodworker, then this really is a wonderful project to start out with.
4. Begin in a nook and scratch out the earth. You ought to go among 1/8th of an inch down. Maintain casting off material until you are happy with the fundamental framework. Presently clean out the effect with a piece of smoothing equipment. It would appear that a little sensitive eraser. Pursue a uniform profundity.
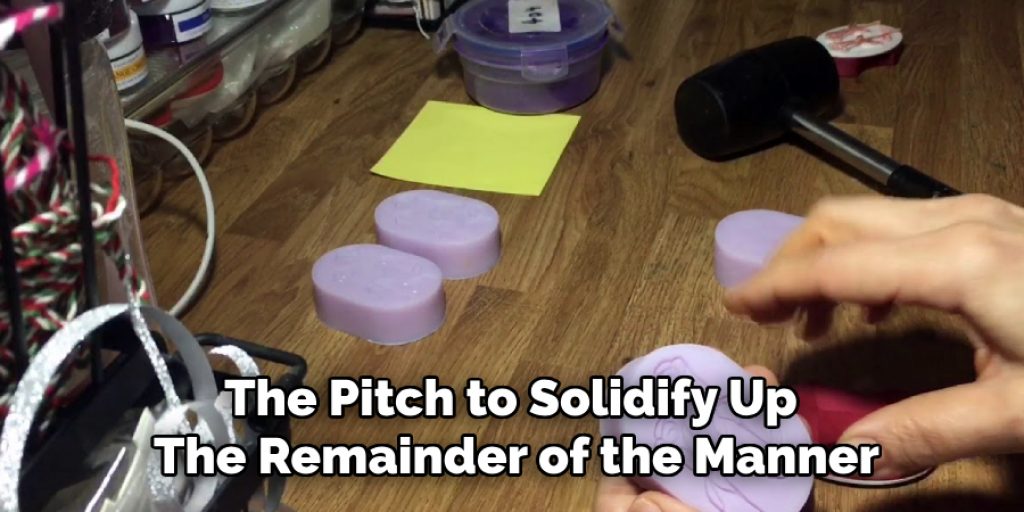
5. Presently make sidewalls. Utilize the channel tape. Make sure to make a decent seal around the form because the sap is extraordinarily meager and will run out. Blend the pitch as per the bearings and immerse your shape. Attempt no longer to drain it legitimately into the impact alternatively permit it movement in by way of pouring onto a level region. Permit the pitch to run in a bit and make it level with the bottom of the form. Block the forms and let them sit overnight. At that point you are prepared to make another layer.
6. While the tar has installation to the consistency of company elastic but now not completely tough the time. Start by stripping off the conduit tape. At that factor, paint across the form extricates the edges.
On the factor, if you have the brink unfastened all around, progressively pry it separated until it pops unfastened. At that point, while the pitch is as yet rubbery, use scissors to manage the lip. Presently permit the pitch to solidify up the remainder of the manner, about 60 minutes. After this is solidified, wipe the leftover dust off.
We have appeared almost at the end. At this point, we think you have known all the necessary information on how to make a soap stamp that was restricting you from achieving your most desired outcome.
Frequently Asked Question
Can You Use Any Stamp for Soap?
No, not really. Soap stamps are specifically designed for soap making, and using them for other items may cause damage or spoil your soap. Soap stamps are made from a soft rubber material and are imprinted with a design that will help you make soap. They come in a variety of shapes and sizes and can be used with both liquid and solid soaps.
Can You Use a Wax Stamp on Soap?
Yes, a wax stamp can be used on the soap. This is a great way to add a personalized touch to your soap bars! All you need is a stamp and some soap. Simply melt the soap and pour it into the stamp. Then, stamp the soap onto your desired surface. Be sure to let it cool before using it, as the wax may be hot to the touch.
Can I Stamp Melt and Pour Soap?
Stamping soap is a great way to personalize your soap and make it unique. Melt and pour soap is a great way to make soap that is more affordable and easier to store. You can stamp your design onto the soap using a stamping tool and then melt and pour the soap. This will create a soap that is unique and one of a kind.
Can You Emboss Soap?
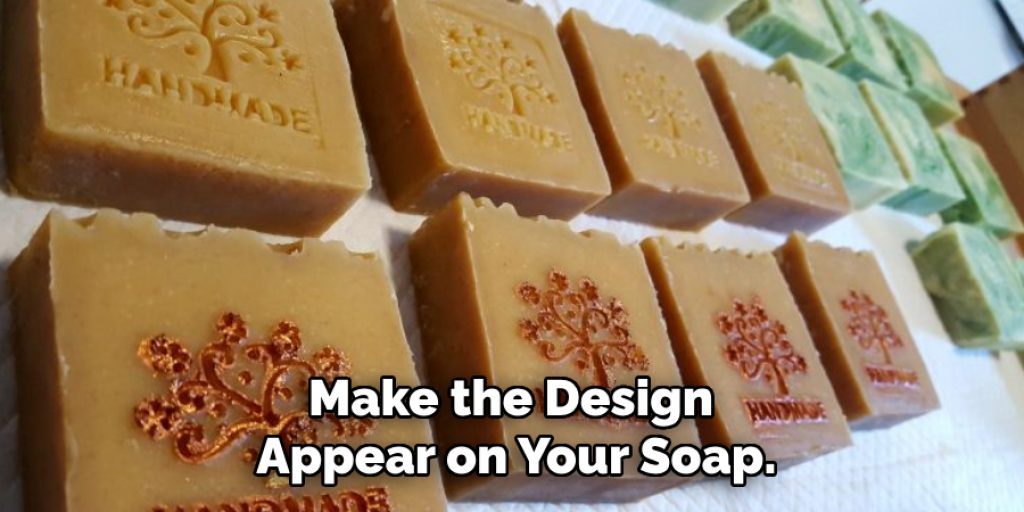
Yes, you can emboss soap! This is a great way to add a unique and personalized touch to your soap creations. To emboss soap, you will need a mold, embossing ink, soap paste, and a heat gun or iron.
To emboss soap, first, trace the outline of your desired design onto a piece of paper. Next, use the embossing ink to fill in the design. Finally, use the soap paste to smooth out the edges of the design. Next, heat up the heat gun or iron and press it against the soap paste to make the design appear on your soap. Be sure to watch your soap as it will start to melt as soon as it is heated. Once the design is complete, let the soap cool and then store it in a cool, dry place.
Final Thoughts
Thus you can apply the acquired knowledge in your practical work without even requiring any additional guides. Make sure you try to follow the safety measures while executing the task hand to hand to avoid messes and accidents for a flawless and effective result!
You May Read Also. How to Make Crispy Soap
Elizabeth Davis
Elizabeth is a creative writer and digital editor based in the United States. She has a passion for the arts and crafts, which she developed from a young age. Elizabeth has always loved experimenting with new mediums and sharing her work with others. When she started blogging, she knew that DIYquickly would be the perfect platform to share her tutorials and tips. She's been writing for the blog from the beginning, and her readers love her helpful advice and easy-to-follow instructions. When she's not writing or editing, Elizabeth enjoys spending time with her family and friends.


