How to Make a Waterproof Wooden Box
Waterproofing a wooden box is a great way to protect your belongings from rain or accidental spills. This blog post will show you how to make a waterproof wooden box using a few simple steps. First, prepare the wood by sanding and staining it.
Next, seal the wood with a waterproof sealant. Finally, attach the hinges and latches. With just a few simple steps, you can create a sturdy and waterproof wooden box that will keep your belongings safe and dry. Read on to know more!
Materials and Tools Needed
- Wood glue
- Sand Paper, medium grit
- Large clamp or ratchet straps
- Circular saw with a fine-tooth blade for cutting wood
- Rasp for smoothing cuts
- Ruler and pencil to mark cut lines on wood pieces
Step-by-Step Guide: How to Make a Waterproof Wooden Box
Step 1: Prepare the Wooden Box Pieces
We need to cut the wooden box pieces out of our wood. I used a sheet of 1/2″ plywood for this project, which was easy to work with. Other suitable woods would be basswood or balsa. The main thing you want to look for is how thick the material is compared to the finished product; you don’t want your finished box to be too thin. First, use a straight edge and a pencil to draw your box onto the wood. It’s helpful to make a few light pencil marks to help you keep your cuts straight.
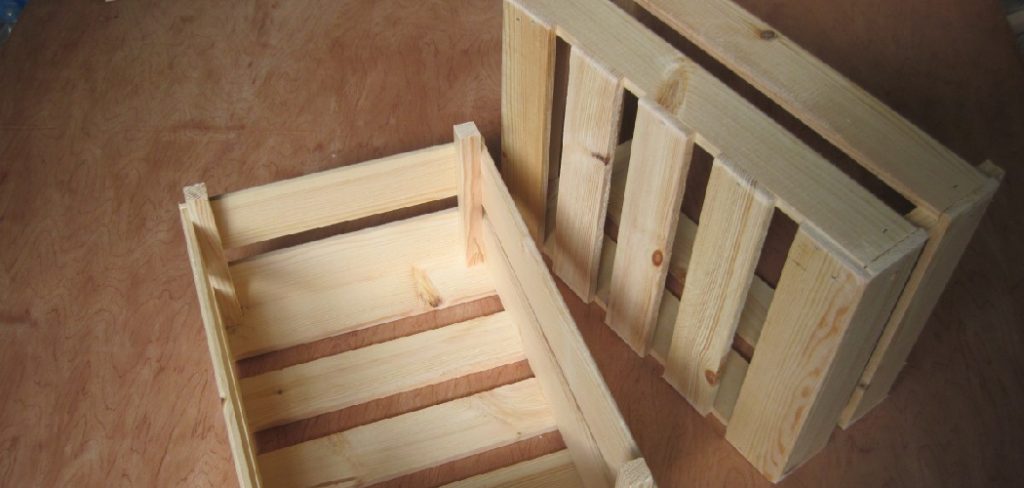
Step 2: Cut Out the Wooden Box Pieces
Using a jigsaw or bandsaw, carefully cut out all four pieces for the box. If you don’t have either of those tools, a coping saw will work. If you have a scroll saw, that will be the best choice. Just make clean cuts and take your time; it’s easier to go slowly than risk making a bad cut. Glue the box together using wood glue. You may wish to clamp the pieces together with a couple of clamps for about half an hour to be sure the joints are set up. Allow the glue to dry overnight if possible.
I cut across the longest dimension, but if you wanted to angle two opposing sides of the box instead of using mitered corners (box joints), that would work as well.
Step 3: Sand the Wooden Box Pieces
Once you have the pieces cut out, use sandpaper to smooth down all of the rough spots. Start with 100 grit and get it nice and even, then move up to 150 or 200 for a smoother feel. When done correctly, your box should have a nice sheen to it. Now, you need to create the bottom of your box. Start by drilling 4 pilot holes on the top side of each piece of plywood. Then, using the jigsaw, cut along the lines until you have a hole large enough for your wire to fit through.
Step 4: Drill the Wooden Box Pieces
Using a drill press, a hand drill, or a handheld power tool, carefully drill out holes in the bottom of the plywood box pieces. This is where we will be attaching edge banding later on. The hole depth should be just deep enough so that the edge banding will sit flush with the surface.

Step 5: Cut out a Lid Piece from Wood
Next, cut out a rectangular piece of wood that will serve as the lid to your box. The dimensions don’t have to be precise because you can sand the edge later on, to make it fit perfectly. Be sure to leave extra room around the perimeter to accommodate the edge banding you will be attaching later. It’s best to leave extra room in the back because the bottom of the box will be slightly recessed.
Step 6: Cut Edge Banding to Size
We purchased this inexpensive 1/8″ thick white PVC edge banding from our local hardware store and used a standard utility knife to cut it out and trim off the rough edges. The length of your piece should be about 1/2″ longer than the perimeter of your box. The width should be slightly smaller than how thick your plywood pieces are.
Step 7: Apply Silicone Caulk to the Wooden Box Pieces
Using a caulking gun, apply a heavy bead of silicone caulk to all of the side and bottom edges where two pieces meet up. This will help waterproof our box by sealing off the exposed plywood where water may seep through. Be sure to wipe away any excess product from your finger. Also, allow enough time for the caulk to dry before moving on.
Step 8: Drill Holes in the Side Pieces
Using a drill press or power drill, carefully drill holes in each corner of the sides of your wooden box. Be sure to make these holes slightly larger than the diameter of the screws you will be using so that they can move freely.
Step 9: Apply a Coat of Stain to the Wooden Box Pieces
Once you have all of your edges sealed with silicone, go ahead and apply a single coat of stain to the outside of the box pieces. The color you choose doesn’t matter because it won’t show through our foam later on, but I chose a dark walnut color to give the project contrast. Allow this coat to dry for about 30 minutes.
Step 10: Assemble the Wooden Box Pieces
The easiest way to assemble the box is to lay it flat on its side with the lid piece facing out. Then, line up your drilled holes in the sides with their corresponding pieces in the lid, and attach them using screws. If you are using a screwdriver, make sure to line them up and tighten down firmly after each one. You might want to use a clamp or rubber band to help hold your box together while you attach it.
Some Helpful Tips and Suggestions
1. To make waterproof joints, apply a liberal amount of varnish or wood glue to one surface. Then, wipe away the excess on the surfaces you want to join together. Please wait until it’s entirely dry before dry-fitting your box parts.
2. You need only varnish the insides of your box. This will help prevent the wood inside your box, which is more susceptible to water damage from losing its moisture.
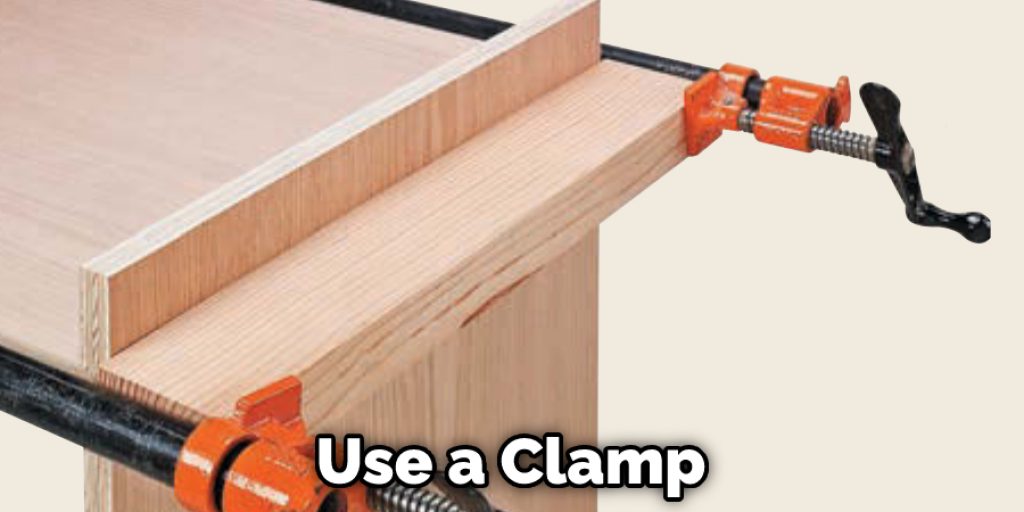
3. Apply at least two coats of varnish or tung oil (1-2 days apart). Sand with 220 grit sandpaper after each coat and steel wool before each coat. Applying steel wool between coats helps to give you a smoother finish.
4. It is important that all of your joints be perfectly dry before the assembly so as not to warp or otherwise damage them when assembling your box.
5. The best way to apply varnish is in multiple very thin coats with sanding in-between. Use either a brush or roller on large flat surfaces to apply the varnish. You can use an old sock wrapped around your finger for tight spots. Use a wet-sanding technique with 1000 grit sandpaper to smooth out any imperfections in the final coat.
6. It is better to be under-varnish than over-varnish. If you want a darker color, use multiple coats of varnish instead of applying more at once.
Conclusion
We’ve shown you how to make a waterproof wooden box in this blog post. We started by discussing the different types of wood that can be used for this project and why cedar is a good choice. Then, we showed you how to cut and assemble the pieces of the box.
Finally, we gave you tips on weatherproofing and finishing your box. We hope you find this information helpful and that you will give this project a try! Please let us know if you have any comments or questions in the comment section below!