
How to Make Custom Temporary Tattoos
Introduction:
Temporary tattoos are also known as “temporary tattoos, shimmer tattoos, transfer tattoos, henna tattoos, body art tattoos.” Temporary tattoos are not real tattoos. Real tattoos last forever.
These temporary ones look like real tattoos & they can be placed on any part of your body you want to enhance your appearance. The tattoo combines water-based color and adhesive, so it can be transferred from one place to another without fading away.
They last for 2-5 days depending upon the area in which they have been applied. If you don’t want them to be seen by others, then just rub cold cream over it, and it will become invisible within no time. In this article, I will discuss how to make custom temporary tattoos. So let us get started.
Stepwise Guide on How to Make Custom Temporary Tattoos:
A temporary tattoo is an innovative artistic accessory that can be worn for a day and then removed to give your skin a breather. You can sport it in the form of drawings, photographs, or words and even record short messages that will last only as long as you want them to. Here we present all the information necessary to make custom temporary tattoos.
Step 1: Gather Materials:
· White paper (for drawing on)
· Markers/pens (water-soluble)
· Rubber cement (or another rubber-based adhesive). The beauty of this material is that it does not leave any stains on the skin when applied. But make sure that you buy only white rubber cement as other colors may contain pigments.
· Kool-Aid (All flavor packs of Kool-Aid will work)
· Mixing bowl and spoon/fork
· Bowls for dying the tattoos in different shades. You can use liquid food color or liquid watercolors.
Step 2: Draw the Design:
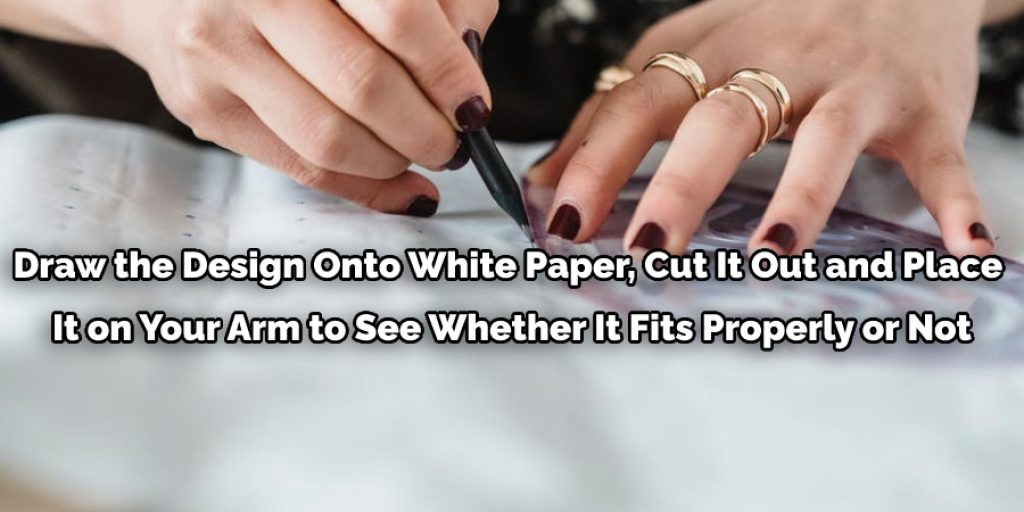
Draw the design onto white paper, cut it out and place it on your arm to see whether it fits properly or not before you actually start tattooing yourself. When you are satisfied with the size, draw it again on a piece of transfer paper.
When you are finished drawing your design, make sure all the lines are dark enough that they will show up even when photocopied. Then cut out the design and use rubbing alcohol on it for at least five minutes to remove any pencil lead or grease marks.
Step 3: Prepare Skin:
Clean your skin with rubbing alcohol (remove all make-up beforehand). Make sure that the skin is dry before you apply rubber cement. Let it dry completely (it takes around 15-20 minutes). If you want, you can use baby powder to remove any moisture left on the skin after cleaning it with alcohol.
Step 4: Apply Rubber Cement:
Place a small quantity of rubber cement on a piece of paper and spread it into an even layer using your finger. Then place the transfer sheet with the drawing onto your skin and fix it in place with clean fingers so that air bubbles are not formed next,
apply pressure on the sheet using a bird feather(or something similar) and let it dry for around 10 minutes. Then apply another thin layer of rubber cement (similar to step 2).
Step 5: Transfer Drawing:
After the second layer is completely dried, place it face down on an ironing board or some other heatproof surface like a wood block. Now cover with a piece of cloth and press with an iron (on its highest setting without steam).
Hold this position for about 30 seconds before turning over to see whether the drawing has transferred onto your skin. If not, keep applying more heat and check after every 15 seconds or so. Once satisfied with the result, let it air-dry completely before peeling off the transfer sheet.
Step 6: Apply Kool-Aid:
Here, you have to take care of two things. First, do not apply a large quantity of Kool-Aid as it may leave a mark on your skin. Secondly, the tattoo should dry completely before you start applying Kool-Aid. Otherwise, the color will spread everywhere and spoil the design.
Step 7 : Drying:
The tattoo must dry completely before you try to wash it off. So give yourself sufficient time for this process to complete (at least 10 hours). Now wash the tattoo with water only. If ink has been successfully transferred from paper to skin,
Colored lines will appear on your skin after washing. Pat dry with a clean cloth and wait for 1 hour or so. Now repeat the water washing process and gently scrub the tattoo with a cloth soaked in soapy water.
Step 8 :Plaster:
Apply plaster (Band-Aid works fine) to protect your tattoo and wear it for at least 8 hours. You can wear it overnight if you want, which is recommended if your skin gets very dry at night. After removing the plaster, rewash the area with soap and water and moisturize with good-quality hand or body lotion.
Step 9 :
You can make as many tattoos as you like using this method, but it is important that before applying rubber cement on your skin, you clean your skin with rubbing alcohol to avoid any infection. Further, when applied directly, Kool-Aid stains fingers quite recently, so it is advisable to use a paintbrush or cotton to apply Kool-Aid over tattoos after you’re done.
Precautions While Making Custom Temporary Tattoo:
While you are on the mission to create a custom temporary tattoo, you must keep a few things in mind. First of all, ensure that the area where you want to apply your new gorgeous-looking temporary tattoo is clean and dry. You can use rubbing alcohol or soap water as a cleaner.
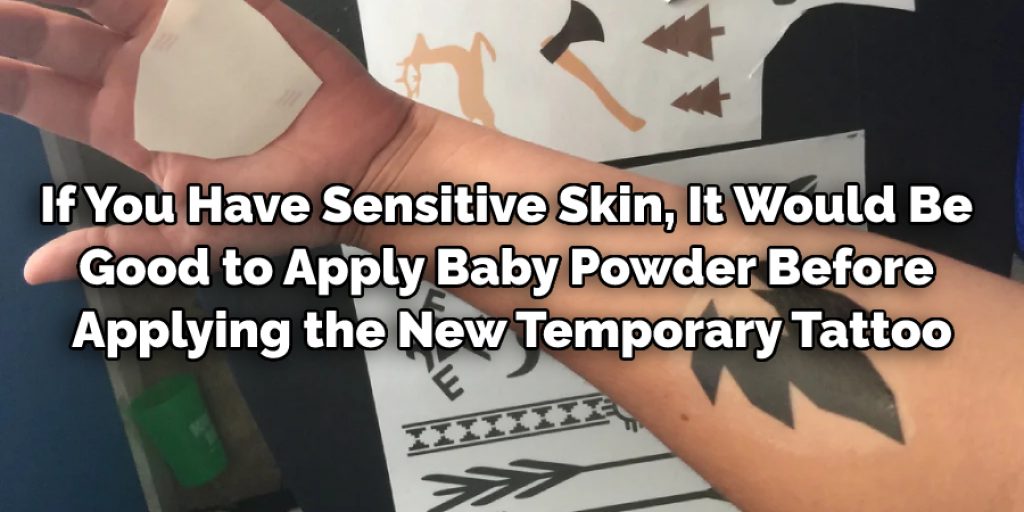
If you have sensitive skin, applying baby powder before applying the new temporary tattoo on your body would be good to avoid further irritation. You can’t go wrong with temporary tattoos.
They are available for every taste, style, and design you might want. Making your own will ensure that it fits your personal needs exactly. You can also show off your artistic talent to friends by making custom temporary tattoos yourself.
Conclusion:
I hope this article has been beneficial for learning how to make custom temporary tattoos. Before starting the process, you should always gather all the materials properly and maintain all the necessary precautions. Thank you, and have a nice day!
You May Also Read – How to Transfer Tattoo Stencil to Skin With Wax Paper
Elizabeth Davis
Elizabeth is a creative writer and digital editor based in the United States. She has a passion for the arts and crafts, which she developed from a young age. Elizabeth has always loved experimenting with new mediums and sharing her work with others. When she started blogging, she knew that DIYquickly would be the perfect platform to share her tutorials and tips. She's been writing for the blog from the beginning, and her readers love her helpful advice and easy-to-follow instructions. When she's not writing or editing, Elizabeth enjoys spending time with her family and friends.


