
How to Make Foam Look like Wood
Insulation foams are always used in our houses, and sometimes the color of the foam contradicts with the decor of the home. For this reason, today, we will suggest a technique on how to make the foam look like wood so that you can easily accommodate this foam as an insulation material suitable for your home decor. This process includes some generalized steps. These steps are simplified below with proper explanation.
Procedure
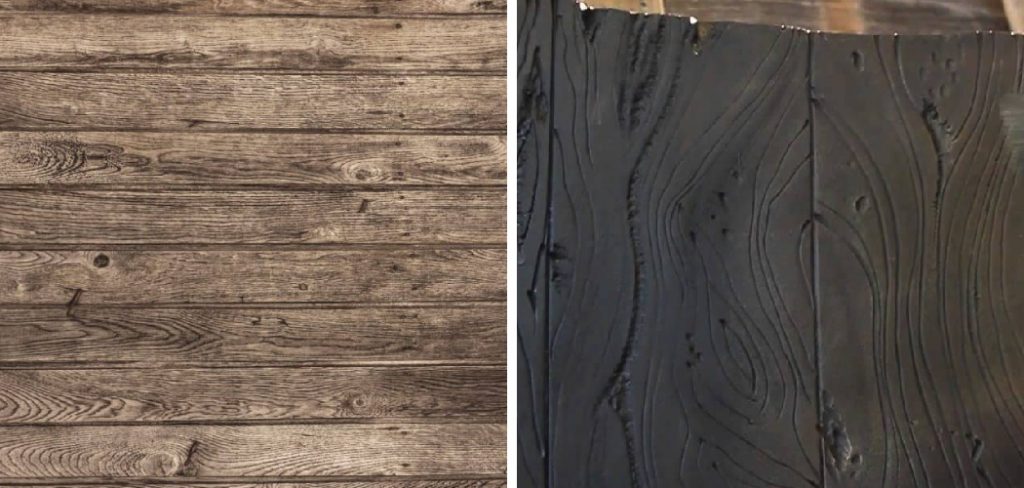
• Step One: To create a wood-like look for your insulation foam, you will need a small handheld rasp and a small wire brush. First, keep the foam in a smooth horizontal plane and place plastic underneath the foam to prevent the paint from spreading. Next, take the rasp and start ribbing the edges of the foam. This is important because the wood-like look for the foam will need some corroded edges. Apply the rasp over the foam in a downward motion until some of the foam starts to corrode and the shape of a wood panel is achieved.
• Step Two: The person is saying that once you have the foam looking the way you want it to, you can use a wire brush to give it linear markings. This is necessary because the fibers in wood are always visible lengthwise, so you need to replicate that before adding color. You can do this by rubbing the wire brush along the foam in a particular direction.
• Step Three: While applying the strokes using a brush, you can start from broad strokes and then go for the narrow ones. The corner of the foam should be rapidly stroked to get deeper and dense grooves. Once the surface is prepared, we have to start painting the foam. At first, we will begin with a light beige color and butterscotch color. A mix of these two colors will be applied as the first coating of the foam. The layer should have a uniform mixing of both colors. Next, we will use the glaze.
• Step Four: We are going to mix two colors together to make a new color. We will use dark brown and light grey. We will mix them together at a one-to-one ratio. This means that for every part of dark brown, we will use one part of light grey. We will use this new color to paint something. But before we paint, we need to let the paint dry. To make the new color, we have to combine dark brown and light grey. We will use a wood graining tool and a whisk brush to apply the glaze. First, we will use the wood graining tool to make grooves on the surface. Then, we will use the whisk brush to spread the glaze around.
Conclusion
In conclusion, we would like to state that the process we have exhibited here will surely help you obtain a wood finish on the foam. The foam can be used for decorative purposes, and you can also use them for insulation in your attic. The process is much suitable for beginners to learn new things. Thank you for your precious time. Have a nice day!
You May Also Read –
Elizabeth Davis
Elizabeth is a creative writer and digital editor based in the United States. She has a passion for the arts and crafts, which she developed from a young age. Elizabeth has always loved experimenting with new mediums and sharing her work with others. When she started blogging, she knew that DIYquickly would be the perfect platform to share her tutorials and tips. She's been writing for the blog from the beginning, and her readers love her helpful advice and easy-to-follow instructions. When she's not writing or editing, Elizabeth enjoys spending time with her family and friends.


