How to Paint a Basket
Are you ready to add some color and creativity to your home décor? Then why not try painting a basket? With the right materials, techniques, and supplies at your disposal, it’s surprisingly easy to turn any plain or used basket into an eye-catching piece of art.

In this blog post, we’ll be going through all the steps involved in painting a basket—from choosing the perfect paint colors and design inspirations to properly prepping and washing baskets, from finding the ideal brushes for the task to using special paints that work best on these unique surfaces from deciding on which finishing touch will make your painted basket stand out from everything else in your space! So if you’re feeling crafty today – let’s get started with our guide on how to paint a basket.
What Kind of Paint Do You Use on Baskets?
When deciding which paint to use for your basket, it is important to consider the type of material you are painting. If the basket is made from wicker or rattan, acrylic craft paint works well but may need several coats.
For a smoother look, spray paint may also be used on these materials. For wooden baskets, you can use either latex exterior house paint or oil-based enamel paint. Be sure to apply a coat of primer prior to painting with either of these options and allow ample drying time between each coat. If decorating a metal basket, any type of spray paint will work best and should hold up the best over time.
As always, make sure to shake your can of paint well before using it and begin painting in strategic sections for the best finish. After your paint is dry, seal it with a matte water-based polyurethane sealer to protect against damage and fading over time.
No matter what type of basket you are painting, be sure to use a brush that is specifically designed for the medium you are working with – this will help make sure your lines are nice and crisp. Have fun experimenting with different colors and designs to create something truly unique! With these tips in mind, you can confidently turn any ordinary basket into an eye-catching work of art.
9 Methods How to Paint a Basket
1. Choose the Right Paint
The first step to painting a basket is to choose the right paint. You will want to use a paint that is specifically designed for use on baskets. These paints are typically made of natural materials and are designed to be durable and long-lasting.
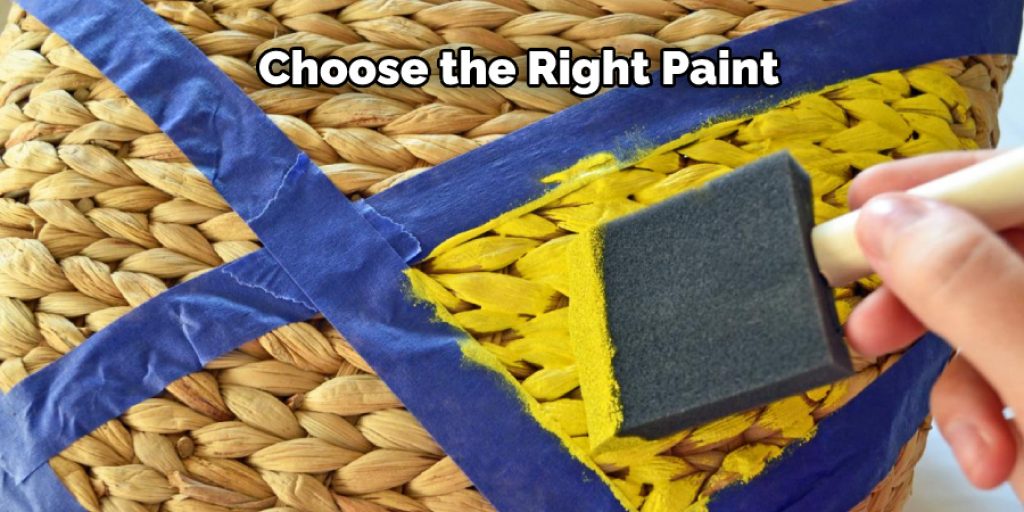
To help ensure that the paint adheres to the basket, use a primer before applying the paint. You can also use a sealer to protect the basket from water and other elements. However, you must be careful when applying these products, as they can discolor the basket if not used correctly.
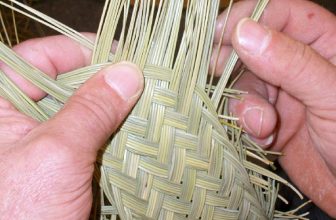
2. Prepare the Basket
Once you have chosen the paint, you will need to prepare the basket. This involves cleaning the basket and removing any dirt or debris. You may also want to sand the basket down to create a smooth surface for the paint to adhere to.
Once the basket is clean and prepped, you will need to apply a primer. Primer helps ensure that the paint adheres properly to the surface. Allow the primer to dry completely before moving on to the next step.
3. Prime the Basket
After the basket is clean and prepped, you will need to prime it. This helps the paint to adhere better to the basket and prevents it from chipping or peeling over time. You can use a variety of different primers, but make sure to choose one that is compatible with the paint you have chosen.
4. Paint the Basket
Once the primer is dry, you can begin painting the basket. Start with a light coat of paint and build up to a thicker layer if desired. Make sure to evenly distribute the paint and avoid any drips or runs. If you are using outdoor paint, be sure to layer on several coats for durability. Allow each coat to dry before applying the next.
Once the paint is dry, you can add a layer of sealant to protect the finish. If desired, use wax or varnish to give the basket a glossy finish. Allowing the sealed paint to dry completely before handling will help ensure that the new paint job lasts for years to come.

5. Let the Paint Dry
After you have finished painting, let the paint dry completely before moving on to the next step. This usually takes about 24 hours. Some paints may require two coats, so this process may take a bit longer.
Once the paint is dry to the touch, it’s time to move on to the next step. If you need to paint a second coat, keep in mind that it’s best to wait at least 24 hours between each coat. While you wait, make sure to protect your newly painted basket from dust and dirt.
6. Apply a Clear Coat
Once the paint is dry, you can apply a clear coat over top of it. This helps to protect the paint and makes it more durable. You can find clear coats specifically designed for use on baskets at most craft stores.
Before applying the clear coat, make sure that the basket is completely dry. Apply the clear coat evenly and with a light touch. Allow it to dry before moving on to the next step. Although it isn’t necessary, adding a clear coat will help to protect the basket and make it last longer. To get the best results, use a brush to apply it.
7. Decorate as Desired
Once the clear coat is dry, you can decorate your basket as desired. This could involve adding embellishments such as beads or sequins or simply painting designs on top of the base color with a different color of paint. Let your creativity flow!
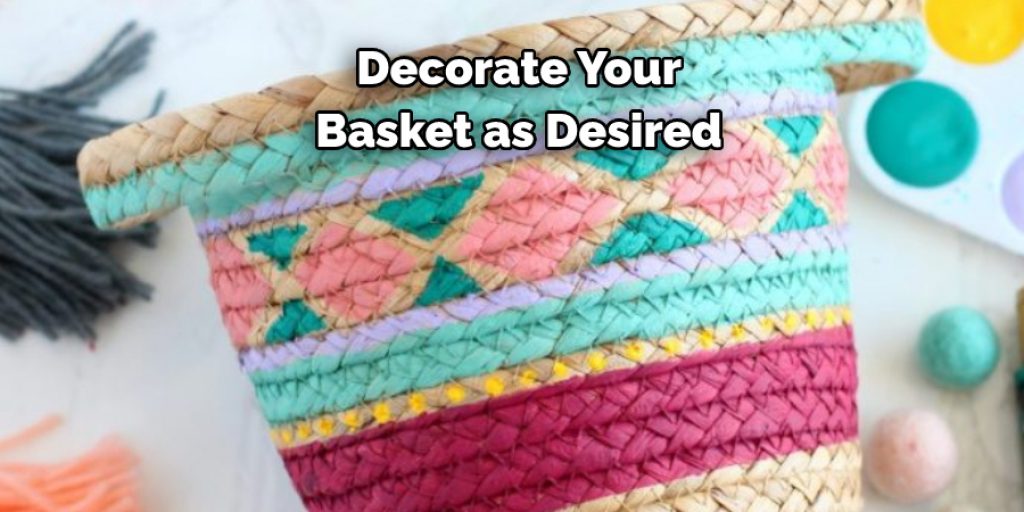
After all of the decorations have been added, you will need to apply a final clear coat over everything to protect your basket from wear and tear. If you are using a spray sealant, make sure to apply several light coats for the best results. Now your basket is ready for display!
8. Allow Everything to Dry Completely
After you have decorated your basket, let everything dry completely before using it or putting it on display. This could take several hours or even days, depending on what materials you used in your design. To be sure, give it at least 24 hours of drying time.
Once everything is dry, your basket is ready to show off! Enjoy your beautiful, handmade creation! If you want to add extra protection, you can always apply a layer of sealant to the basket when everything is dry. This will help protect against scuffs, scratches, and water damage.
9. Enjoy Your Handiwork!
Once everything is dry, your basket is ready to be used or displayed proudly in your home! Enjoy your handiwork and show it off to all your friends and family members. Painting a basket is an enjoyable and creative experience that can add so much character to your home décor.
Whether you choose to go with a traditional or modern style, the options are endless when it comes to creating a unique look for your basket. While it may take a bit of effort and patience, the end result will be well worth it.
Things to Consider When Painting a Basket
1. Choose the Right Paint –
When painting a basket, it is important to choose the right paint for the job. Acrylic craft paints are usually best for baskets because they are easy to use and clean up with just soap and water. Make sure you select a color that will look nice against the material of your basket.
2. Prepare the Basket –
Before you begin painting, it is important to properly prepare the basket. This involves cleaning it with a soft cloth and warm water or with a mild soap solution. Once clean, allow the basket to dry completely before applying paint. If desired, you can also sand your basket lightly for a smoother paint finish.

3. Start Painting –
When ready to paint, begin with a thin coat of paint so that it will easily adhere to the basket. Allow the first coat of paint to dry completely before adding additional coats as necessary. If you’re using multiple colors, make sure to give each color ample time to dry before moving on to the next color.
Conclusion
Painting a basket may seem daunting, but it is actually quite easy. You just have to have the right tools and techniques. Now that we’ve gone over the basics of how to paint a basket, you should be feeling more confident about tackling your project.
Keep in mind all of the tips and tricks discussed in this blog post, such as: picking the right type of paint for indoor or outdoor use; sanding and priming the surface; adding decorative details with felt markers; painting multiple thin coats for best results; and protecting your artwork with sealant.
If you follow these steps closely, you’ll be proud of your finished product! Give it a try: you could create an accent piece to highlight any room in your home.
Angela Ervin
Angela is the executive editor of DIY quickly. She began her career as an interior designer before applying her strategic and creative passion to lifestyle and home. She has close to 15 years of experience in creative writing and online content strategy for housekeeping, home decorations as well as other niche efforts. She loves her job and has the privilege of working with an extraordinary team. She lives with her husband, two sons, and daughter in Petersburg. When she's not busy working she spent time with her family.