How to Put Studs on a Leather Jacket
Adding studs to a leather jacket is a great way to give it some personality and style. So whether you’re looking to add some punk edge or dress it up a little, here’s how. Note that this blog post is for adding studs to a leather jacket that doesn’t have any already.
To give your leather jacket some extra studs and edge, you’ll need to do a bit of preparation. This guide will teach you how to put studs on a leather jacket securely and professionally. You’ll need the following materials: studs, fabric glue, needle and thread, scissors, and a leather jacket. Let’s get started!
Why Put Studs on a Leather Jacket?
There are many reasons you might want to put studs on a leather jacket. Maybe you want to add some edge to your style or make a statement. Or, maybe you just want to dress up your jacket a bit.
Whatever the reason, studs can be a great way to personalize a leather jacket and make it your own. Putting studs on your jacket can also be a fun project, and it’s not as difficult as you might think. You can buy studs at most craft stores or online.
What You’ll Need:
- Studs (number will depend on the size of your jacket and how many you want to use)
- Leather glue
- A toothpick or other small, sharp object
- A piece of cardboard or scrap paper
Instructions: How to Put Studs on a Leather Jacket
Step 1: Design Your Stencil.
Before you start studding your jacket, it’s a good idea to design a stencil. This will help you determine the placement of the studs and make sure they’re evenly spaced. You can use a piece of cardboard or scrap paper to create your stencil. Just trace the outline of your jacket onto the paper and then mark where you want the studs to go. Once you’re happy with the design, cut out the stencil.
Step 2: Cutting Out the Stencil.
Carefully cut out the stencil using a sharp pair of scissors. Make sure to cut along the outline of your jacket so that the stencil is the same size and shape. If you don’t cut it in a straight line, the studs won’t be evenly spaced.
Step 3: Positioning the Stencil.
Position the stencil on your jacket to center and where you want the studs to go. Once you’re happy with the placement, use a piece of tape to secure it in place. If you think the studs will look better off-center, please place the stencil accordingly.
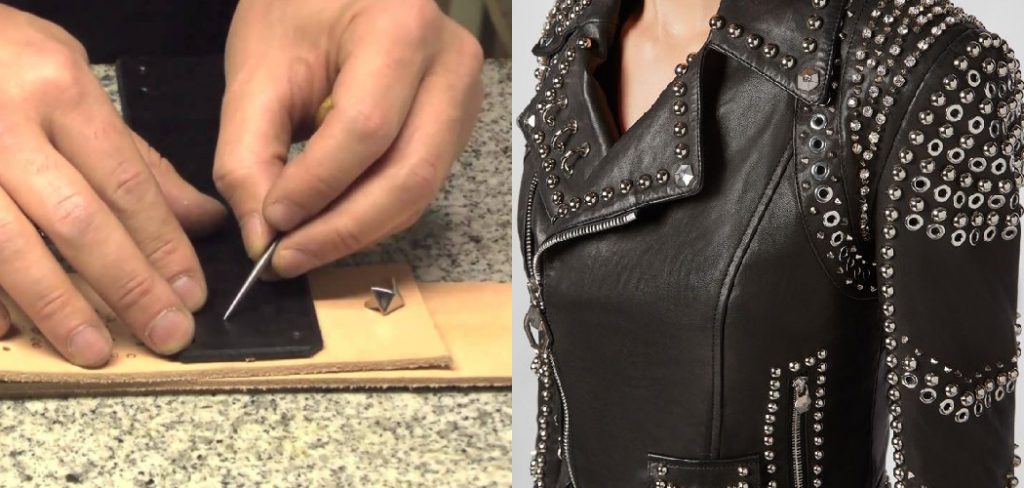
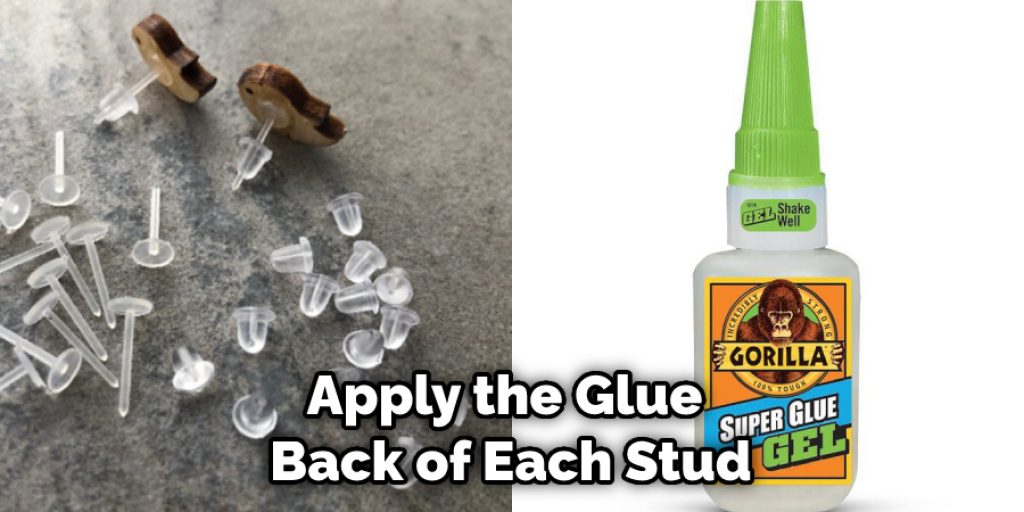
Step 4: Applying the Glue.
Now it’s time to apply the glue. First, squeeze a small amount of glue onto a toothpick or other sharp object. Then, carefully apply the glue to the back of each stud. Again, only use a small amount of glue, as too much will make the studs difficult to remove later.
Step 5: Attaching the Studs.
Once you’ve applied glue to the back of each stud, it’s time to attach them to the jacket. Gently press each stud into place on the stencil. If any of the studs are not sticking, you can add a bit more glue. You may need to hold the stud for a few minutes until the glue dries.
Step 6: Removing the Stencil.
Once all of the studs are in place, carefully remove the stencil. If any studs come off with the stencil, reapply glue and press them back into place. When removing the stencil, be careful not to pull too hard, or you may rip the paper.
Step 7: Let the Glue Dry.
Now that all the studs are in place, let the glue dry for at least 24 hours. This will ensure that the studs are securely attached to the jacket. Once the glue is dry, you can wear your jacket with pride! Of course, if you think the studs are too big or small, you can always add or remove them later on. But be sure to let the glue dry completely before making any adjustments.
Some Helpful Tips & Suggestions
1. If you’re not sure where to place the studs, try putting them along the jacket’s seams or in a grid pattern.
2. You can also use different sizes and shapes of studs for a unique look.

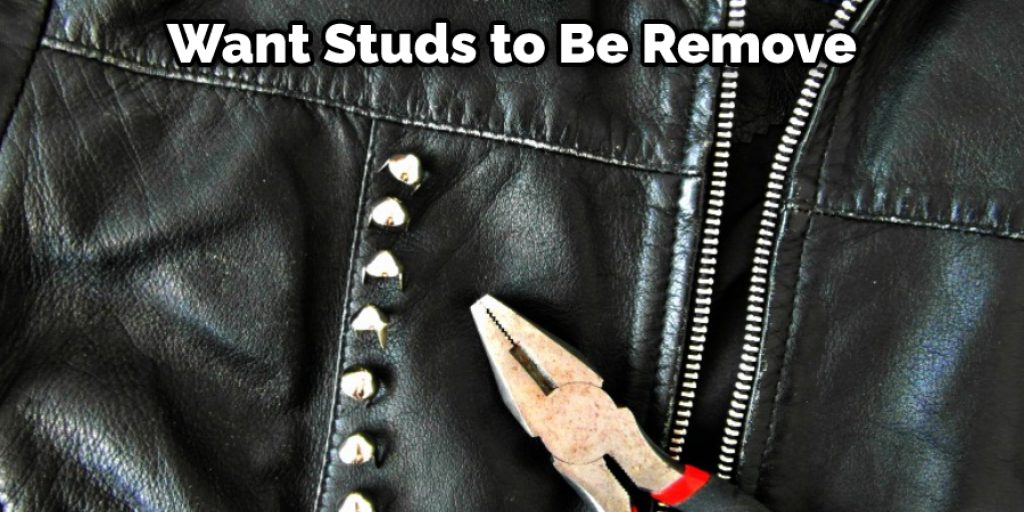
3. If you want to remove the studs later on, apply a small amount of heat (with a hair dryer or heat gun), and they should come right off.
4. It’s a good idea to test on a scrap piece of leather first to get a feel for how the studs will look and stay in place.
5. Make sure you have the right tools for the job, such as a hammer or anvil (if using rivets) and a good leather adhesive.
6. When removing the studs, be careful not to damage the leather.
Can You Attach Studs to Clothing?
Yes, you can attach studs to clothing! It’s a relatively simple process that anyone can do at home with the right materials. First, decide where you want to place the studs on your jacket. It’s best to mark the spots with a pen or pencil, so you know exactly where to put them. Then, using a sharp pair of scissors, cut small slits into the leather at each mark. Be careful not to cut too deep!
Next, take your studs and insert them through the slits from the back side of the jacket. Once they’re in place, flip the jacket over and use a hammer to tap the studs into place gently. That’s it! You’ve successfully added studs to your jacket.
If you want your studs to be removable, you can use Velcro instead of cutting slits into the leather. First, adhere a piece of Velcro to the back of each stud, then press them into place on the jacket. Then, when you’re ready to remove them, peel them off.
Conclusion
Now that you know how to put studs on a leather jacket, it’s time to get creative! There are endless possibilities for what you can do with this look. Whether you want to create a rock and roll vibe or add some glamour to your outfit, adding studs is the perfect way to make a statement.
So go ahead and experiment until you find the perfect look for you. With these instructions, putting studs on a leather jacket is easy and fun! Experiment with different placements and designs until you find the perfect look for you. We hope you enjoy your new jacket as much as we enjoyed helping you create it.