
How to Reinforce Closet Rod
Introduction
Closets are always an essential part of our day to day life. We keep all our belongings stored in these places. Sometimes the rod that has been placed in the closet breaks down. This happens due to the excessive pressure of the cloths on the closet rod. For this reason, we are going to discuss a technique on how to reinforce the closet rod. The broken rod can easily be repaired in this method, which will be advantageous for maintaining a safe place for your attire storing.

Procedure
The steps to reinforce a closet rod are:
- Remove the old closet rod.
- Cut a new piece of wood to the same size as the old one.
- Drill holes in the new piece of wood, ensuring they line up with the holes in the wall.
- Insert the new piece of wood into the holes in the wall.
- Screw the new piece of wood into place.
Steps to Follow

Step One:
For this step, you will need some wooden timber, and then you will need some sandpaper. These are much needed for reinforcing the rod. The wood will help to balance the ruptured end. You will need a miter saw, which will be used to make a hole on the wood.
The sandpaper will be used to make the surface smooth. You will also need a hammer and a measuring tape to help you make the correct measurement.
Step Two:
After gathering all the necessary aspects, you should get to work. At first, you have to start by measuring the rod from the ground. The failure of the closet rid occurs due to the weight of the clothes.
And eventually, the rod gets bent, which results in breaking the rod, and the materials fall. To eliminate such a scenario, you must reinforce the rod along the weak zone, and placing wooden support will be the best solution.
Step Three:
After you have measured the total free space from the ground, you should measure the diameter of the rod, and then you have to cut a wooden plank, which will have a total length of three inches more than the accumulated size of the free space and the diameter of the rod.
Then you marked the upper side of the wood and cut a hole on the upper portion of the wood using a miter saw. The hole should have a diameter that can easily accommodate the closet rod.
Step Four:
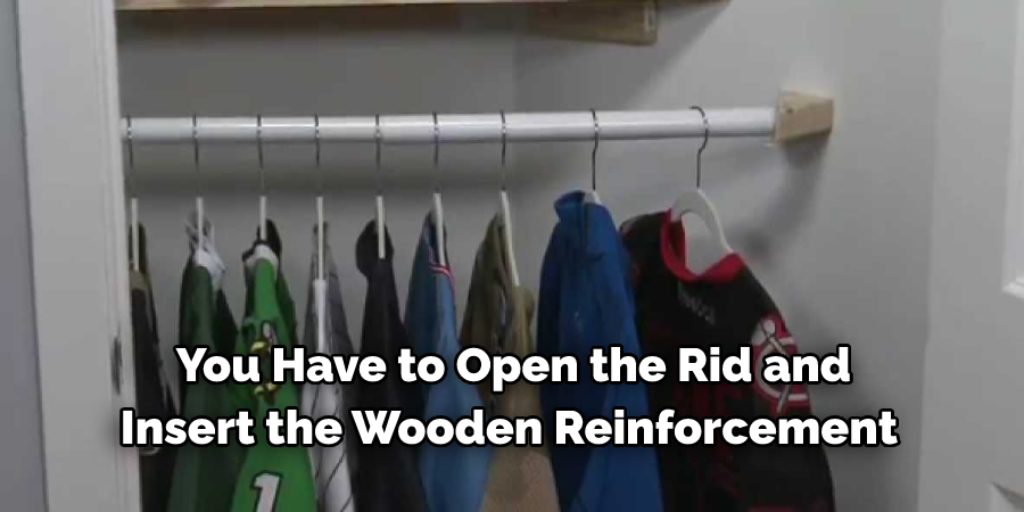
After the wood is prepared, you must use sandpaper of 220 grit to smooth the surface and blunt the edges. Then you have to open the rid and insert the wooden reinforcement through the rod.
You must place the plank in the middle of the rod, dividing the total closet rod into two parts. Then you have to attach the wood firmly to the ground using adhesive. Thus the closet rod will be successfully reinforced.
Frequently Asked Questions
Can You Spray Paint Metal Closet Rods?
Yes, you can spray paint metal closet rods. However, you will need to use the right paint for this process and a primer and finish coat. You should also test out your spray gun on scrap metal before painting the closet rod to know it works correctly.
If you spray paint onto a bare metal rod, spray it in short bursts. The paint will not dry quickly and can ruin the brush if you keep on spraying it for too long. If the paint is already applied to the closet rod, you can use longer bursts of spray. Also, make sure to shake the can of paint before using it.
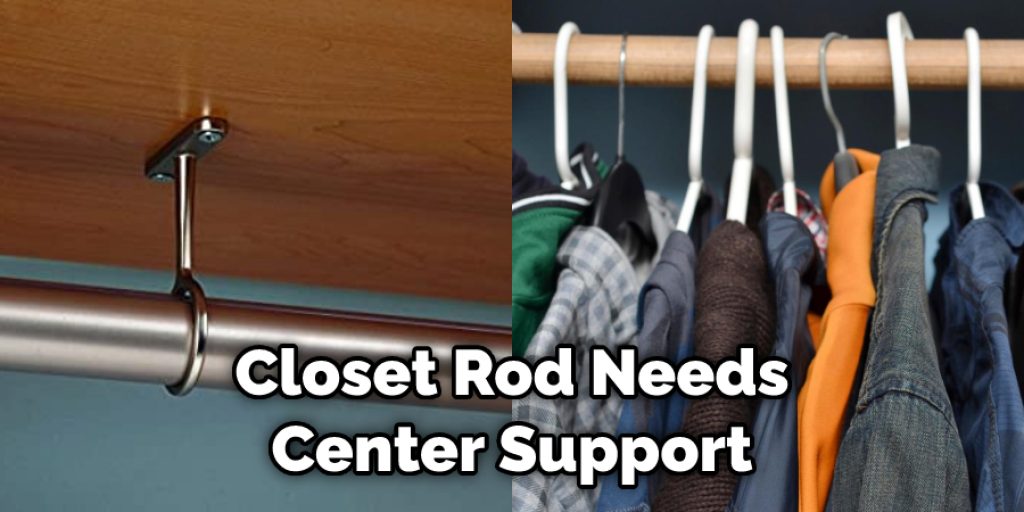
Does a Closet Rod Need Center Support?
Yes, a closet rod needs center support to prevent the rod from tipping. To prevent the rod from tipping, you can use either a crossbar or screws. If you’re using a crossbar, the crossbar should be placed in the middle of the closet rod. This is how to install a closet rod without center support.
Is A Wood or Metal Closet Rod Better?
Wood and metal closet rods have different advantages, depending on the use case. Wooden closet rods are more aesthetically pleasing and can be stained or painted to match each individual’s style.
They are also often preferred for heavier loads because they can handle greater weight than metal. On the other hand, metal closet rods are much more durable and can withstand wear and tear over time better than wood. They are also generally more affordable, making them a good option for those who need an economical choice.
How High Should the Top Shelf Be in a Closet?
The height of the top shelf in a closet depends on the size of your room. For example, the top shelf should be about 2 feet from the floor if you have a smaller room. If you have a larger room, then it can be up to 6 feet or more from the floor.
If you are still unsure what is best for your space, here are some general guidelines:
• For closets less than 10 ft wide and 5 ft deep, measure 6-7 ft above the floor.
• For closets 10 ft wide and 5-6 ft deep, measure 7-8 ft above the floor.
• For closets wider than 8 ft and deeper than 6 ft, measure 8-9 ft above the floor.
What Is a Good Size for a Master Closet?
A good size for a master closet is 8 feet wide and 10 feet long. The width is to accommodate double-wide hangers, rods, and shelves. The length can be used for longer pieces of clothing like coats or extra storage space. The size of your closet will depend on the amount of clothing you need to store and your available storage space. Ideally, your closet should be at least 8 feet wide and 10 feet long to accommodate your clothing items.
What Goes in a Master Closet?
A master closet is a closet that has the highest priority in a home. It is usually bigger than other closets and can be accessed from the house’s main living area. It may or may not be located in the master bedroom. The master closet usually stores things such as clothing, shoes, handbags, and jewelry.
Conclusion
In conclusion, we would extend our heartfelt gratitude to our readers who have spent their time going through this mentioned technique. We hope the process will benefit beginners to learn new techniques and apply them. DIY enthusiasts can use this technique to reinforce the closet rods. Happy repairing. Have a nice day!
You may read also: How to Wash Shop Rags
Angela Ervin
Angela is the executive editor of DIY quickly. She began her career as an interior designer before applying her strategic and creative passion to lifestyle and home. She has close to 15 years of experience in creative writing and online content strategy for housekeeping, home decorations as well as other niche efforts. She loves her job and has the privilege of working with an extraordinary team. She lives with her husband, two sons, and daughter in Petersburg. When she's not busy working she spent time with her family.


