
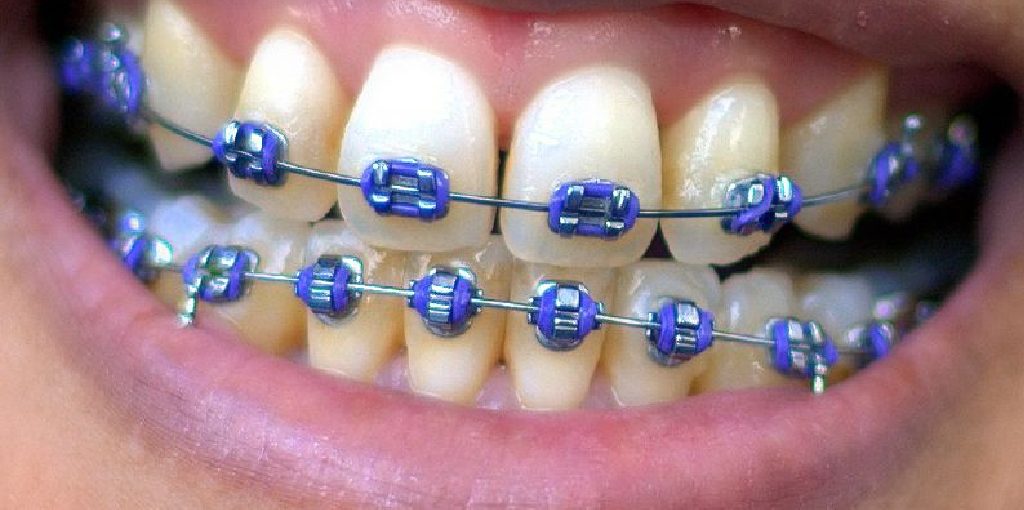
How to Remove Braces at Home Safely
Braces are often seen as an uncomfortable necessity in life. However, there is a way to remove them at home without pain or expensive visits to the orthodontist! If you follow these steps carefully on how to remove braces at home safely, your braces can be removed in just one week. The first step in clearing your braces at home is gathering the necessary supplies.
You will need some lubricant (such as coconut oil), two small bowls, and some dental wax. The next step is significant to sterilize everything that will touch your teeth! By doing this, you can prevent any infection from setting in after the removal of the braces. Read on to know more!
10 Ways on How to Remove Braces at Home Safely:
1. Oil Pulling:
Swishing oil in your mouth (preferably sesame or sunflower oil) and spitting it out while this person is also brushing their teeth with baking soda and rinsing their mouth with salt water several times throughout the day is referred to as dental cleaning.
2. Saltwater Flossing:
This form of home removal involves swishing some saltwater around in your mouth for 10-30 minutes or more before spitting it out again.
3. Castor Oil Pack:
This method consists of wearing a hot castor oil pack on the area of the braces, usually at night while sleeping. They leave the pack in place for at least an hour, but longer is better.
4. Lemon Juice/Baking Soda Rinse:
This method involves rinsing the mouth with lemon juice or baking soda to help remove built-up plaque. The person will also brush their teeth with baking soda and saltwater throughout the day to keep the gums in good condition.
5. Apple Cider Vinegar Rinse:
This form of removal involves the person rinsing with a mixture of water and apple cider vinegar to help remove the built-up plaque already attached to your teeth. To have optimal results, you will need to brush your teeth with baking soda and saltwater throughout the day.
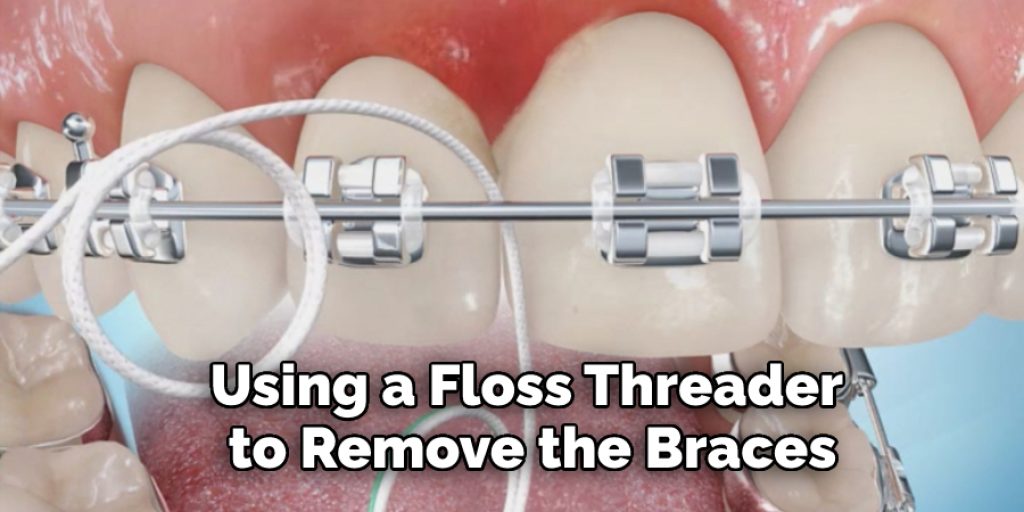
6. Floss Threader:
This method involves using a floss threader to remove the braces from your teeth. To do this, you melt some wax onto the end of the floss threader and then carefully slide it under each wire loop attached to your teeth. Again, you will need an assistant to hold a cup or something handy underneath you while you do this.
7. Wire Cutter:
This method involves using a wire cutter to make an incision into the wire attached to your braces and then pull it out. It should be noted that this method of removal should only be used as a last resort if other methods fail to work for you.
8. Filing the Wire:
This method involves filing down (cutting) the wire attached to your braces or removing each of the coils on the wire one at a time. This will allow you to slip out your orthodontic appliance more easily after it has been filed down.
9. Rubbing Alcohol Swab:
This method consists of first cleaning off all of the wax on each wire loop attached to your braces. Then, you take a rag or swab soaked in rubbing alcohol and wipe down each wire loop. After that, all you will need to do is slide each wire loop off of your braces.
10. Dental Floss:
Lastly, it’s worth noting that you don’t necessarily need to remove the braces before trying any of these methods. For instance, you could swish some saltwater around in your mouth and then use a floss threader to pull out the braces without removing them first.
Some Things to Consider for Removing Braces In-Home Safely:
1. It’s Worth It to Consult Your Dentist
Before you start, make sure to consult your dentist. They can check whether or not applying heat is safe for your teeth, and they should be able to give you more information about the braces. Don’t take any chances if your dentist determines that it’s unsafe for you to remove them without professional help.
2. Don’t Use Expensive Materials
You don’t have to get fancy when it comes to the materials that you use. You can find what you need at a hardware or grocery store and even craft stores if necessary.
3. Avoid Using Lye
The first step that you need to take is removing the metal brackets from each tooth. One of the dangerous materials you want to avoid using is lye, a base chemical that can burn your mouth if it comes into contact with your gums or cheek tissue.
4. Hot Water is a Bad Idea
Even though hot water seems like an obvious choice, don’t use boiling water since your teeth are already warm. Very hot water can warp and crack teeth if left in for too long. Furthermore, using boiling water can burn your gums and cheeks if you aren’t careful.
5. Heating the Brackets Instead of the Teeth
Many bracers recommend heating the brackets instead of the teeth to ease the process. You can use a hot towel or piece of aluminum foil to heat your braces. Avoid using things like lighter fluid, which can damage your gums and cheeks if it comes into contact with them.

6. The Cold Water Rinse
Once you’ve successfully removed the braces, your next step is to rinse out your mouth with cold water. The cold water helps close off blood vessels and reduces swelling, which can decrease any pain you might feel.
Conclusion:
To remove braces at home, you will need the following materials a towel or cloth to cushion your teeth, an elastic bandage that fits snugly over your head and under your chin, scissors. Wrap the cloth around one of your hands to protect it from injury when removing part of the wire against the brackets on each side of all upper molars. Then, cut through any remaining metal bits sticking out with a pair of sharp scissors.
Remove both sides simultaneously by pulling up and towards yourself while holding onto them tightly until they come free. You should then be able to slide off any leftover pieces easily once this is done without having to worry about injuring yourself further or damaging other parts of your mouth! We hope after reading this blog post, you now know how to remove braces at home safely. Reach out to us if you have any questions to ask!
You may read also:


