How to Remove Caulk From a Window
Are you looking to remove caulk from your windows but don’t know how? Don’t panic – while it may seem like a daunting task, removing caulk can be done with a few simple steps. In this blog post, we’ll provide an easy-to-follow guide so that even the most novice of DIYers can successfully rid their window frames of excess caulking.
Whether it’s replacing old caulk or sprucing up unsightly existing sealant, our step-by-step tips on how to remove caulk from a window will help make the process stress-free and straightforward. Read on to learn all you need to know about removing silicone and latex caulk from your windows!
Why Do You Need to Remove Caulk From a Window?
Before starting your project, it’s important to understand why you need to remove the caulk from a window in the first place. If caulk around a window is too old, dry, or cracked, it can cause air leakage that leads to higher energy bills and other issues like condensation build-up and mold growth. By replacing old caulk with fresh material, you can help ensure that your windows are properly sealed and insulated.
Is It Possible to Remove Caulk From a Window?
Yes, it is possible to remove caulk from a window! Whether you’re replacing an old seal or simply want to refresh the appearance of your windows, removing caulk can be done relatively easily with minimal effort.
It is also important to ensure that the window is properly sealed afterward, as caulk helps protect against drafts and moisture. In this article, we’ll discuss how to remove caulk from a window safely and effectively.
Required Items
To successfully remove caulk from a window, you’ll need the following items:
- Utility knife or razor blade
- Putty knife or plastic scraper
- Caulk remover (optional)
- Mineral spirits (optional)
10 Ways How to Remove Caulk From a Window
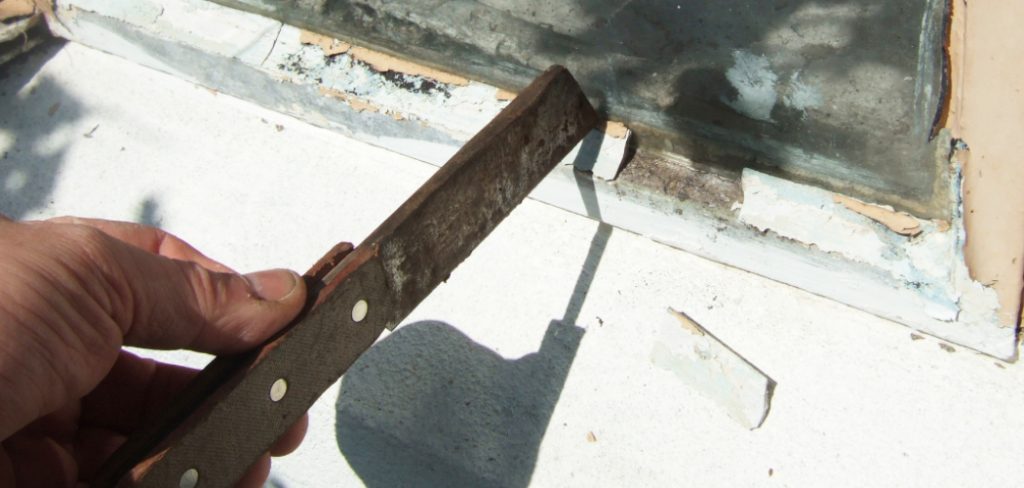
1. Cutting
Start by using a utility knife or razor blade to carefully cut away at the caulk around the window, being careful not to damage the window frame. When cutting, make sure to use a light touch and keep the blade at a shallow angle.
2. Warming
Apply heat with a hair dryer or heat gun to soften the caulk before attempting to remove it. This will help make the process easier and reduce clean-up time afterward. Make sure not to overheat, as this can cause damage to the window frame.

3. Scraping
Once the caulk has been softened with heat, use a putty knife or plastic scraper to carefully scrape it away from the window frame. Be careful not to damage the frame while scraping, and take breaks as needed in order to avoid exhaustion.
4. Chemical Removers
Using removers such as caulkover or mineral spirits can help dissolve the caulk and make it easier to remove. Before using, read the instructions carefully and follow all safety guidelines. Chemical removers should also not be used on painted surfaces as they can damage the paint.
5. Cleaning
Once all of the caulk has been removed, use a damp cloth to clean away any remaining residue from the window frame. If necessary, you may need to use a mild detergent or solvent to remove any tough residue.
6. Sealing
Once the window frame has been cleaned, apply a fresh bead of caulk around the edges to seal it back up and protect against drafts and moisture. Make sure to use a quality caulk that is designed for outdoor use and follow all instructions provided by the manufacturer.
7. Finishing
After allowing the caulk to dry completely, you may want to finish off the edges with a bit of painter’s tape or a good sealant. This will help protect against future damage and give the window frame a finished look.
8. Maintenance
Caulk should be removed and replaced periodically in order to keep your windows properly sealed and looking their best. Most caulk can last for up to 25 years, but it’s important to check on it regularly and replace it as needed.
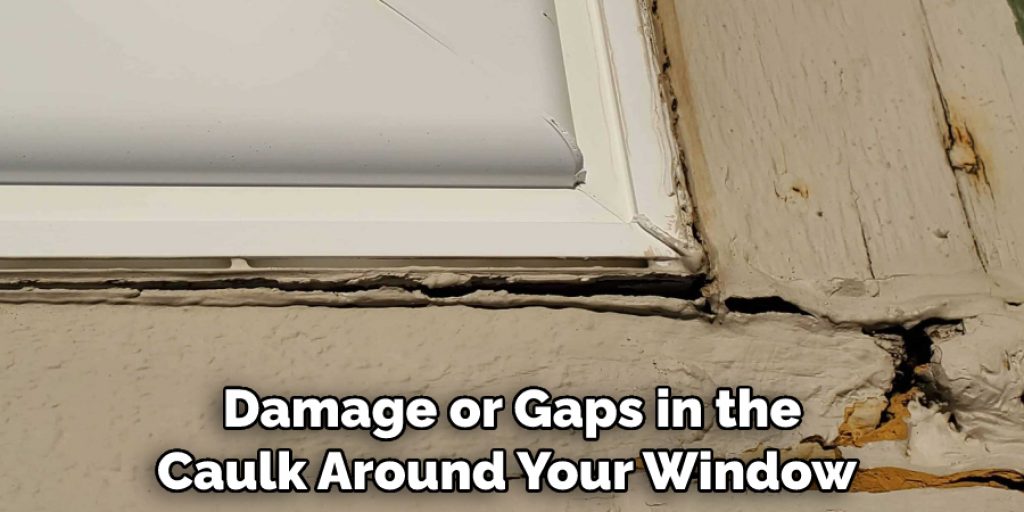
9. Replacing Caulk
If you notice any damage or gaps in the caulk around your window, be sure to repair it as soon as possible. This will help keep drafts and moisture out, as well as protect against damage to the window frame.
10. Professional Help
If you are unable to remove the caulk or don’t feel comfortable doing it yourself, it’s best to contact a professional for help. They will be able to safely and effectively remove the old caulk and install a new seal to protect against drafts and moisture.
Removing caulk from a window doesn’t have to be difficult or intimidating! By following these simple steps, you can easily remove old caulk and replace it with a fresh seal in no time. Just be sure to take your time and use the right tools for the job, and you’ll have a well-sealed window in no time.
8 Safety Precautions to Take When Removing Caulk From a Window
Removing caulk from a window is an important step in the maintenance of your window. However, it can be a dangerous job if not done correctly. Here are 8 safety precautions to take when removing caulk from a window:
1. Wear protective gear such as gloves and safety glasses to protect your eyes and hands from potential caulk spills. Protective wear should also be worn to protect the skin from contact with any caulk residue.
2. Make sure you have adequate ventilation, such as a fan or opening windows, when working with caulk that contains toxic fumes. The ventilation will help to keep the room safe from caulk fumes.
3. Make sure your workspace is clear of clutter so that you can move around easily without the risk of tripping over something. Clear and uncluttered work areas are much safer when it comes to removing caulk.
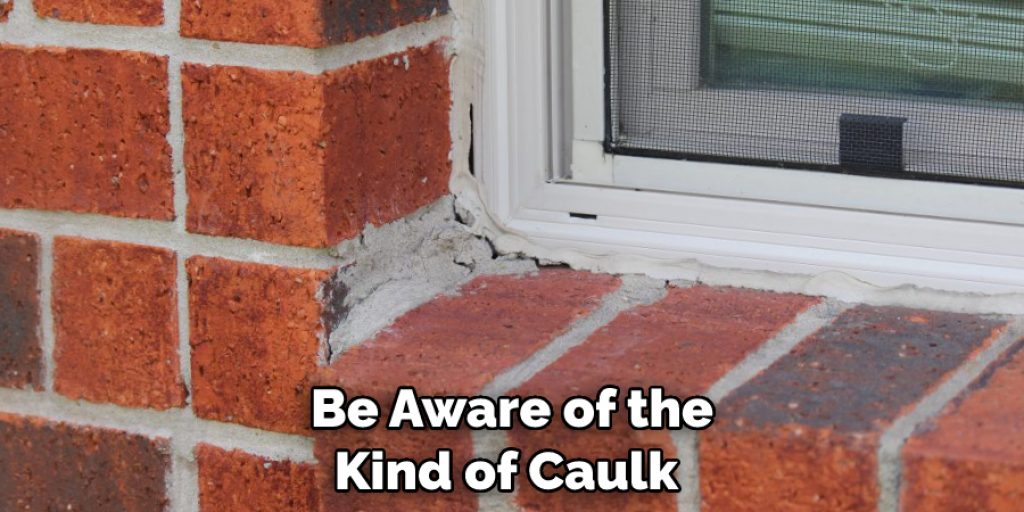
4. Be aware of the kind of caulk you are dealing with and take the necessary safety measures, such as wearing a respirator if needed. All step-by-step caulk removal instructions should clearly outline any safety precautions required.
5. To minimize the risk of injury to yourself, use tools specifically designed for removing caulk, such as a putty knife or razor blade scraper. The design of these tools allows for better precision and control when removing caulk.
6. Use an old rag or cloth to catch any loose caulk that may be sprayed off in the process of removal. This will help prevent the caulk from staining your walls or other surfaces during the removal process.
7. Avoid using heat guns, blow torches, or other tools that generate high heat when removing caulk. These can be dangerous tools to use and can easily cause serious injury if used improperly.
8. Finally, always follow all manufacturer’s instructions on the product label before using any particular caulk removal product. This will ensure that you are using the right product in a safe manner to get the job done.
By following these safety precautions when removing caulk from a window, you can keep yourself and your home safe during the process. Taking the time to properly prepare for and execute your caulk removal project will make it much less of a hassle in the end. It’s always better to be safe than sorry.
Frequently Asked Questions
How Long Will It Take to Remove Caulk From a Window?
The amount of time it will take to remove caulk from a window depends on several factors, including the size of the window and the type of caulk you are trying to remove.
Generally, it should take anywhere from one hour to a few hours to thoroughly remove caulk from a window. If you have an especially large or complex window, it may take longer to get all of the caulk removed.
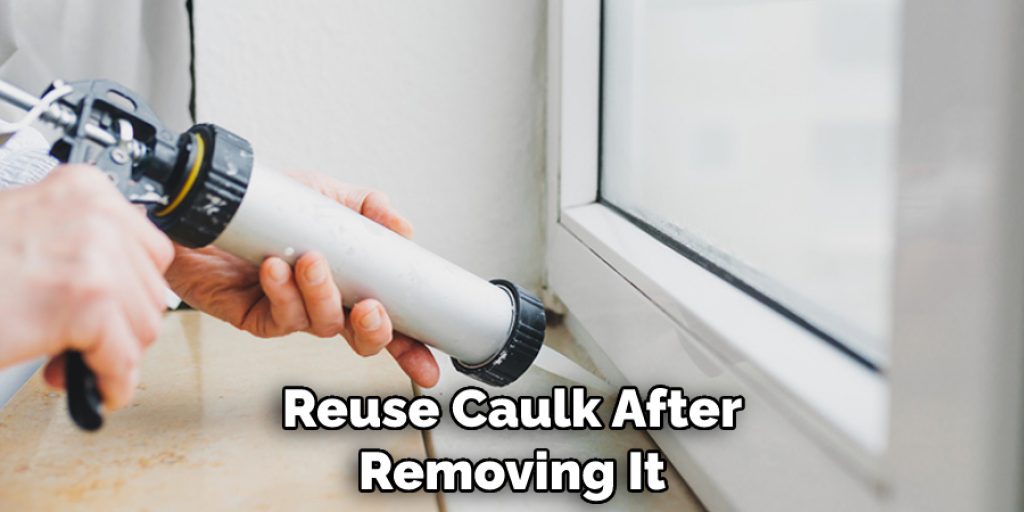
Is It Possible to Reuse Caulk After Removing It From a Window?
In many cases, it’s possible to reuse caulk after removing it from a window. However, the success of this depends on the type of caulk used and how well it has been stored. If you’re able to remove the caulk in one piece and store it properly, then it may be possible to reuse it.
Conclusion
After trying a few different methods to get rid of caulk from a window, you should now be well on your way to enjoying beautiful, clean windows. It is important to remember that removing caulk requires some patience and planning.
Once you decide which method fits best for your situation, take the necessary time to complete it with precision so that the job is done correctly.
Additionally, always remember to wear protective gear whenever using hazardous materials such as sharp blades and chemical solvents. Keeping safety in mind will ensure that no harm comes to you or anyone else during the process of caulk removal.
Following these steps on how to remove caulk from a window, even a novice can remove caulk from any window without ruining their results by taking too much time or using improper tools and methods.
Angela Ervin
Angela is the executive editor of DIY quickly. She began her career as an interior designer before applying her strategic and creative passion to lifestyle and home. She has close to 15 years of experience in creative writing and online content strategy for housekeeping, home decorations as well as other niche efforts. She loves her job and has the privilege of working with an extraordinary team. She lives with her husband, two sons, and daughter in Petersburg. When she's not busy working she spent time with her family.