How to Replace a Thermocouple on a Water Heater
Are you looking for a straightforward guide on replacing the thermocouple on your water heater? If so, then look no further! Replacing a thermocouple is a relatively simple task that anyone can do with the right tools and a basic understanding of plumbing principles.
If your water heater is not producing enough hot water or is just not operating correctly, it’s possible a broken or damaged thermocouple may be to blame. Replacing a thermocouple on a water heater can seem like an intimidating task, but with the right tools and knowledge, it really isn’t as hard as you might think!
This blog post will offer step-by-step directions for how to replace a thermocouple on a water heater so you can troubleshoot any issues quickly and easily in your own home. With this straightforward guide and some basic safety precautions, you’ll be back up and running in no time!
What Will You Need?
Before you start the job, it’s important to make sure that you have all the necessary tools and supplies. A full list of what you will need includes:
- New thermocouple
- Flathead screwdriver
- Wrench or adjustable pliers
- Safety glasses and gloves
Once you have all the necessary supplies, you can start replacing the thermocouple.
10 Easy Steps on How to Replace a Thermocouple on a Water Heater
1. Turn Off the Gas Supply
Turn off the gas supply to your water heater by turning the gas valve located on the unit anti-clockwise. It is important to ensure that the gas is off before proceeding. Because of this, it’s a good idea to double check by turning on the gas and then smelling for any gas smells.
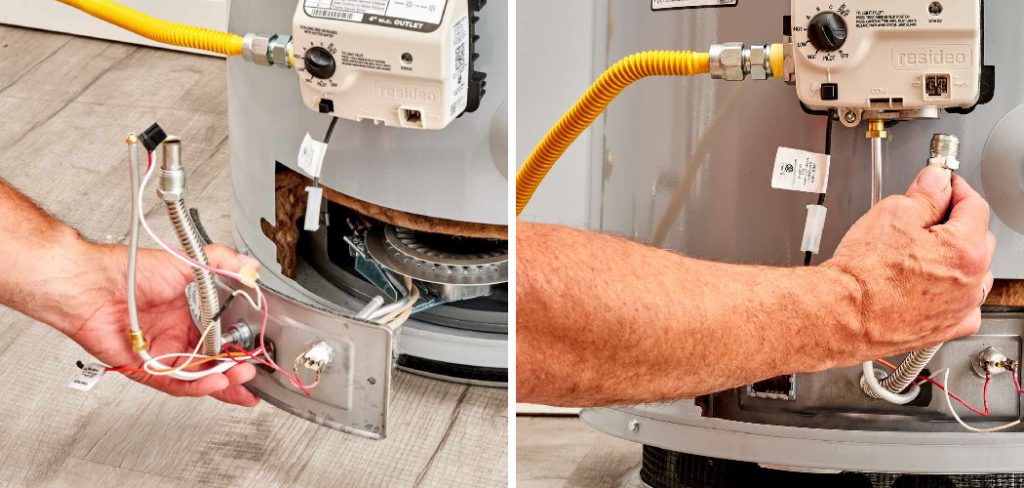
2. Remove the Gas Tube
Using a flat-head screwdriver, disconnect the thermocouple from the gas tube connected to the water heater by unscrewing the bolts on either side of it. Be careful when handling the gas tube as it can be very fragile. You can also use a wrench or adjustable pliers to loosen and remove the bolts.
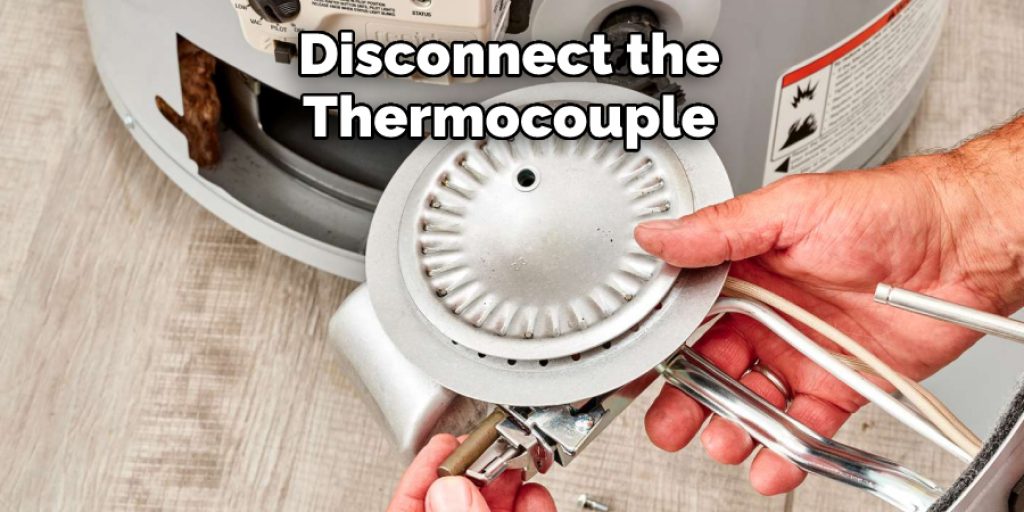
3. Unscrew and Remove the Old Thermocouple
Once disconnected, use a wrench or adjustable pliers to carefully unscrew and remove the old thermocouple from its position in the gas valve. Be careful not to damage any other parts as you are doing this. Otherwise, you may have to replace other parts in the water heater.
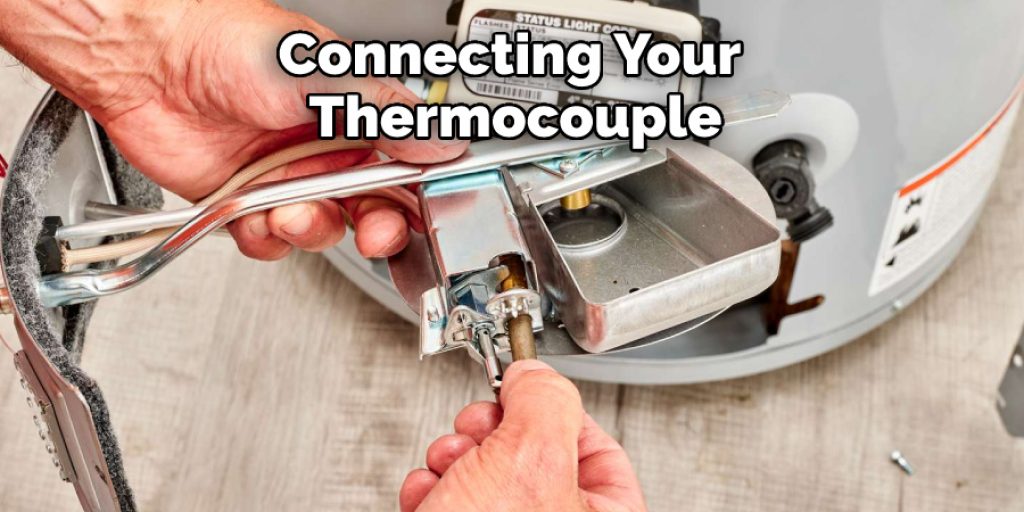
4. Install New Thermocouple
Take your new thermocouple and carefully screw it into the gas valve. Make sure that you tighten it firmly but not too tightly, as this could damage the parts. Moreover, you want to make sure that the new thermocouple is inserted properly so that it can accurately measure the temperature of the water heater.
5. Connect New Thermocouple to Gas Tube
Reattach your new thermocouple to the gas tube connected to your water heater by attaching and tightening the screws located on either side of the thermocouple. Again, be careful when handling the gas tube, and make sure that you don’t overtighten anything or cause any other damage. Don’t forget to check the connections for any leaks.
6. Turn On the Gas Supply
Once everything is in place, turn on the gas supply to your water heater by turning the gas valve located on the unit clockwise until it clicks into place. Be careful when doing this as you don’t want to cause any gas leaks. If you smell gas or have any other safety concerns, turn off the gas supply immediately and contact a professional for help.
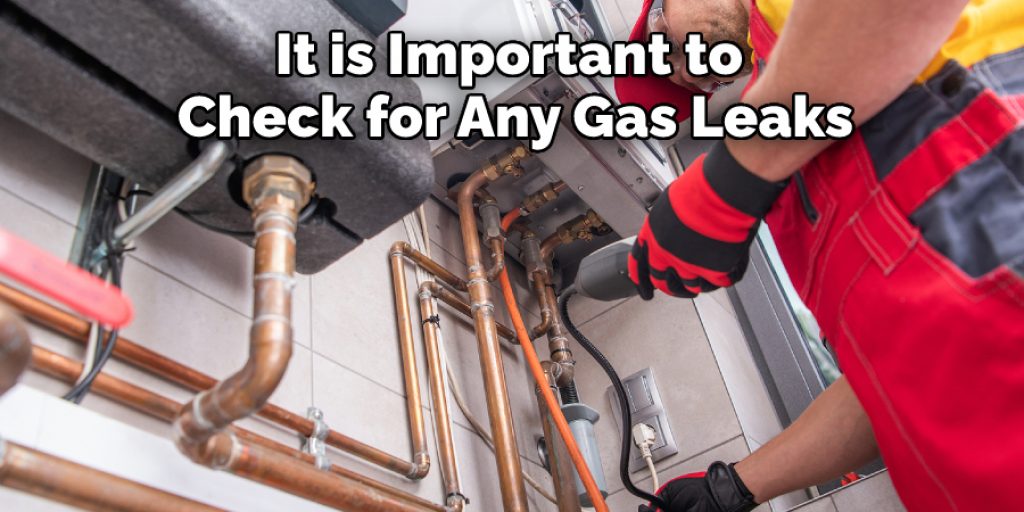
7. Test for Gas Leaks
It is important to check for any gas leaks before you turn on your water heater. To do this, mix a soap and water solution and brush it over your thermocouple and gas valve joints. If there are any bubbles forming around the joints, this indicates a gas leak present and you should contact a professional plumber or service technician as soon as possible.
8. Turn On the Water Heater
Now that all safety checks have been done, it’s time to turn on the water heater! Make sure to double check that all connections are secure again before turning on the unit. The water heater will take a few minutes to reach its normal temperature.
9. Test Temperature Settings
Once the water heater has been turned on, make sure to check the temperature settings to make sure that everything is working. You can do this by running a few tests on how hot or cold the water is coming from your faucets. Additionally, you can adjust the temperature settings as needed.
10. Enjoy Hot Water Again
If all of these steps have been followed correctly, you should now be able to enjoy hot water in your home again! Make sure to test the thermocouple regularly and replace it every 3-5 years, depending on how often it is used. This will ensure that your water heater functions like new for many years to come.
Replacing a thermocouple on a water heater doesn’t have to be a complicated process. With these simple steps and some basic safety precautions, you can get your water heater up and running in no time. Happy DIYing!
5 Additional Tips and Tricks
- Make sure to purchase a thermocouple that is the correct size for your water heater. The wrong size could cause the pilot light to go out and the heater to malfunction.
- If you are replacing an old thermocouple, take a photo of how the wires are connected so that you can easily connect them back in the same way once the new one is installed.
- Make sure all the wiring and connections are tight before screwing in the new thermocouple. Loose connections could result in a faulty connection leading to improper operation of your water heater.
- Take note of how much gas is released when disconnecting or connecting your thermocouple, as too much gas can be dangerous and cause fire hazards.
- Have a professional inspect your water heater at least every two years to ensure that everything is in proper working order for optimal performance and safety.
With these tips and tricks, you can successfully replace your water heater’s thermocouple. Be sure to follow the instructions carefully and double-check all connections for a safe and effective installation.
5 Things You Should Avoid
- Do not attempt to replace the thermocouple on your water heater if you are unfamiliar with how to do so correctly. It is best to call a professional for assistance in order to ensure that the job is done properly and safely.
- Do not overtighten any of the connections, as this could cause damage or result in a faulty connection.
- Never try to light the pilot light without first waiting at least five minutes after turning off the gas supply. This will allow enough time for any excess gas to dissipate and reduce the risk of fire or explosions caused by an accumulation of gas within your water heater.
- Do not use tools other than what is recommended when replacing your thermocouple, as this could cause damage to the water heater.
- Do not ignore any warning signs that your water heater is malfunctioning in any way, such as strange noises or an insufficient flow of hot water. Have a professional inspect your unit if you suspect any issues with how it is functioning.
By following these tips and avoiding these common mistakes, you should have no problems replacing your thermocouple on a water heater safely and effectively.
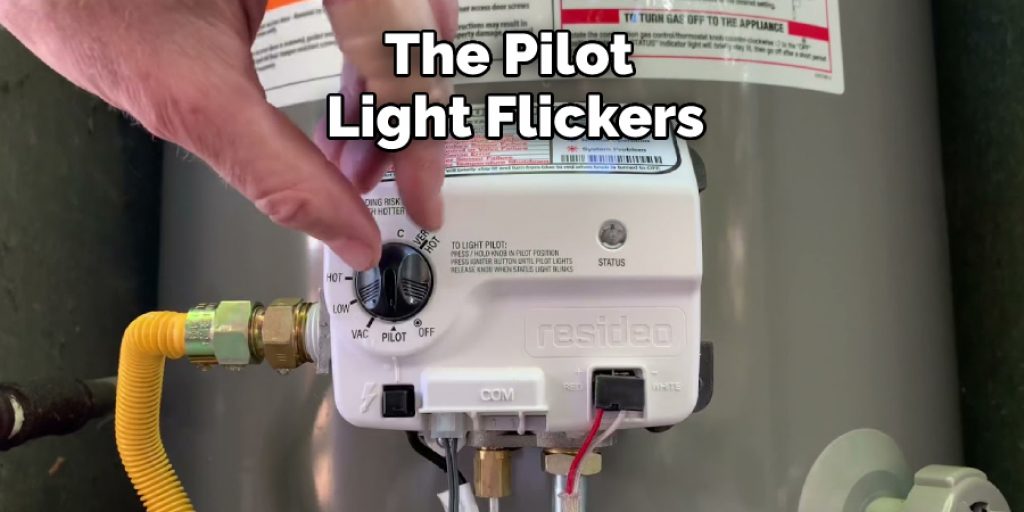
How Do You Know if Your Thermocouple is Broken?
Knowing the signs indicating you need to replace your thermocouple is important. Look out for these common symptoms:
- The pilot light flickers and won’t stay lit
- The hot water supply is inadequate
- Strange noises emitting from the unit
- The water heater is not turning on/off as it should
If any of these symptoms are present, it may be time to replace the thermocouple in your water heater. Alternatively, have a professional inspect your unit to determine if another issue could be at play.
By replacing your thermocouple regularly (every 3-5 years, depending how often it’s used) and following the steps outlined in this article, you can ensure that your water heater runs smoothly and efficiently for years to come.
Conclusion
In conclusion, how to replace a thermocouple on a water heater is not the most difficult task. However, it is important to be prepared before tackling such an endeavor. Having the right tools and following the right steps can make all the difference in having a successful project. Also, ensure that you follow manufacturer instructions and safety protocol while working with gas components.
Once you’re finished, use a multimeter to test your work. Doing all of this will help ensure that you have a properly working water heater so that you and your family can enjoy hot showers for years to come! Lastly, if you feel overwhelmed or uncomfortable at any time in the process, it is best practice to contact a certified plumber or Heating technician for help.
All in all, making sure your water heater job is done safely and efficiently is worth taking extra care with every step of the process.
Angela Ervin
Angela is the executive editor of DIY quickly. She began her career as an interior designer before applying her strategic and creative passion to lifestyle and home. She has close to 15 years of experience in creative writing and online content strategy for housekeeping, home decorations as well as other niche efforts. She loves her job and has the privilege of working with an extraordinary team. She lives with her husband, two sons, and daughter in Petersburg. When she's not busy working she spent time with her family.