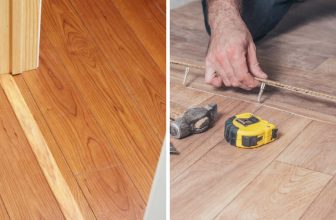
How to Replace Flooring Under Cabinets
Replacing or installing new flooring can transform the entire look of your house. However, the process can seem overwhelming and intimidating when it comes to replacing flooring beneath cabinets. It is essential to avoid damaging your cabinets while still getting a professional and satisfactory result. In this guide, we will provide you with a step-by-step process on how to replace flooring under cabinets.
Can You Replace the Flooring Under the Cabinets?
We all have that one room in our house that we would love to renovate, but we’re unsure if it’s even possible. If you’ve been considering replacing the flooring in your home but have hesitated because your cabinets are already in place, we have good news for you! It is possible to replace the flooring under your cabinets.
While it may seem daunting, with the right tools and a little know-how, you can install a brand-new floor without having to remove any of your cabinetry. Not only will this give your home a fresh new look, but it will also increase the value of your property. So, go ahead and take the first step towards transforming your space and start planning your flooring renovation today!
Why Should You Replace Flooring Under Cabinets?
Upgrading your home’s flooring can be daunting, and it becomes even more complicated when you have cabinetry and appliances that need to be moved around. However, replacing flooring under your cabinets is essential to maintain the look and health of your house.
First and foremost, it expands the lifespan of your flooring by ensuring that there are no weak spots or loose ends that can gradually damage the surface. Additionally, removing the cabinets before laying new flooring allows you to inspect the subfloor for mold or water damage.
The subfloor’s integrity is vital for the evenness of your flooring, and a faulty foundation can lead to further problems. Finally, replacing the flooring under your cabinets provides an excellent opportunity to change your home’s decor and add value to your property. You can create a more modern or classic look that reflects your personality and style with a wide range of materials and designs.
A Step-by-Step Guide on How to Replace Flooring Under Cabinets
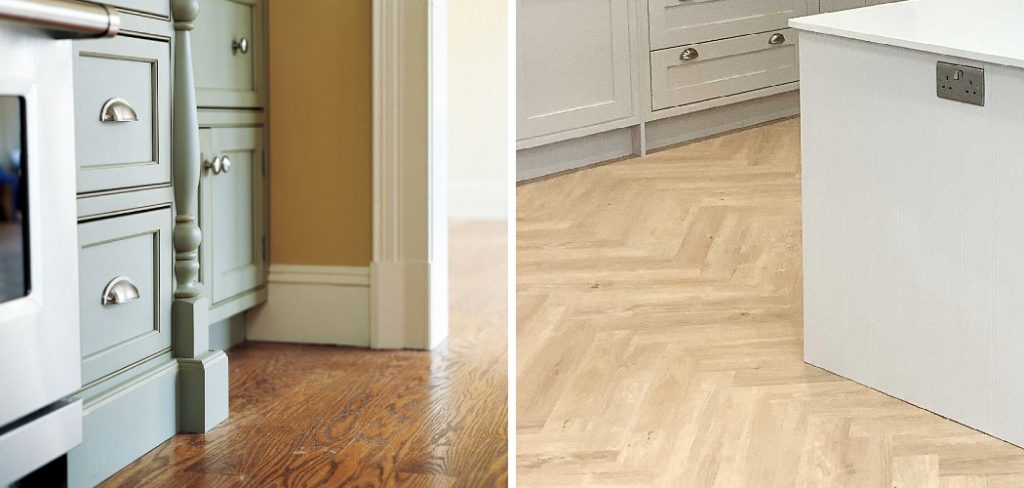
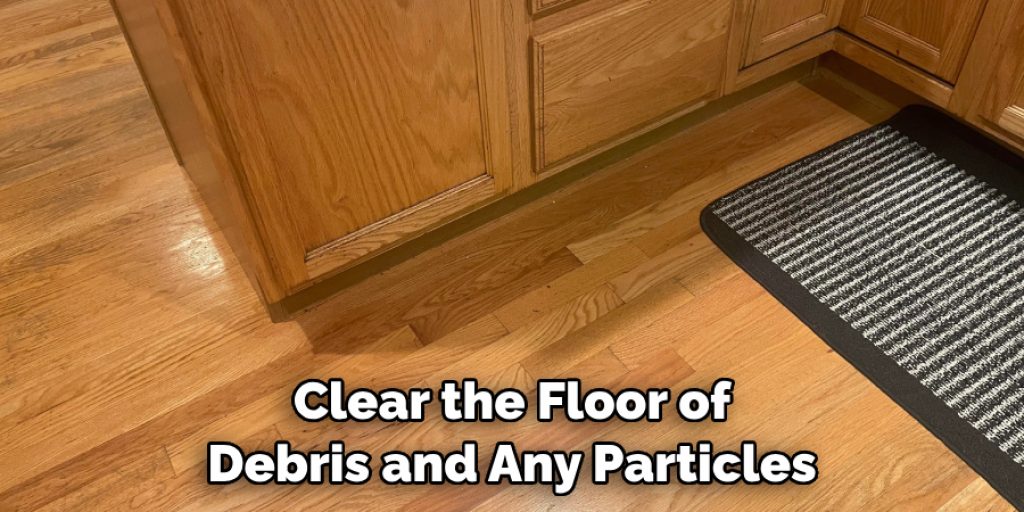
Step 1: Empty Your Cabinets and Clear the Floor
The first step when replacing your flooring under the cabinets is to clear them out. Remove all the items in your cabinets to avoid damage or disruptions. Remove the toe kick from the cabinets to expose the subfloor. This will allow you to access the area below the cabinets and the subfloor surface. Clear the floor of debris and any particles that might affect the installation process.
Step 2: Removing the Existing Flooring
Remove the old flooring around the perimeter of the cabinetry by using a utility knife. Cut the old flooring into sections to avoid tearing the surface or compromising the subfloor. If you have glued the flooring to the subfloor, you must remove it carefully using a heat gun or chemical remover. A reciprocating saw may be useful if the flooring runs beneath a wall or other immovable object.
Step 3: Measure and Cut the New Flooring
After removing the old flooring around the perimeters of the cabinets, measure the area you need to replace precisely. Use a coping saw or jamb saw to remove the flooring under the cabinet’s toe kick. Measure the height of the existing flooring and cut the new flooring material to match the same height. Add an extra ¼ inch on each side to ensure a perfect fit under the cabinets that would still allow air to flow out.
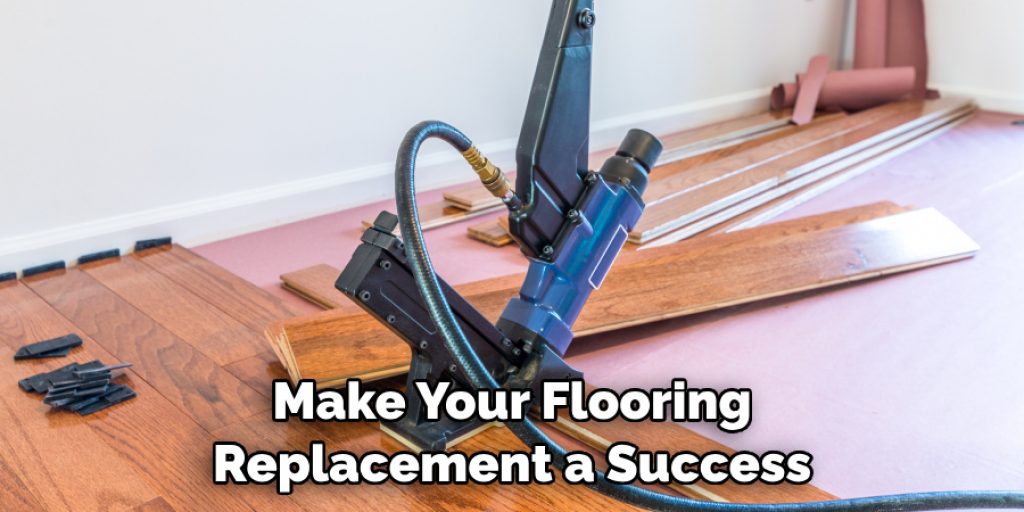
Step 4: Install the New Flooring
Once you have cut the new flooring material to size, it is time to install it under the cabinets. Make sure the subfloor is clean and free from any debris or contaminants. Start by laying the new flooring into place, ensuring it fits snugly around the cabinets’ perimeter and the toe kick. Staple or glue the flooring into place according to the manufacturer’s instructions. Install the toe kick back into place and reattach any plumbing or outlets to ensure a perfect finish.
Step 5: Finishing Touches
After installing the new flooring, check for any gaps or misalignments. Add caulking along the edges of the cabinets and flooring to create a seamless finish if needed. Sand down any rough edges or bumps on the new flooring, and clean up any excess glue or debris. Once everything is dry, you can put the items back in your cabinets.
Step 6: Final Inspection
Once everything is installed, it is crucial to do a final inspection. Check for any gaps or inconsistencies and make necessary adjustments. Ensure the flooring is level and flush with the rest of the room. If there are any visible gaps between the flooring and cabinets, you can use quarter-round molding to hide them.
Step 7: Maintenance and Care
To keep your new flooring looking its best, it is essential to maintain and care for it properly. Regularly sweep or vacuum the area under the cabinets to remove any dirt or debris that can cause scratches or damage. Wipe up any spills immediately and avoid using harsh chemicals on your new flooring. With proper care, your new flooring will last for years to come.

Congratulations! You have successfully replaced the flooring under your cabinets. You can achieve a professional and seamless look without damaging your cabinets by following these steps. Remember to take your time and be careful during the process to get the best results.
Some Considerations Things When You Need to Replace Flooring Under Cabinets
Replacing the flooring under cabinets can be daunting and requires serious considerations. Firstly, the type of flooring you choose should be strong and durable, capable of withstanding the weight of heavy cabinets.
Additionally, you must ensure that the new flooring height matches the cabinets’ height, ensuring they remain at the correct level. It’s also important to evaluate the type of subflooring you have, as it may need to be replaced or reinforced to support the heavy cabinets.
Finally, choosing a flooring material that complements your existing kitchen decor is crucial to achieving a cohesive look. Understanding these considerations will make the flooring replacement process smoother and result in a beautiful and functional kitchen.
5 Benefits of Replacing Flooring Under Cabinets
1. Easier Cleaning
Replacing the flooring under cabinets can make it easier to clean the area. This is because it eliminates the gap between the cabinet and the floor, which can be difficult to reach with a vacuum or mop. Replacing the flooring will also help reduce dust accumulation in this area, making it easier to keep clean.
2. Improved Aesthetics
Replacing the flooring under cabinets can also improve the overall aesthetics of your kitchen or bathroom. By replacing outdated or worn-out flooring with a more modern material, you can instantly update and refresh the look of your space. This is especially important if you plan on selling your home, as potential buyers will appreciate an updated look and feel.
3. Increased Safety
Replacing old or damaged flooring under cabinets can also increase safety in your home. Loose tiles or warped wood floors can become slippery when wet, creating a hazard for anyone walking in that area. Replacing these materials with new ones will help reduce slipping and tripping hazards in your home, ensuring everyone stays safe while walking around your kitchen or bathroom.

4. Better Insulation
Replacing old flooring under cabinets can also improve insulation in your home. Old tile or wood floors may have gaps that allow cold air from outside to enter your home during winter, resulting in higher energy bills as you try to keep your house warm. By replacing these materials with newer ones that fit together tightly, you can reduce heat loss and save money on monthly energy costs.
5. Improved Air Quality
Finally, replacing old flooring under cabinets can also help to improve air quality in your home by reducing dust accumulation and trapping allergens like mold spores and pet dander beneath them where they cannot circulate throughout the air inside your home.
This is especially important for people with allergies or asthma as it helps them breathe better indoors without worrying about triggers such as dust particles floating around their living space.
Some Common Mistakes People Make When Trying to Replace Flooring Under Cabinets
Replacing the flooring under cabinets can be quite an undertaking, especially if not done correctly. Unfortunately, many homeowners make some common mistakes, such as not removing the cabinets first or not leaving enough room for the new flooring to settle.
Not only does this make the process longer and more complicated, but it can also lead to costly damages. Planning meticulously before beginning the project is crucial, including measuring the space, researching compatible flooring options, and preparing the area for installation.
Taking these small steps can save you a lot of headaches and money in the long run. So, whether you’re a DIY enthusiast or hire a professional, avoid these common mistakes to make your flooring replacement a success.
Conclusion
Replacing the flooring under your cabinets does not have to be a daunting process. It requires proper planning, preparation, and execution. Follow the simple steps mentioned above to ensure a successful installation that will transform your home. Remember, take your time, follow the manufacturer’s instructions, and use the right tools to achieve a more professional finish. Thanks for reading our post about how to replace flooring under cabinets.
Angela Ervin
Angela is the executive editor of DIY quickly. She began her career as an interior designer before applying her strategic and creative passion to lifestyle and home. She has close to 15 years of experience in creative writing and online content strategy for housekeeping, home decorations as well as other niche efforts. She loves her job and has the privilege of working with an extraordinary team. She lives with her husband, two sons, and daughter in Petersburg. When she's not busy working she spent time with her family.