
How to Seal Acrylic Paint for Outdoor Use
Do you love painting outdoors but find your work is fading too quickly? Fear not! This blog post will show you how to seal acrylic paint for outdoor use. The key to a long-lasting finish is using the right acrylic paint and taking care of it once it’s dry.
In this article, we’ll cover everything from what materials are necessary to how often to reseal your paintings, so they last for years. So whether you’re an avid artist or just starting, this is an excellent resource for all things related to sealing acrylics!

Summary: To keep acrylic paint from fading and staining in the sun, you can seal it with a coat of clear or tinted sealant. Clear sealant is best for light colors, while tinted sealant is best for darker colors. Apply the sealant in a thin coat using a brush or spray bottle. Let the paint dry completely before using.
8 Reasons Why You Should Seal Acrylic Paint:
- To change the color of a paint that has changed tone after drying. For example, acrylic paints will naturally darken as they dry. You can prevent this by sealing them with a clear acrylic sealer before exposing them to UV rays from the sun or fluorescent lighting.
- Paint may fade, bleed and lose its opacity when exposed to moisture and UV rays. You can minimize this by adding a sealer on top of your acrylic paintings
- Minimize the absorption of oil from oil-based paints when using an acrylic painting
- To achieve a hard, abrasion-resistant surface on mixed media projects such as collage or sculpting with plaster or clay
- To preserve the original color of mixed media projects when storing for an extended period
- For an added glossy effect to your paintings or drawings, especially if you are using handmade paper, pastels, or charcoal. You can also use this technique to achieve an opaque look on top of watercolor paintings without having the report turn yellow from the layers of paint over time
- To add a protective layer on top of acrylic paintings when varnishing will not do, such as when working with delicate surfaces, photographs, and assorted materials. You can also use this technique to seal finger paints for children’s art projects.
- Prevent oil paints or oil pastels from bleeding through the painting or paper when applying them to a textured surface. You can also prevent paint from seeping into handmade pieces, fabrics, and other porous surfaces.
12 Ways on How to Seal Acrylic Paint for Outdoor Use:
Here is the step-by-step guide on how to seal acrylic paint for outdoor use. If you follow any of these methods, you’ll have a nice coat of clear acrylic sealer that will last for years.
You Can Check It Out to Make Orange Paint Darker
1. Use an Acrylic Varnish
You can use double-sided tape to attach the glass to the frame. This is a temporary solution if you need to replace your glass, but it can also be useful for small pieces that don’t require a lot of force to come off. There are many types of double-sided tape available, so you can choose the one that best suits your needs.
2. Use a Water-Based Polyurethane
Outdoor finishes come in two types: matte and glossy. They provide a tough, durable barrier to the elements and are suitable for use on non-porous surfaces like glass or metal. However, they are not so great for porous surfaces like wood since they may be yellow over time.
3. Use a Low-VOC Water-Based Epoxy
Epoxy finishes come in 2 parts and must be mixed before application. The first part is the epoxy itself, and the second is a hardener. You need to mix the two parts together to activate the epoxy. Apply two coats of epoxy using a high-quality brush. A good quality exterior epoxy costs about $35 a gallon.
4. Use Oil-Based Stain
Oil-based stains are made with either alkyd or modified alkyd resins and oil. They provide excellent color but will darken the wood slightly over time. These paints dry relatively quickly to a hard finish that resists water penetration. They are available at home centers and paint stores.
5. Use a Gel Exterior Varnish
Gel varnishes come in varying levels of clarity, from transparent to opaque. They last longer than regular exterior varnish, but need multiple coats and a long time to cure. If you’re looking for a transparent finish, the gel is your best bet since it penetrates deeper than other varnishes.
6. Use a Latex Stain
Latex stains come in semitransparent and opaque finishes and can be applied to wood decks, concrete patios, and masonry. They dry fast, so they’re easy to use without waiting for one coat to dry before applying the next. Latex stains are water-soluble, so clean-up is quick with soap and water.
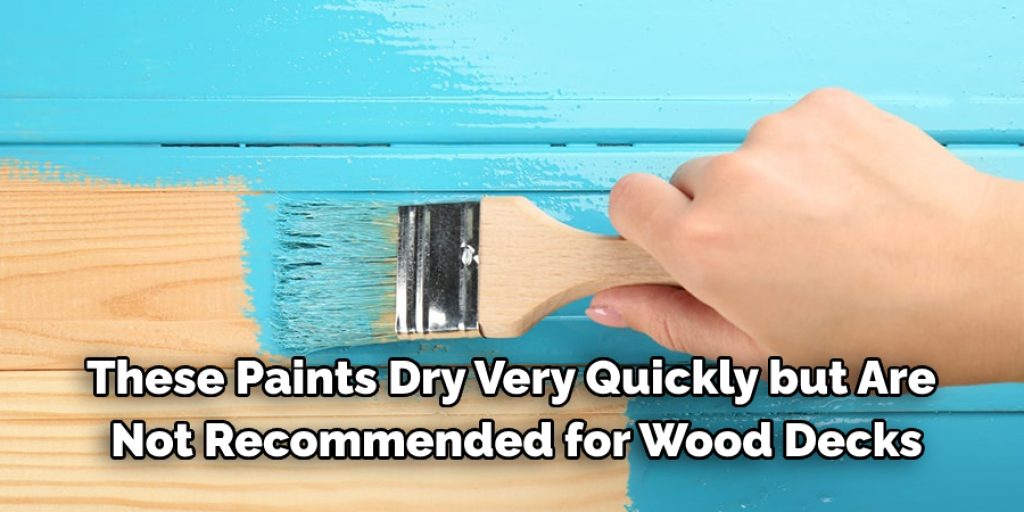
7. Use an Acrylic Latex Paint
Paints that contain latex come in different finishes, such as satin, semigloss, or gloss. You can also find them in paint/primer combos. These paints dry quickly, but they are not recommended for wood decks because they do not protect against water penetration..
You Can Check It Out to Paint Air Force Ones With Acrylic Paint
8. Use an Oil-Based Exterior Paint
Oil-based paints come in both matte and semigloss finishes. These paints are thick and can be opaque or transparent depending on the sheen, which is determined by how much oil is mixed. Oil paint takes longer to dry than latex, but it offers excellent protection against water penetration. They’re great for anywhere you might see a little moisture, such as pool decks or patios.
9. Use a Clear Wood Finish
Clear wood finishes, which are often called oil varnishes, come in thinned and undiluted finishes. These finishes penetrate deep into the wood’s pores, leaving a thin layer that has good water resistance and durability. They’re popular because they offer a tough finish without compromising the wood’s natural beauty.
10. Use Water Repellent Stain
Water-repellent stains are ideal for protecting wood decks, patios, fences, and other surfaces that get a lot of exposure to the sun. They contain silicone, which fills in pores and grain, so water can’t penetrate as easily. They also have ultraviolet light inhibitors to slow down the breakdown of the stain and paint due to the sun.
11. Use an Acrylic Coating
Clear acrylic or polyurethane coatings offer good protection against water penetration, fading, and blistering due to moisture. You can apply them with a brush or roller on new wood, but it’s best to pressure wash first since they won’t soak into bare, dry wood if the wood is older than six months. epoxy resin
If you’re applying the coating inside your home on furniture, be aware that these products release some odors, so they need to be used in well-ventilated areas.
12. Use a Deck Oil Finish
Oil finishes are used to protect wood from moisture and damage. They come in two types: semitransparent and transparent. Semitransparent oil finishes penetrate deep into the wood, leaving a thin layer that resists moisture but doesn’t offer good protection against UV damage or water stains. Transparent oil finishes also penetrate deep into the wood, but they leave a thicker layer that offers better protection against UV damage and water stains.
These finishes are often combined with penetrating stains for a different look and with provide better protection. Oil finishes can take weeks or months to cure, so storing them in a shaded, cool area is best.
Conclusion:
With all the great projects you have lined up to paint outdoors, you must seal your acrylic paints before painting. If not appropriately sealed, outdoor acrylics may fade in a matter of weeks or months, depending on their exposure and how much UV light they’re exposed to. So don’t forget this step when prepping for your next project!
Remember to use one coat only no need for more than that as these products are designed for durability and protection from weathering effects such as fading and chalking. Just make sure it dries completely before applying another layer; we recommend waiting at least 48 hours after application before doing another coat.
We hope this blog post on how to seal acrylic paint for outdoor use has been helpful. Let us know your thoughts in the comment section below!
Elizabeth Davis
Elizabeth is a creative writer and digital editor based in the United States. She has a passion for the arts and crafts, which she developed from a young age. Elizabeth has always loved experimenting with new mediums and sharing her work with others. When she started blogging, she knew that DIYquickly would be the perfect platform to share her tutorials and tips. She's been writing for the blog from the beginning, and her readers love her helpful advice and easy-to-follow instructions. When she's not writing or editing, Elizabeth enjoys spending time with her family and friends.


