How to Take Apart a Delonghi Air Conditioner
Introduction:
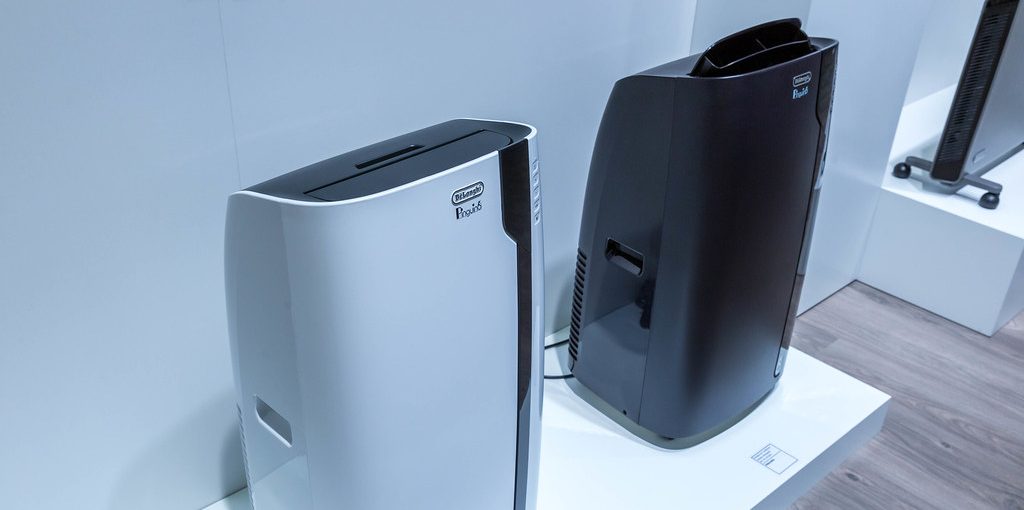
A Delonghi air conditioner is a unique heating and cooling system that operates both as an air conditioner or heat pump and a furnace in one unit. It was developed by the Delonghi Company in Italy and first manufactured for sale in 1996. The company now sells its products around the globe. Since this article focuses on how to take apart a Delonghi air conditioner unit, we will be discussing all these units. So, let us get started.
12 Step-wise Guide How to Take Apart a Delonghi Air Conditioner:
Step 1: Tools You Need
The tools we use for this job are a small flat-head screwdriver, a Philips head screwdriver, a power drill with steel core bits, and a 7/32 inch diameter carbide bit for making a hole in the wall. With these tools, you can easily take apart Delonghi Air Conditioner by yourself.
You will also need a ladder, a drop cloth (to avoid damage to your floor), and tape to label the screws for easy reassembly. It is also recommended to have a helper, as some parts of the unit might be heavy and difficult to maneuver by yourself.
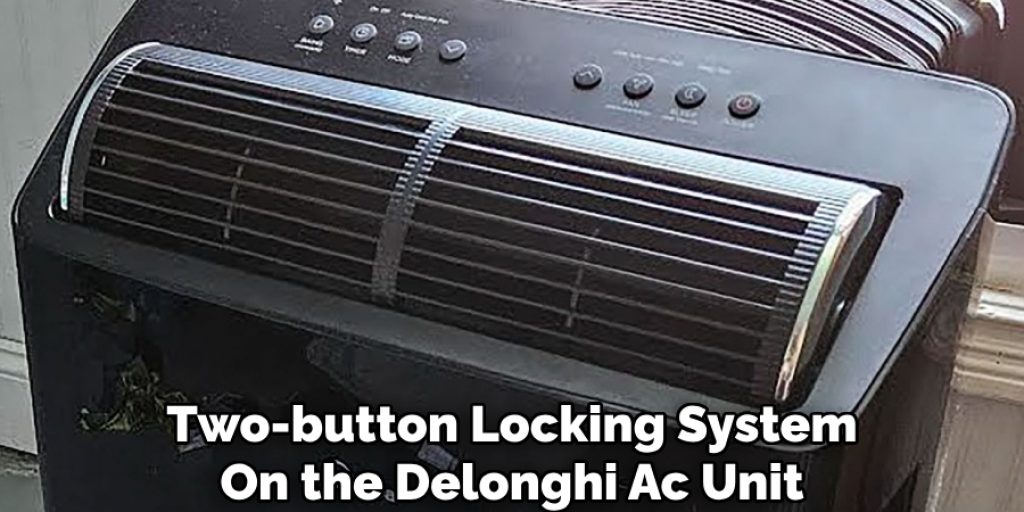
Step 2: Opening the Unit
There is a two-button locking system on the Delonghi AC unit to keep it safe from unauthorized repair work. Flip those two button-ups so they no longer lock the unit in place, then slide off the cover of your Air Conditioning Unit. You will be looking at something like this once you have removed the upper panel. Here there are two cables and a power switch. Disconnect the wires from their respective location.
But before you do it, take a picture of the wiring and connections for future reference. This will help you reassemble the unit correctly. You can also label the wires so that you remember their positions while reassembling.
Step 3: Remove the Front Panel
The next step is to remove the front panel of the Delonghi unit. To do this, you will have to unscrew the screws that hold it in place using a Philips head screwdriver. It is recommended to keep all the screws together and label them so they go back into their original positions.
Once you have unscrewed the front panel, gently lift and remove it. Be careful not to damage any of the components while removing the panel.
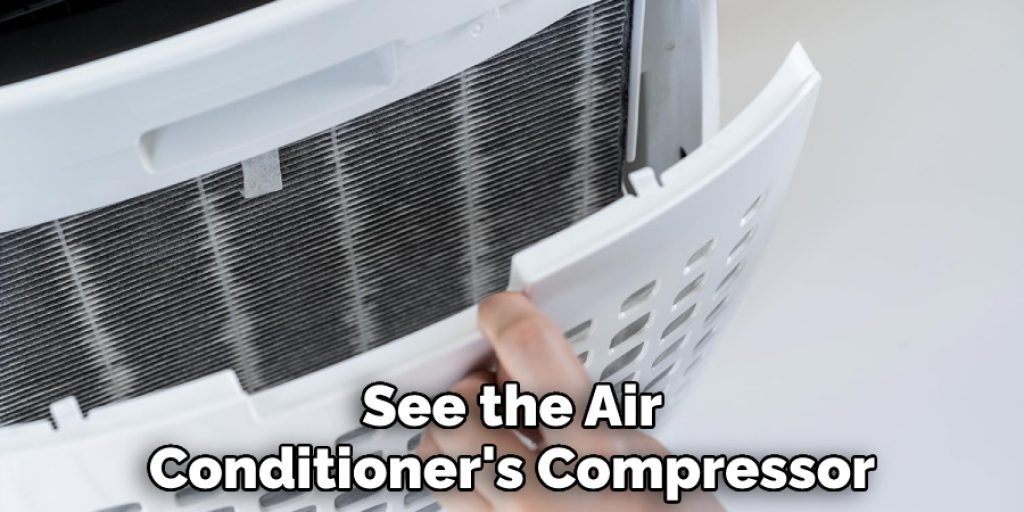
Step 4: Removing the Air Filter
The air filter is located behind the front panel and can be easily removed by sliding it out from its designated slot. Gently clean the air filter with a mild detergent and warm water and let it air dry before reassembling it back into the unit.
You can also check if the filter needs to be replaced or not. If it is damaged or too dirty, it is recommended that it be replaced with a new one. The air filter is an important component that ensures clean and fresh air circulation in your room, so it is important to keep it well-maintained.

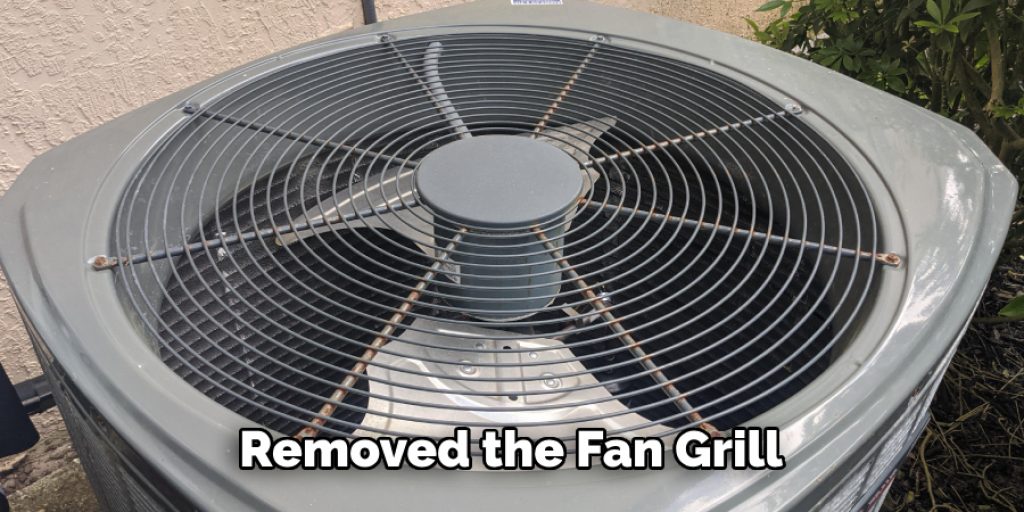
Step 5: Removing the Fan Grill
The next step is to remove the fan grill, which covers the fan blades. To do this, unscrew the screws located on either side of the grill using a Philips head screwdriver. Once unscrewed, gently lift and remove the grill.
It is important to clean the fan blades at least once a year to ensure proper airflow and prevent any potential damage to the unit. You can use a soft cloth or brush to clean the blades.
Step 6: Removing the Fan Motor
Once you have removed the fan grill, you will have access to the fan motor. Unscrew any screws that hold it in place using a Philips head screwdriver and carefully remove it from the unit.
Clean the fan motor with a dry cloth or vacuum cleaner to remove any dust or debris that might have accumulated. This will ensure the proper functioning of the motor and increase its lifespan. But if the motor is damaged, it is recommended that it be replaced with a new one.
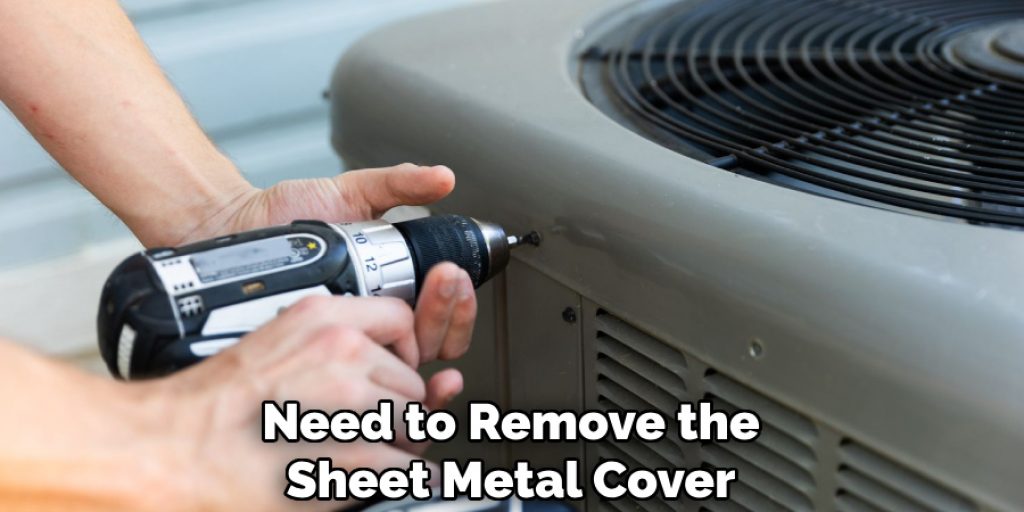
Step 7: Removing the Evaporator Coil
The evaporator coil is a vital component in the cooling process of your air conditioner. To access it, you will need to remove the sheet metal cover on top of it. Unscrew any screws holding it in place using a Philips head screwdriver and carefully lift and remove the cover.
Once you have access to the evaporator coil, clean it with a soft cloth or brush. You can also use a mild detergent solution to remove any dirt or debris that might be stuck on it. Make sure to rinse it thoroughly before reassembling it.
Step 8: Removing the Condenser Coil
Similar to the evaporator coil, you will need to remove the sheet metal cover on top of the condenser coil to access it. Unscrew any screws holding it in place using a Philips head screwdriver and carefully lift and remove the cover.
Clean the condenser coil with a soft cloth or brush, making sure to remove any dirt or debris that might have accumulated. You can also use a mild detergent solution to clean it thoroughly. Rinse and let it air dry before reassembling.
Step 9: Removing the Drain Pan
The drain pan collects any excess water from the cooling process and prevents it from dripping inside your room. To access it, you will need to remove the sheet metal cover on top of it.
Unscrew any screws holding it in place using a Philips head screwdriver and carefully lift and remove the cover. Clean the drain pan with warm water and mild detergent, then rinse and let it air dry before reassembling. The drain pan should be cleaned regularly to prevent any clogging or mold growth.
Step 10: Removing the Compressor
The compressor is responsible for compressing the refrigerant and pumping it through the system to cool the air. To access it, you will need to remove the sheet metal cover on top of it.
Unscrew any screws holding it in place using a Philips head screwdriver and carefully lift and remove the cover. Clean the compressor with a dry cloth or vacuum cleaner to remove any debris or dust that might have accumulated. You can also use a mild detergent solution to clean it thoroughly. Rinse and let it air dry before reassembling.
Step 11: Removing the Control Panel
The control panel contains the electronic controls for your air conditioner. To access it, you will need to remove any screws holding it in place using a Philips head screwdriver and carefully lift and remove the panel.
Clean the control panel with a damp cloth, making sure not to get any water inside the unit. Let it dry before reassembling. You can also use a soft-bristled brush to remove any dirt or debris from the buttons and display screen. It is important to keep the control panel clean and well-maintained for the smooth functioning of your air conditioner.
Step 12: Reassembling the Unit
Now that you have cleaned and inspected all the components of your Delonghi Air Conditioner, it’s time to reassemble everything back together. Make sure to follow the steps mentioned above in reverse order.
Refer to the pictures or labels you took earlier to correctly reconnect any wires and cables. Once everything is in place, secure the panels with screws and turn the power switch back on. Your Delonghi air conditioner should now be ready to use.
Remember to perform regular maintenance and cleaning of your air conditioner to ensure its optimal performance and longevity. This includes cleaning or replacing the air filter, checking and cleaning the coils, and inspecting the fan motor for any damage. By following these steps, you can keep your Delonghi air conditioner running smoothly for years to come.
Precautions While Taking Apart a Delonghi Air Conditioner:
1) Ensure that the AC is switched off and disconnected from the power source.
2) Unplug the wire connected to the earth terminal (Grounding Terminal); this step is important for safety precautions as one must not get electrocuted while working on the air conditioner. The wire connected to the ground terminal (the green-colored wire connected in between at least two wires with thick insulation – typically black, brown & blue, or red &blue; also look for a copper-colored earthing rod inside the unit, which can be used as an alternative grounding point.)
3) Preferably work away from water vessels; use a sander or any dusty material. Gloves should be worn while handling broken parts and keep them dry by wrapping them in cloth or paper while working on the AC.
4) Always wear safety glasses/goggles when dismantling any electrical or mechanical device: this step is indispensable as fragments of glass may fly off if a window breaks during disassembly and injure your eyes.
5) Take out the air filter before working on any device as there is a risk of dust, dirt and other pollutants being dispersed while dismantling which can be harmful to lungs.
6) Ensure proper ventilation in the room where you are working; avoid enclosed spaces with poor airflow. This will protect you from inhaling any harmful chemicals or fumes that may be present.
7) In case of any difficulties or uncertainties while disassembling your Delonghi air conditioner, it is recommended to seek professional help. Improper dismantling can cause damage to the unit and also pose a safety hazard.
8) Always refer to the user manual provided by the manufacturer for specific instructions and precautions related to your model of Delonghi air conditioner.
9) While cleaning the components, avoid using harsh chemicals or abrasive materials that can cause damage. Stick to mild detergents and soft cloths/brushes for effective yet gentle cleaning.
10) After reassembling your air conditioner, make sure to properly dispose of any old or damaged parts according to local regulations.
Common Issues With Delonghi Portable Air Conditioner:
Problem 1: the Air Conditioner Does Not Turn on
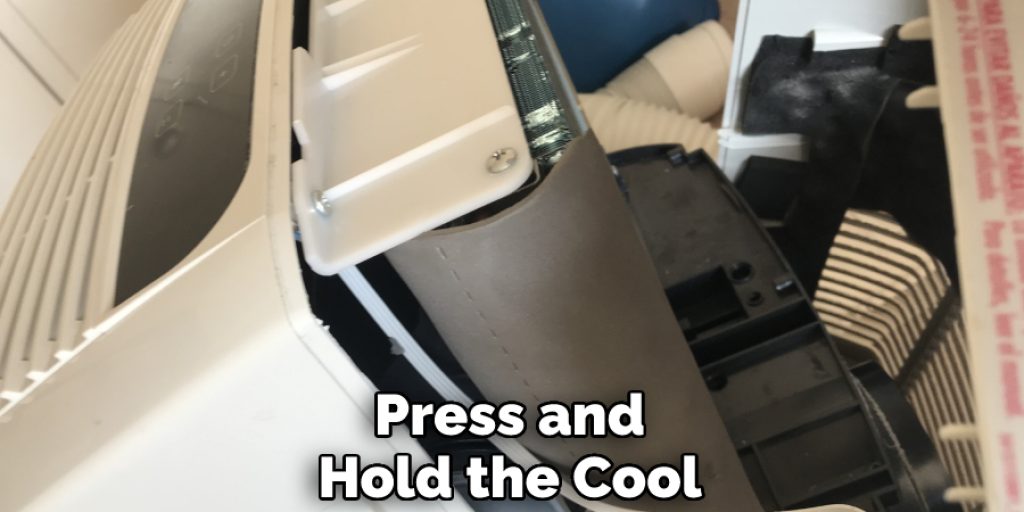
The remote control or power switch may have turned the unit off. Would you please verify that the On/Off button is illuminated when you press it? The unit may be in standby mode; please press and hold the Cool or Fan key for 2 seconds to activate your unit. If no lights are visible in front of your AC, check if there is power at the outlet with a lamp or other appliance plugged into it (Please note that this is very important as many do not believe it can happen, but I have seen several reviews where people are mad at how long their brand new units sat and waited to cool while they thought they were broken).
When replacing batteries, never use different types at one time. Always use the same type of batteries in the remote control and conditioner.
If your unit is not cooling or dehumidifying, a circuit breaker may have tripped in the condenser; please check before calling for service. Also, verify that all connections from the outdoor unit to the inside air handler are tightly secured and insulated against the ground when installed on a metal roof without a conduit tube.
Always run a cool cycle first to allow sufficient water evaporation, then follow with heat mode if needed.
Problem 2: The Air Conditioner Does Not Cool
Please set the unit to Cool mode and adjust your thermostat for maximum comfort. The air filter could be clogged: check and clean it as necessary. Also, verify that the vents are not blocked by any furniture or other obstructions.
If the above steps do not work, call for service. The refrigerant may need to be recharged or there could be an issue with the compressor. It is important to address this issue promptly as running a malfunctioning air conditioner can lead to further damage and higher repair costs.
Problem 3: Strong Fan Smell From AC and/or Remote Control
The strong smell (often like paint thinner) that comes from the Remote Control or Air Conditioner when turned on can be caused by dry air being sucked into the vents from indoor and outdoor units. This is typical in the Summer months when doors and windows are closed more often than in the winter months when homes are left closed all day. This smell will dissipate after a few minutes and is a normal operation.
This smell can also be caused by dust build-up on the airflow sensor located in the outdoor unit just below the evaporator coil, which kicks on when there is no airflow to move cool air around inside your home. Many people do not realize that this sensor also removes hot, humid indoor air from their house, causing condensation to form on it that drips into the drain pan.
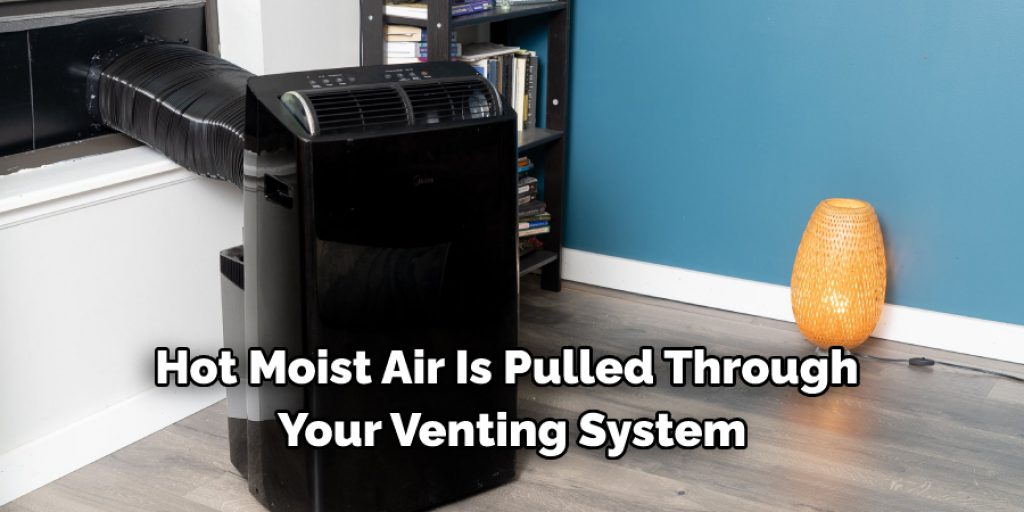
This hot, moist air is pulled through your venting system where dryer lint, dead skin, hair, etc., gets stuck on it, creating a perfect place for a fungus called “Legionella” to grow and release toxic chemicals into your home. So please do not turn off your unit as this will worsen over time and cause many potentially fatal illnesses. Please refer to the Legionella vent cleaning sheet included in this article for more information on properly cleaning these sensors, which should be done once every 6 months.
Frequently Asked Questions:
Q: Why is My Delonghi Portable Air Conditioner Not Cooling?
A: There could be several reasons for your AC not cooling, including a dirty air filter, blocked vents, or a malfunctioning compressor. Please refer to the section on common issues for detailed troubleshooting steps. If the issue persists, it is best to seek professional assistance. It is important to address cooling issues promptly as running a malfunctioning air conditioner can lead to further damage and higher repair costs.
Q: How Often Should I Clean the Air Filter on My Delonghi Portable Air Conditioner?
A: It is recommended that the air filter be cleaned once every two weeks during regular use. However, the frequency may vary depending on your environment and usage. It is important to regularly clean or replace the air filter as a clogged filter can restrict airflow and reduce the unit’s cooling efficiency.
Q: Can I Use Any Type of Chemicals or Cleaners to Clean My Delonghi Portable Air Conditioner?
A: No, it is not recommended to use harsh chemicals or abrasive cleaners on your AC as they can damage the components. It is best to stick to mild detergents and soft cloths/brushes for effective yet gentle cleaning. Always refer to the manufacturer’s user manual for specific instructions and precautions.
Q: Can I Dismantle My Delonghi Portable Air Conditioner Myself?
A: It is not recommended to dismantle your air conditioner without professional assistance. If you need to clean or replace any parts, refer to the manufacturer’s user manual for specific instructions. Always make sure to disconnect the unit from power before attempting any maintenance or repairs. Improper dismantling can cause damage and void your warranty.
Conclusion:
Finally, I hope you have obtained a clear conception of how to take apart a Delonghi air conditioner. Ensure proper safety while dismantling the air conditioner. Thank you and have a nice day!