How to Take Good Shower Pictures
Do you enjoy taking pictures? Want to take stunning photos of your shower experience? If so, this article is for you! We’ll discuss ways how to take good shower pictures and make sure your bathroom selfies are unforgettable. The key to taking good shower pictures is to use natural light. If you are in a dark bathroom or have not turned on any lights, make sure that at least one window nearby where the morning sunlight shines through.
Make sure your phone camera settings are set to take photos with better lighting and fewer shadows by switching your phone’s camera mode from auto to manual. You can also try using apps like Lightroom or Photoshop Express (Android), which allow you more control over different aspects of your photo, like exposure, contrast, saturation, brightness, highlights, and shadows. Read on to learn more about taking a good shower picture.
What Does a Good Shower Picture Look Like?
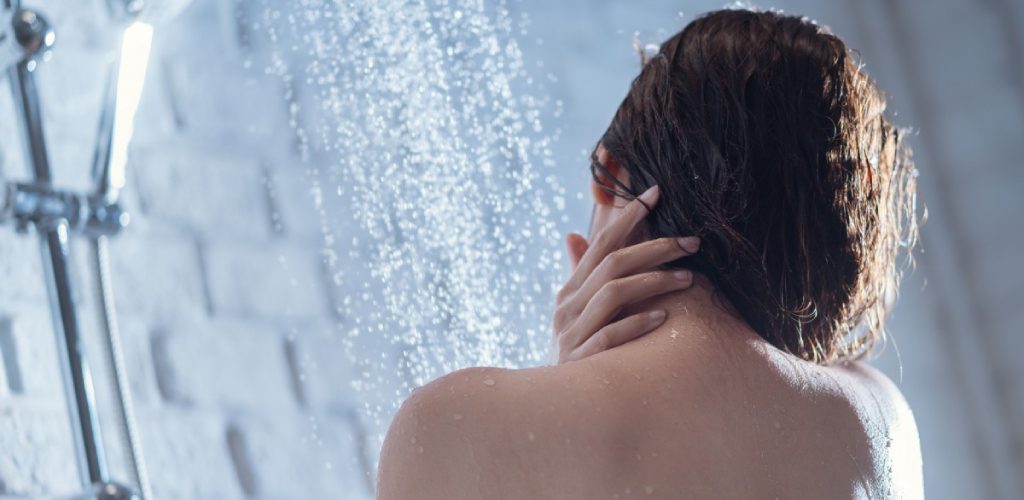
A good shower picture would be one that captures the essence of your experience while taking a shower. It should convey the feeling and mood in the moment, whether it’s relaxation or invigoration. The water droplets, steam, and lighting all contribute to creating a visually appealing image. You want your shower pictures to evoke emotion and tell a story.
The shower itself can also be a great subject for your photos. Get creative with angles and perspectives to capture the shape, texture, and design of your shower. You can also include props such as candles, plants, or bath products to add visual interest to your pictures.
Why Take Shower Pictures?
Some may wonder why anyone would want to take pictures of themselves in the shower. The answer is simple – it’s a unique and intimate experience that can be captured in a beautiful way through photography. Plus, with the rising trend of self-care and mindfulness, more people are embracing the idea of documenting their self-care routines.
You can also use shower pictures to showcase your bathroom decor, especially if you have invested time and effort into creating a cozy and aesthetically pleasing space. It’s a way to show off your style and personality while also incorporating self-care into it.
Needed Materials:
To take good shower pictures, you will need a few essential materials:
A Phone or Camera With a Good Quality Camera (at Least 8mp):
First and foremost, you will need a phone or camera with a good quality camera. It doesn’t have to be the latest model, but it should have at least 8 megapixels (mp) for decent image resolution. This will ensure that your pictures are clear and sharp, even when zoomed in.
Natural Light:
As mentioned earlier, natural light is crucial for taking good shower pictures. Make sure your bathroom has a window nearby or that you can bring in natural light through an open door or skylight.
Towels or Shower Curtain:
Towels and shower curtains can add texture and color to your photos. Experiment with different colors and patterns to see what works best with your overall aesthetic.
Props:
As mentioned earlier, props can add visual interest to your shower pictures. Some ideas include candles, plants, bath products, and even raindrops or flower petals.
10 Methods on How to Take Good Shower Pictures:
Here are ten methods on how to take good shower pictures. Follow these methods, and you will be able to take good awesome shower pictures.
1. Lighting
Lighting is key to taking good shower pictures. Because the subject of your photo will be wet and often shiny (if they’re covered in soap), it can be tricky to get good lighting on them without washing out the picture. If you want an underwater effect, try using a flashlight or other small light source as a backlight to separate your subject from the backdrop of the tub.
You can also try diffusing the light by placing a white sheet or shower curtain between the light source and your subject. This will create softer, more flattering lighting. It’s all about experimenting and finding what works best for your specific setup.
2. Keep It Clean!
Shower curtains are the enemy. Instead, try using a dark towel over the curtain or hang up some extra Shower curtains behind you to block them out. You can also use the edge of towels where they meet on the floor in front of your shower to create a more solid background or use a dark shower mat.
It’s also essential to clean your shower before taking pictures. No one wants to see a dirty shower in their photos. Plus, it will make your space more visually appealing and create a better overall aesthetic.
3. Use a Camera Phone With a Wide-angle Lens
Phone cameras have relatively small sensors, so they will have difficulty focusing on your subject from far away if there is little contrast between the back and front of the issue. Therefore, avoid using rear lenses whenever possible. Instead, use a camera phone with a wide-angle lens to capture more of the shower and create a sense of depth in your photos.
You can also use the front-facing camera on your phone, but the quality may not be as good. If you have a DSLR or mirrorless camera with a wide-angle lens, that would work even better. The key is to capture as much of the shower space as possible while also keeping your subject in focus.
4. Use a Tripod
No special equipment is required, but you will need to be very steady to get a sharp picture; even the slightest movement in your hand can ruin a photo. A tripod will also allow you to shoot from farther away and create an underwater effect since you won’t have to get as close to it. You can also purchase a waterproof phone case or use a waterproof camera if you want to get closer without worrying about water damage.
You can also use a makeshift tripod by using items like books, boxes, or even the edge of your bathtub. Just make sure whatever you use is stable and won’t fall into the water. It’s also a good idea to wrap your phone or camera in plastic wrap to protect it from any water splashes.
5. Use a Waterproof Camera
Waterproof point-and-shoot cameras are cheaper than DSLRs, and the results can be surprisingly good with correct lighting and steady hands. The quality of photos can vary widely, though, so always do some research before buying one. There are also lots of options available secondhand on eBay if you don’t mind the risk of getting a broken product. And, of course, if you have the budget, higher-end waterproof cameras will produce better-quality photos.
You can also use a disposable waterproof camera for a more retro feel. Just keep in mind that you will have to take the film to be developed, so it may not be an instant process like with digital cameras.
6. Avoid Feature Creep
Waterproof cameras are notorious for this, so you’ll need to buy carefully if you want one that’s easy to use. Look for a simple point-and-shoot camera with all manual controls, including ISO, aperture, shutter speed, etc., locked out while underwater. You will also need to make sure that all of your settings can be changed underwater so your camera doesn’t automatically switch back to auto mode. Some cameras have a special underwater mode, while others need to be set manually. It’s essential to read the manual and get familiar with your camera before using it in the shower.
You may also want to consider purchasing a camera with built-in Wi-Fi capabilities. This will allow you to transfer photos straight from your waterproof camera to your phone, making it easier to edit and share your photos.
7. Take a Photo of Your Shadow on the Curtain
Use a flashlight or other light source as a backlight, and you will have a stimulating effect on the shower curtain behind you. This technique is best with a DSLR that allows you to adjust the shutter speed. If you’re using a point-and-shoot camera, try setting it to the fastest shutter speed possible and experiment with different light sources to see what effect they create. You can also use this technique with a waterproof camera or phone in underwater mode.

It’s also essential to keep an eye on your shutter speed, as you don’t want it to be too slow. Otherwise, your hand movement may create a blurry photo. But don’t be afraid to experiment and see what creative shots you can capture using this method.
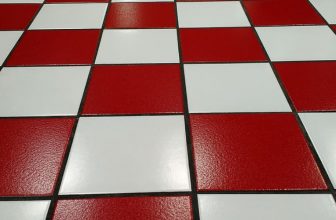
8. Use a White Background
A white bathroom tile or shower wall can make for an exciting backdrop that provides contrast while also helping to highlight your subject. But, of course, the best time to shoot this kind of picture is when it’s clean, immediately after you’ve finished cleaning the shower! You can also use white poster board or a white sheet as a backdrop if you don’t have any white walls in your bathroom.
If you do end up using a poster board or sheet, make sure to secure it in place so that it doesn’t fall into the water or get wet. You can use tape or clips to attach it to the shower curtain rod or the bathroom walls.
9. Allow Wet Subjects
Everyone looks better wet, and with good lighting, it will make for a dramatic picture. It’s best to put the camera in a waterproof case or bag that will allow it to stay dry, then take your photo in one smooth motion before submerging. This will create a more natural-looking photo, as opposed to one where the subject has been posed.
You can also use water droplets on your subject or shower curtain to add texture and interest to your photos. Just be creative and experiment with different angles and lighting to capture stunning shots. And remember to have fun with it! Shower photography is all about being creative and capturing unique moments.
10. Use the Right Angle
If you’re using a point-and-shoot camera, hold it as vertically as possible to avoid distortion. Hold your camera at a 45º angle and shoot from a higher position for maximum visibility to get a good view of the subject’s face. If you’re using a DSLR or mirrorless camera, experiment with different angles and perspectives to create unique compositions.
You can also try placing your camera on the ground or holding it above your head for more creative shots. Do not be afraid to experiment and see what works best for the particular shower space you are working with. Just remember to keep your subject in focus and get as much of the shower space in the frame as possible.
Following these tips and techniques, you can take stunning photos in the shower without any fancy equipment. Just remember to have fun and be creative with your shots, and don’t be afraid to try new angles and compositions. With practice, you will capture unique and captivating images that showcase the beauty of water in a whole new way. So grab your camera, hop in the shower, and start snapping away! Happy shooting!
Some Tips and Tricks:
- Put your camera on a chair, so you don’t have to hold it.
- Make sure your camera is fast enough to take a picture of water moving.
- After taking the picture, bring the phone out of the shower and immediately wipe off excess water droplets with a towel and dry it as much as you can.
- If it’s too dark, turn on the bathroom’s lights instead of using natural lighting from the window.
- Use burst mode or take multiple pictures for better results!
- Don’t worry about being wet while taking the picture because your camera should be safe from water damage.
- If indoor lighting is too poor for your phone’s camera, try using the built-in flashlight of the camera while taking pictures.
- You can also place your phone on a tripod and use the timer function to take pictures. This way, you can focus on posing and creating the perfect shot without worrying about holding the phone steady.
- Experiment with different angles and compositions to find the most flattering look for your shower pictures.
- Don’t be afraid to get creative and use props or accessories to enhance your shower pictures. Just make sure they are waterproof if you plan on using them in the shower.
- Consider using editing apps or software to enhance the lighting and color of your shower pictures. Just be careful not to overdo it, as you want your photos to look natural and realistic.
- Have fun with it! Taking shower pictures can be a fun and creative way to express yourself and tell a story through photography. Don’t take it too seriously, and enjoy the process. Overall, taking good shower pictures requires a combination of good lighting, steady hands, and creativity. Follow these tips and tricks, and you’ll be able to capture stunning shower photos in no time!
Should I Waterproof a Camera Before Taking a Shower Picture?
Taking a shower picture is simple. However, waterproofing your camera before taking a shower picture might not be. I’ve seen waterproof cameras advertised as ‘waterproof to 33 feet. The problem with these waterproof models is that they’re designed for divers, and their focus has been on adding features and durability and waterproofing but not image quality.
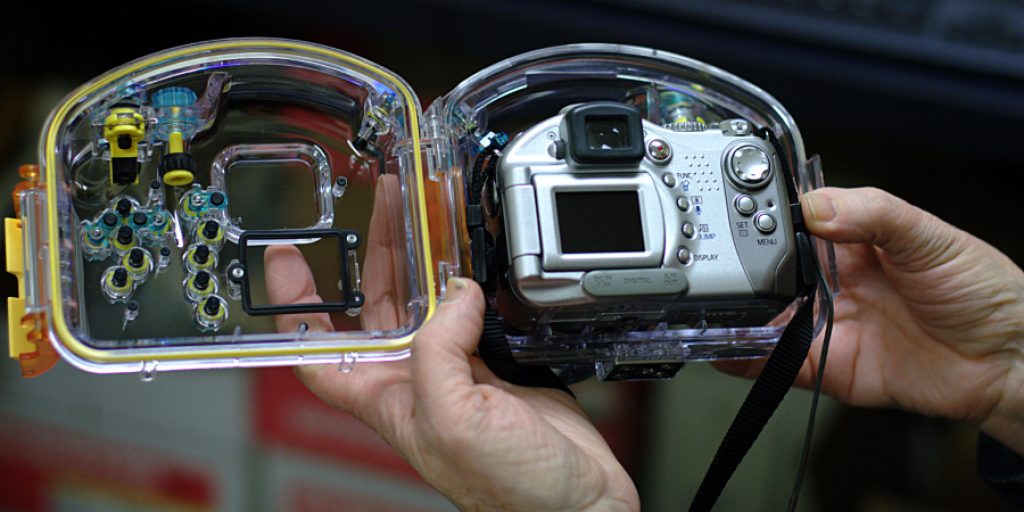
You can find a waterproof camera for a reasonably low price. Still, in my experience, if you want to take good shower pictures with a cheap waterproof camera, I have found that there’s a trade-off between image quality and water resistance. Most of the time, when you see the front of an underwater camera clear up after being submerged, it’s because the camera was water-resistant enough to survive a drop from 33 feet but not so waterproof that any moisture or condensation forms on the inside of the camera.
Conclusion:
Get your next shower selfie to stand out with these simple steps. An excellent way to start is by setting the right mood. Please search for a song that you want people to associate with your photo, open up an app on your phone and play it in the background of your shot.
Your bathroom should be clean, but if there are any dirty spots or clutter, move them into another room temporarily so they don’t distract from the focus of the picture of you! To conclude, We hope you found this information helpful and that it has helped to answer some of your questions about how to take good shower pictures. If there’s anything else we can do for you, please feel free to contact us!
You may also read How to Clean Sliding Shower Door Tracks