How to Test a Heater Core
It is important to know testing a heater core because it plays an integral role in the performance of your vehicle’s heating system. A faulty heater core can cause coolant to leak, resulting in inefficient and incomplete heat transfer. Testing your heater core can help prevent these issues from occurring and ensure that your vehicle’s heating system is working properly.
The advantage of testing a heater core is that it can help identify whether there is any internal damage or blockage in the component. This can be especially important if you are having difficulty with the heaters functioning properly. Testing can also help to determine how well the system is operating and if any repairs or upgrades may be needed.
Testing a heater core is relatively simple and can be done by any experienced auto repair technician. Doing it yourself can also save you time, money, and hassle as compared to having a mechanic do it for you. You can find step-by-step instructions on how to test a heater core in this blog article.
Tools You Will Need
- A multimeter
- A pair of pliers
- An adjustable wrench
- A socket set or screwdriver
- Compressed air
- A water pump and hoses
- Replacement coolant for the system
- Replacement heater core if needed
- An oil filter and lubricants
- Clean paper towels or rags
Step-by-step Instructions for How to Test a Heater Core
Step 1: Inspect the Hoses Connected
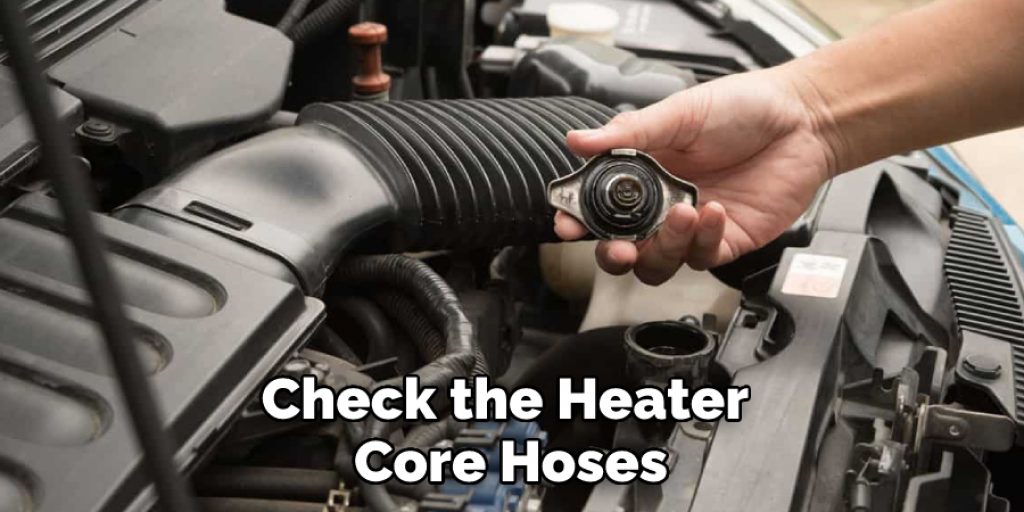
First, locate the heater core and check all the connected hoses. The two main hoses are the inlet and outlet. If there is a crack or any kind of damage in either hose, it should be replaced immediately before testing it.
Step 2: Test the Temperature
Once you have ensured that both the hoses are in good condition, start the engine and turn the heater on. Feel both hoses for any difference in temperature. If there is a huge difference, it may indicate an issue with the core itself. This could be due to clogged passages or a bad seal inside them.
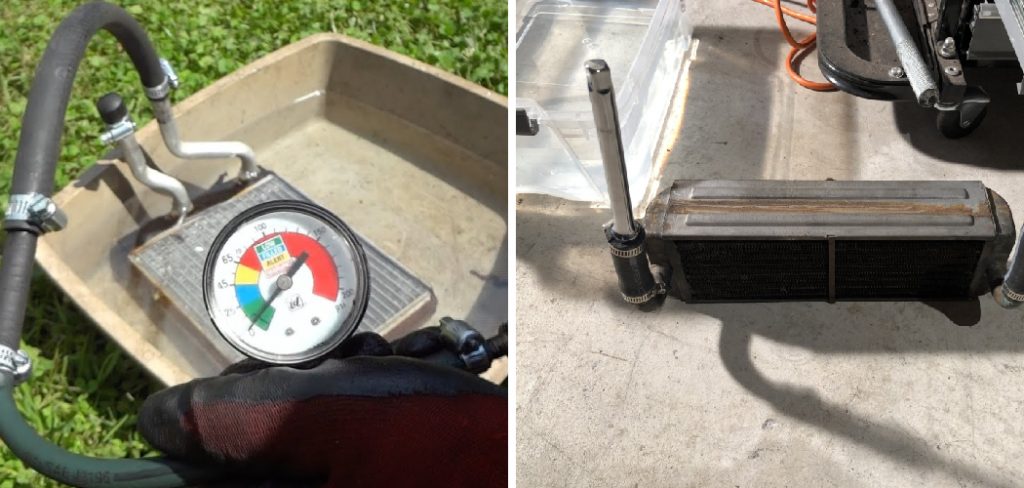
Step 3: Perform a Pressure Test
Perform a pressure test to confirm whether the heater core is functioning properly. You will need to attach a special pressure tester to the inlet and outlet hoses of the heater core and pressurize it for about 10 minutes.
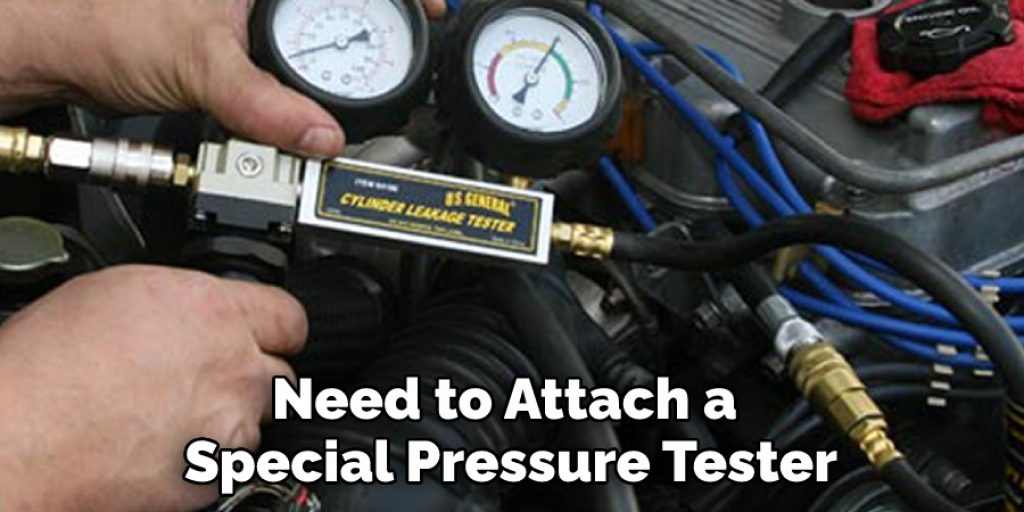
The reading should remain constant or increase slightly if all is working correctly. Turn the heater off and disconnect the pressure tester. Then, start the engine again and check that coolant is flowing through both hoses. This will help you determine if there are any blockages in either pipe or core tubes.
Step 4: Inspect for Leaks
Now it’s time to check for any signs of leakage from the heater core. To do this, open up the hood and inspect all around the engine bay for any unusual dampness or traces of coolant that may indicate a leak. If any is found, you’ll likely have to replace the heater core.
Step 5: Test the Heater Core with a Voltmeter
Another way to check the heater core is by testing it with a voltmeter. Firstly, turn off the engine and disconnect both hoses connected to it. Then, place one end of the voltmeter’s probes on either side of the core while measuring the resistance between them. The reading should be within normal range, indicating that the heater core is functioning properly.
Step 6: Check the Coolant Level
Ensure that the coolant level in the radiator is topped up as per the manufacturer’s specifications. If it’s too low, then the coolant won’t be able to flow through the heater core, and hence you may get a faulty reading during testing. It could be due to a clogged heater core if you don’t get any positive results even after pressure and voltmeter tests. In such cases, you’ll need to clean it with a special cleaner before continuing with further tests.
Step 7: Check Electrical Connections
Once the heater core is cleaned, check all the electrical connections to ensure they’re free of any dirt and debris. This will help ensure that electricity can pass through them with ease and won’t cause any interruptions in operation. Finally, re-test the heater core with a pressure tester and voltmeter to ensure everything works properly. If you get positive results in both tests, the heater core will function optimally.
By following these step-by-step instructions for Testing a Heater Core, you should have all the information you need to diagnose any problems with your car’s heater core and make the necessary repairs.
Safety Tips for How to Test a Heater Core
- Wear protective clothing and safety equipment, like a face mask, protective glasses, gloves, and work boots.
- Make sure that your workspace is clean and well-ventilated.
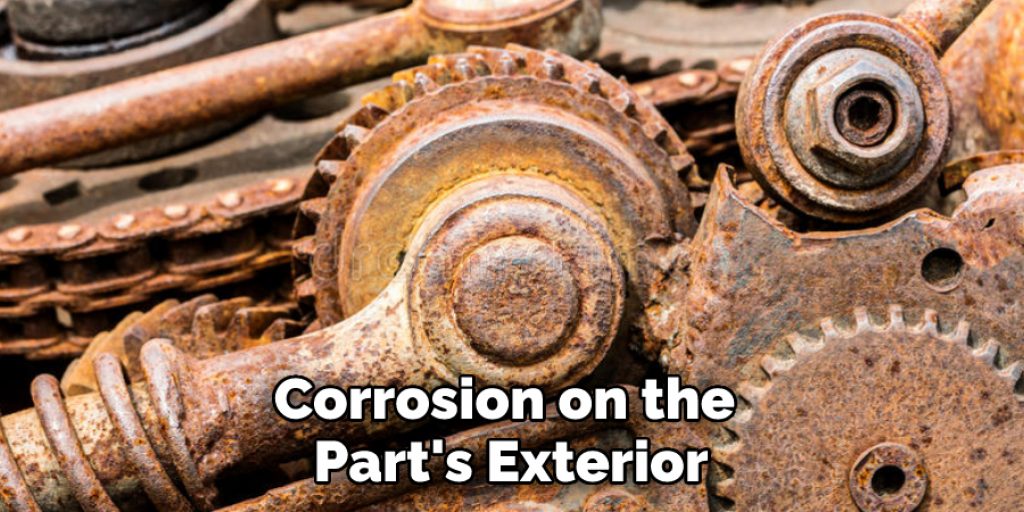
- Check the heater core for any visible signs of damage or corrosion, such as rotten hoses or leaks.
- Disconnect the negative battery cable before starting any work on the heater core.
- Take extra caution when using any electrical testing devices, such as multimeters and ohmmeters, to test the power supply of the heater core; these are powerful tools that can cause injury if not handled properly.
- Inspect all of the connections and hoses before reinstalling the heater core to ensure there are no loose connections.
- When re-installing the heater core into the vehicle, be sure to double-check all of your connections and use a torque wrench when tightening bolts.
- Make sure that all of the clamps have been securely attached to the heater core before you reinstall it into your vehicle.

Following these safety tips will help ensure that your testing process is successful and free from potential hazards.
How Should You Inspect and Identify Any Potential Problems With Your Heater Core?
If you believe there may be a problem with your heater core, the first step is to perform an inspection. Begin by looking for any obvious signs of damage or corrosion on the part’s exterior. Additionally, check for any loose connections that could cause a leak. Once you have inspected the outside of the heater core, examine the interior as well. Check the fins inside for excessive corrosion or clogging that could prevent it from functioning properly.
If you’re using a pressure tester, make sure to follow the manufacturer’s instructions carefully to ensure accurate readings. As you test, note any fluctuations in pressure or temperature that may indicate a blockage or other issue with the heater core. Finally, take the time to inspect and test each hose connected to the core.
Ensure that all connections are secure and look for any cracks or other signs of potential leaks. If you can’t find a leak, but your heater core is still not working, it may be clogged internally and need to be replaced.
How Often Should You Perform Maintenance on Your Heater Core?
Ideally, you should regularly check for any signs of damage or wear as part of your regular vehicle maintenance schedule. You should also inspect the heater core for any signs of corrosion or clogs and ensure it is free of blockages or build-up. If you don’t regularly maintain your heater core, it could cause several issues with your heating system and other vehicle components.
If you are uncertain when to test your heater core, you should consult a professional mechanic. They will be able to tell you when it is necessary to perform maintenance and can also provide advice on how often you should test your heater core. Regularly inspecting and maintaining your heater core ensures that your vehicle’s heating system runs properly and efficiently. Doing so can also help you avoid costly repairs in the future.
How Should You Diagnose and Troubleshoot Any Issues With Your Heater Core?
If the heater core is not functioning properly, you will need to take some steps to diagnose and troubleshoot the issues. Here are some simple steps to follow:
- Check Your Coolant Levels: Ensure your engine is filled with antifreeze or coolant at the correct levels. If it’s too low, top it up and check again after a few days of driving.
- Check the Heater Core Hoses: Visually inspect the coolant hoses connecting your heater core to the engine block, radiator, and water pump for any signs of damage or leakage. Replace any damaged hoses and seal off any leaks you find.
- Check for Air in Your Coolant System: If you have air trapped in the coolant system, it won’t be able to circulate properly and can cause problems with your heater core. Perform a process called “bleeding” to remove any air from the system.
- Check the Heater Control Valve: Check the position of the heater control valve, which directs coolant flow through the heater core. If it’s not in the proper position, make sure to adjust it accordingly.
- Test Your Heater Core: To test whether or not your heater core is functioning properly, start up the engine and turn on all of the cabin fans and blowers. If the air from the cabin vents is not heated, then your heater core may need to be replaced or repaired.
If you follow these steps, you should be able to diagnose any issues with your heater core and get it fixed quickly and efficiently.
Conclusion
In conclusion, testing a heater core is an important maintenance task for your car that requires the right tools, experience, and process. The testing process will vary from one vehicle to another, so it’s important to understand your specific model of vehicle before attempting this repair.
Additionally, always ensure you have the necessary safety equipment and follow any manufacturer’s instructions as closely as possible. With the right preparation and following a few steps, you can easily test your heater core to ensure it is functioning properly. I hope reading this post has helped you learn how to test a heater core. Make sure the safety precautions are carried out in the order listed.
Angela Ervin
Angela is the executive editor of DIY quickly. She began her career as an interior designer before applying her strategic and creative passion to lifestyle and home. She has close to 15 years of experience in creative writing and online content strategy for housekeeping, home decorations as well as other niche efforts. She loves her job and has the privilege of working with an extraordinary team. She lives with her husband, two sons, and daughter in Petersburg. When she's not busy working she spent time with her family.