How to Fix Sliding Shower Door Bottom Guide
The sliding shower door bottom guide is a crucial part of the design of any shower. It serves as a track for the door to slide on, and without it, the door cannot open and close properly. Additionally, if the guide isn’t installed correctly, it can quickly become worn out or broken due to water damage, which can cause the door to become stuck and difficult to open.
The advantages of fixing a sliding shower door bottom guide are that it is relatively easy and inexpensive. It can be done with minimal tools and supplies, such as a screwdriver, adjustable wrench or pliers, lubricant, and replacement parts if needed. This process will also help you gain access to the track underneath the door, allowing you to make any necessary repairs or adjustments. In this blog post, You will learn in detail how to fix sliding shower door bottom guide.
Materials You Will Need
- Pen/pencil
- Pliers
- Replacement bottom guide
- Screwdriver
- Drill and bits
- Level
- Masking tape
- Silicone caulk and caulking gun
- Wooden shims
- Jigsaw or coping saw
Step-by-Step Processes for How to Fix Sliding Shower Door Bottom Guide
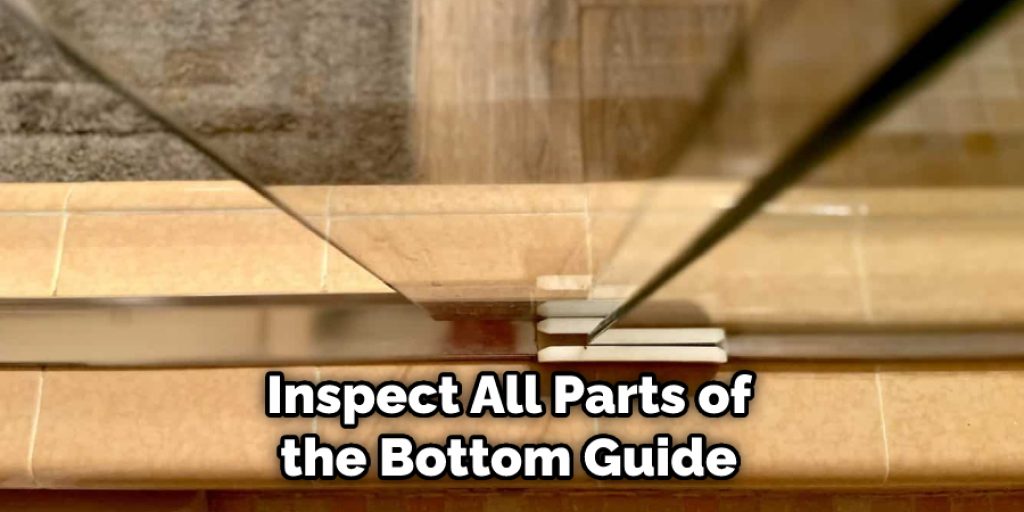
Step 1: Inspect the Shower Door Bottom Guide
The bottom guide at the base of the shower door is usually what ends up damaged, causing the sliding door to get stuck. Carefully inspect all parts of the bottom guide and look for any damage or cracks that could be affecting its movement.
Step 2: Loosen Up a Tight Bottom Guide
The bottom guide may have become too tight due to dirt, dust, and another debris buildup. Loosen it up by removing the screws that secure it and lubricating all its moving parts. If any part of the bottom guide appears to be too damaged, you’ll need to replace it with a new one. You can find bottom guides at your local hardware store.
Step 3: Reassembling the Shower Door Bottom Guide
Once you’ve replaced or repaired the guide, it’s time to reassemble it. Make sure that all screws are tightly secured, and replace any worn-out parts if needed. Now that you’ve reassembled the guide, it’s time to lubricate its moving parts with a silicone-based lubricant or petroleum jelly. Doing this will help reduce friction and ensure smooth sliding door movement.
Step 4: Tighten Up the Screws
Once you’ve lubricated all of the guide’s moving parts, tighten up the screws that secure it. With the bottom guide reassembled and lubricated, it’s time to re-test the sliding door’s movement. Open and close the door a few times to ensure that it’s working properly.

Step 5: Consult a Professional
If the sliding door still isn’t opening or closing properly, you should consult a professional repair technician who can provide further assistance. After you’ve finished fixing the bottom guide, cleaning up any mess that may have been created is important.
Step 6: Regular Maintenance
To prevent future problems with your shower door bottom guide, be sure to inspect and lubricate its moving parts regularly. Doing this will ensure that the guide continues to work properly and that your shower door remains safe for use.
By following these steps, you’ll be able to repair or replace your sliding shower door bottom guide easily.
Safety Tips for How to Fix Sliding Shower Door Bottom Guide
- Wear safety glasses and gloves to protect eyes and hands from sharp edges, flying particles, and tools.
- Unplug power tools before making adjustments or repairs to them.
- Secure the shower door using clamps in order to keep it immobile while working on it.
- Make sure all screws and hinges are securely fastened to avoid accidents.
- Use a screwdriver to make adjustments or repair shower door rollers and wheels if necessary.
- When drilling holes for the screws, always wear hearing protection to prevent damage from the loud noises of power tools.
- Regularly inspect the sliding door bottom guide for signs of wear and tear and defects.
- After making repairs or adjustments, test the operation before fully securing the shower door bottom guide.
Following these safety tips will ensure that you can safely and effectively fix a sliding shower door bottom guide.
How Often Should the Sliding Shower Door Bottom Guide Be Replaced or Serviced?
It is recommended that the sliding shower door bottom guide be serviced or replaced every one to two years. This helps prevent further damage and ensures your shower remains safe and secure. Regularly checking for worn-out parts, such as the bottom guide rails, will help you identify problems before they cause any major issues with your doors. Additionally, if you have any repairs or replacements made to the sliding shower door, make sure you also replace the bottom guide for optimal performance. Replacing the bottom guide will help keep your doors aligned, improving their functionality and preventing further damage.
If you notice that your sliding shower door is not functioning properly, it could be a sign that the bottom guide is in need of servicing or replacement. If you are unsure about how to replace or repair the bottom guide, it’s best to seek the help of a professional. A qualified service technician can assess your shower door and recommend the best course of action for repairing or replacing your sliding shower door bottom guide.
How Do You Remove a Damaged or Broken Sliding Shower Door Bottom Guide?
Removing a damaged or broken sliding shower door bottom guide can be tricky but is not impossible. First, you will want to turn off the water supply and then remove the handle and screws that keep the door in place. Then, unscrew the guide by loosening any fasteners or nuts that are holding it in place. Once all of the fasteners and nuts are removed, you should be able to slide the guide out. If there is any remaining hardware that needs to be removed or replaced, it can be done with a screwdriver.
After all, parts have been removed from your old guide, you will want to prep the area for the installation of your new guide. Make sure to clean the area and remove any old sealant or caulk that may be around the guide. This will help ensure a secure fit for your replacement part. Next, you can now install your new sliding shower door bottom guide. Start by placing the guide into place and then reattach any nuts or fasteners that need to be tightened. Make sure to double-check that all of your screws are tight and secure.
How Do You Clean and Maintain a Sliding Shower Door Bottom Guide?
Regular cleaning and maintenance of the sliding shower door bottom guide are key to properly keeping your shower enclosure working. One way to clean this component is to use an all-purpose bathroom cleaner or a specialty cleaner made specifically for coated metal surfaces.
When using cleaning products, be sure to spray them onto a cloth and not directly onto the bottom guide. This will help to avoid any damage caused by harsh chemicals.
After cleaning, wipe away all excess moisture and allow the guide to dry completely before sliding the door again. In addition to regular cleaning, lubricating the shower door track at least twice a year can help reduce the squeaking or sticking of the door as it slides open and closed. Use a light lubricant such as a silicone spray or machine oil that is safe for use on coated metal surfaces.
How Do You Troubleshoot Issues With a Sliding Shower Door Bottom Guide?
A sliding shower door bottom guide can make it easier to open and close your shower door without lifting it up. However, if you find that the guide is not working correctly or won’t move at all, you may need to troubleshoot the issue. Here are some tips on fixing sliding shower door bottom guides:
- Check for Loose Bolts: The first step is to inspect the bolts on the guide. Make sure they are tight and secure, as this can prevent a proper seal from forming. If any of them look loose or damaged, you may need to replace them with new ones.
- Adjust the Rollers: If the rollers are not properly aligned, they may stop working altogether. Check to make sure that they are in line and adjust them if needed.
- Clean the Tracks: A build-up of debris or dirt can prevent the door from running smoothly. Use a damp cloth to clean out any debris from the tracks and wipe down the rails.
- Lubricate the Tracks: Applying a little lubricant like WD-40 to the tracks can help ensure they move smoothly and reduce friction.
- Check for Weather Stripping: If there is not enough weather stripping around the door, it can cause air to escape, preventing it from closing properly. Make sure that there is enough weather stripping around the door to create a seal and fix any gaps if necessary.
By following these steps, you should be able to fix any issues with your sliding shower door bottom guide. If you are still having trouble or have any questions, contact a professional for help.
Conclusion
In conclusion, fixing a sliding shower door bottom guide is not as difficult as it may seem. By following the steps outlined above, you can easily repair your sliding shower door bottom guide in no time. Remember to use an accurate measuring tool and the right materials for the best results. Additionally, be sure to check that everything fits securely before finalizing the fix.
You can easily repair your sliding shower door bottom guide with patience and the right knowledge. I hope this article has been beneficial in learning how to fix sliding shower door bottom guide. Make Sure the precautionary measures are followed chronologically.
Angela Ervin
Angela is the executive editor of DIY quickly. She began her career as an interior designer before applying her strategic and creative passion to lifestyle and home. She has close to 15 years of experience in creative writing and online content strategy for housekeeping, home decorations as well as other niche efforts. She loves her job and has the privilege of working with an extraordinary team. She lives with her husband, two sons, and daughter in Petersburg. When she's not busy working she spent time with her family.