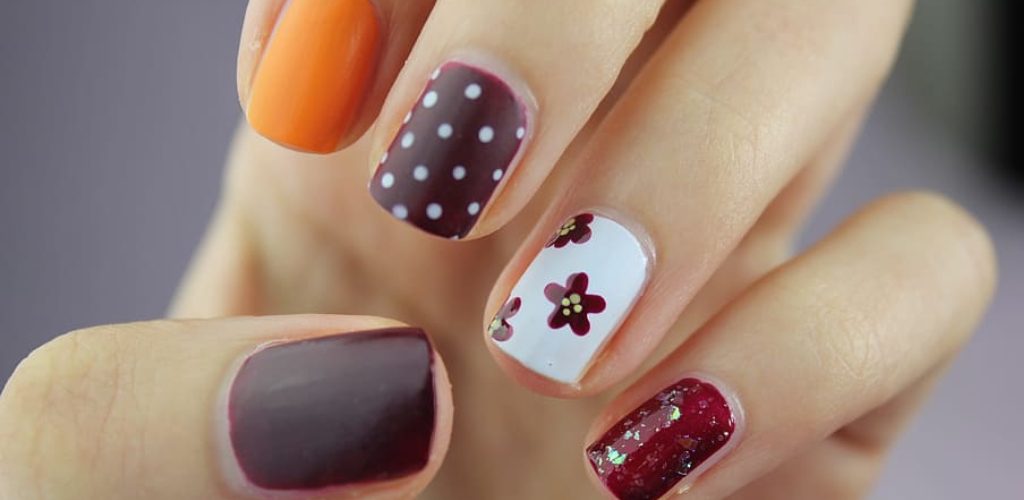
How to Fix Sticky Acrylic Nails
Have you ever had to remove your acrylic nails? Acrylic nails are popular for people who want their nails to look professionally done. They are also often preferred over gel polish because they are cheaper, last longer, and don’t require UV light.
However, if the nail becomes too long or starts to chip, it can be hard to remove them. Some steps can help take care of this problem, though! This blog post will share how to fix sticky acrylic nails.
8 Reasons Why You Need to Fix Sticky Acrylic Nails:
1. Because if they aren’t fixed, you will have a lumpy mess of acrylic on your nails.
2. Once the nails are stuck together, it will be an even bigger pain to separate them without breaking both of the acrylic pieces or at least one of the natural nails underneath.
3. When you can’t use acetone on your nails, you will need a different solution if you want them separated before putting some new acrylic on.
4. When you’re done with your nails and want to take them off, if you don’t fix the problem of the sticky acrylic, taking them off will be significant pain.
5. If you keep them molded, you might as well glue your nails together.
6. You will have a hell of a time trying to shape your nails once they are stuck together if you don’t fix the problem.
7. If you need to file down your natural nail to level with the surface of the acrylic piece, it will be a pain in the butt if your nails are stuck together.
8. Once they’re fixed, you can file them down smoothly, and it won’t bring any tears to your eyes.
Steps to Follow: How to Fix Sticky Acrylic Nails
Here are some steps you need to follow on how to fix sticky acrylic nails.
Step 1: Soak in Warm Water
To loosen the glue on your nails, soak your fingers in warm water for 10 minutes. You can then gently peel off the glue with an orange stick or spoon handle.
Step 2: Apply Petroleum Jelly
Using a spoon, scoop some petroleum jelly and apply it evenly to your fingertips. Be sure to put on more than usual, as this will help the nail stick back on again after you’ve removed the polish and glue from the top of your nails.
Step 3: Prepare Cotton Swabs
To avoid any tears or cuts, use a piece of a cotton swab to soak up the petroleum jelly around your finger. This way, the jelly won’t get on your nails and will also keep any germs away. If you’d like, you can use a new piece of cotton swab for each finger to ensure no bacteria gets into the petroleum jelly on your fingers.
Step 4: Use an Orange Stick or Spoon Handle
You can use a toothpick if you don’t have an orange stick or spoon handle. In this case, however, make sure the flat side of the toothpick is facing your nail; otherwise, you will likely damage any new gel polish that gets on it.
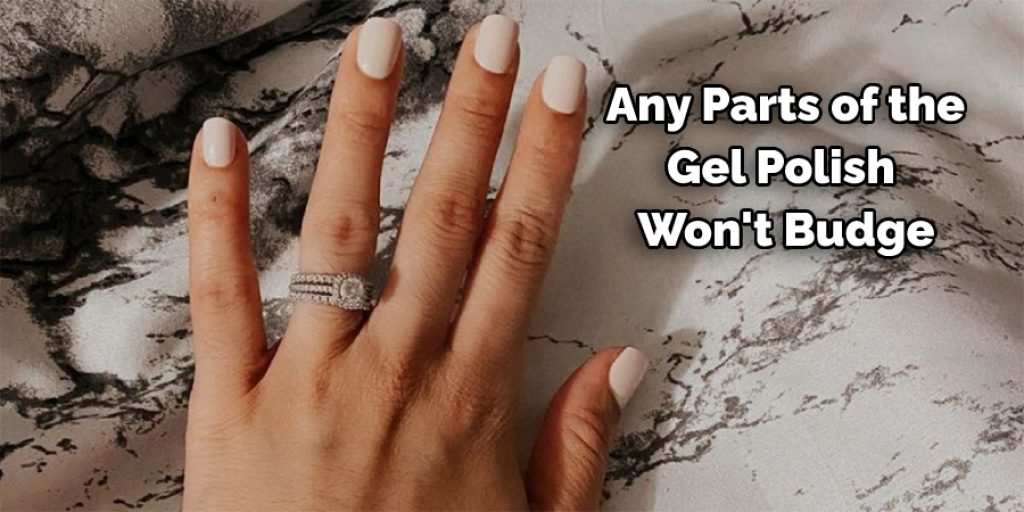
Step 5: Pop Off Gel Polish
Using the orange stick or spoon handle, gently pop off the gel polish on top of your nails. If any parts of the gel polish won’t budge, soak it up with a cotton swab soaked in petroleum jelly before moving to the next step.
Step 6: Loosen Up Sticky Glue
Using the orange stick or spoon handle, gently scrape off any sticky glue that may be on top of your nails. If you’re having trouble getting it off, you can use an acetone-soaked cotton swab to loosen up the glue first.
Step 7: Apply a Thin Coat of Base Coat
Using a thin coat of base coat, gently paint it across the surface of your nails. Doing this will help seal any leftover nail polish on your nails and add extra strength to protect your nails from chipping or cracking.
Step 8: Apply Nail Polish
Using nail polish remover, remove any traces of leftover petroleum jelly on your nails. Then, apply at least two coats of the color you want across the surface of your nails. It’s best to use more than two coats of nail polish for best results; however, ensure the color is fully dry between each coat.
Step 9: Apply Clear Top Coat
Using a thin layer of clear topcoat, lightly paint it across the surface of your nails and let it dry for at least five minutes. Unlike a base coat, a clear topcoat creates a glossy and strong finish, so it’s unnecessary to apply and let each coat dry before applying another.
Step 10: Soak in Acetone
Finally, soak a cotton swab in acetone and use it to remove the tacky layer of topcoat from your nails. Be sure to only apply the cotton swab with acetone on the areas you’ve already applied nail polish; otherwise, it will damage any parts that haven’t been painted yet.
Tips to Avoid Sticky Acrylic Nails:
1. Use a primer before the acrylic product is applied. Acrylic primers make a water-resistant barrier between the skin and the acrylic product. This stops moisture from penetrating the sticky nail, making it feel tacky after 2 or 3 days of wear.
2. Apply a thinner coat of acrylic instead of thick layers. This helps to avoid too much build-up around the cuticle area. In addition, thicker coatings are more likely to form air bubbles which cause the nails to have a bumpy surface texture.
3. Use a fast-drying top gel as an alternative to acrylic. Top gels contain hardeners that make the nails more flexible and harder to wear for longer. There are many different top gels available, allowing you to choose one suitable for your needs and that works well with your selected nail color.
4. Apply a clear gel topcoat. This creates a hard layer that protects the acrylic from dirt and moisture. It also comes with a UV filter that helps prevent the nails’ yellowing, which can happen when acrylic is worn for several weeks in a row.
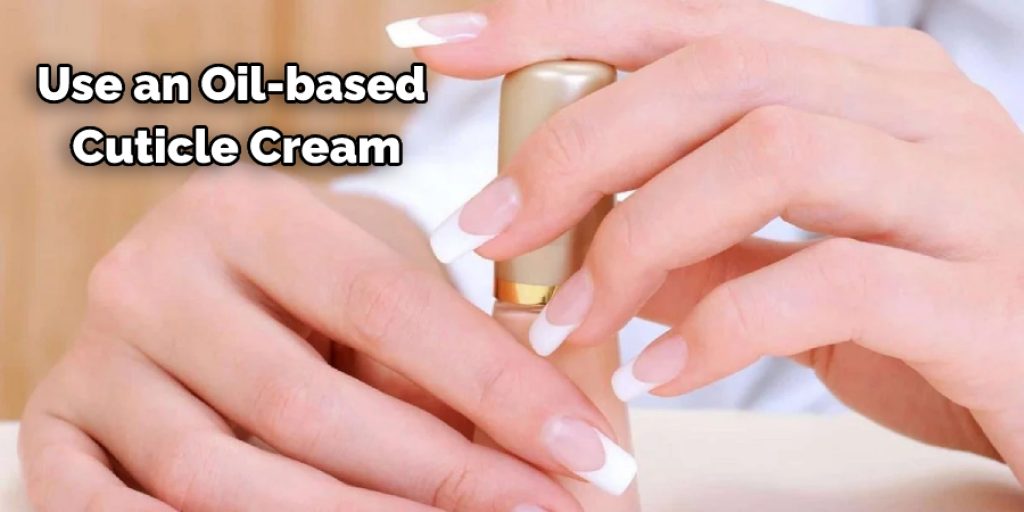
5. Use an oil-based cuticle cream before going to bed at night and after removing the acrylic product. Trim the cuticles with an orangewood stick and wash your hands before applying the cream.
6. Use a nail file to remove bumps, dirt, and dust from the surface of your nails before you go to bed at night. Regularly using a fine-grit file to keep the surface of your nails clean will stop dirt and dust from building up, making acrylic-covered nails look dull.
7. Use organic nail cleaners instead of harsh chemicals. These products contain natural ingredients like honey or apple cider vinegar that help remove sticky residue without drying out your skin or making it feel tight or itchy.
8. Take a break from wearing acrylic nails for several weeks or months at a time. This will allow the top layer of skin on your fingertips to strengthen and build up moisture that can be absorbed into the nails when you wear them again.
Conclusion:
If you’re looking for a solution to your acrylic nails that have become too thick or tacky, try this quick and easy fix. First, put some nail polish remover on the back of your hand, then use an old toothbrush dipped in acetone to scrub off the excess glue from underneath your nails.
This will help them dry faster, so they don’t stick together as quickly! We hope this blog post on how to fix sticky acrylic nails has been helpful. Let us know if you have any questions in the comment section below!
Elizabeth Davis
Elizabeth is a creative writer and digital editor based in the United States. She has a passion for the arts and crafts, which she developed from a young age. Elizabeth has always loved experimenting with new mediums and sharing her work with others. When she started blogging, she knew that DIYquickly would be the perfect platform to share her tutorials and tips. She's been writing for the blog from the beginning, and her readers love her helpful advice and easy-to-follow instructions. When she's not writing or editing, Elizabeth enjoys spending time with her family and friends.