
How to Hem a Wedding Dress With a Train?
Hemming a dress is similar to baking a cake. You must follow the steps one by one, like baking, mixing, frosting, and all the rest. It’s not much difficult if you know the exact techniques. It is like hemming a wedding dress is easy, even if it has a train.
Do you know how to hem a wedding dress with a train? Don’t worry, even if you’re a newbie, because I am here to show you some simple and easy techniques. So, believe in yourself and follow the instructions below.

The person writing this was asked to be a bridesmaid at a wedding, but the bridesmaid’s dress was too long and needed to be hemmed. The person hemmed the dress themselves instead of paying someone else to do it, even though it wasn’t easy.
That’s what you can also give, can’t you? Take your time and follow the simple steps I have crafted below.
Equipment and Supplies Needed
- A long gown
- Sewing machine
- Matching thread and bobbin
- A cutting mat and a rotary blade
- Frey check and overlock machine
You Can Check It Out to Accessorize a Rose Gold Dress
How to Hem a Wedding Dress With a Train?
Step 1

It is crucial to acquire an accurate measurement of the growth. So, try the grown-on and figure out how much hem you need. Once you do that, mark the places.
Step 2
Take your dress and lay the hem on your working table. Now, use a seam gauge to cut it into an accurate measurement. You’re gonna need some pins to hold the fabric in one place. In this case, if you find that you have less than 2 inches, consider half of your job is done. But if you have more than 2 inches, you’ll need to hem all the way around. In my case, I had to remove 4 inches from the bottom.
Step 3
After correctly measuring and marking the spots, take your rotary blade and cut along the drawn line. Don’t rush; take your time.
You Can Check It Out To Tie a Sash Belt
Step 4
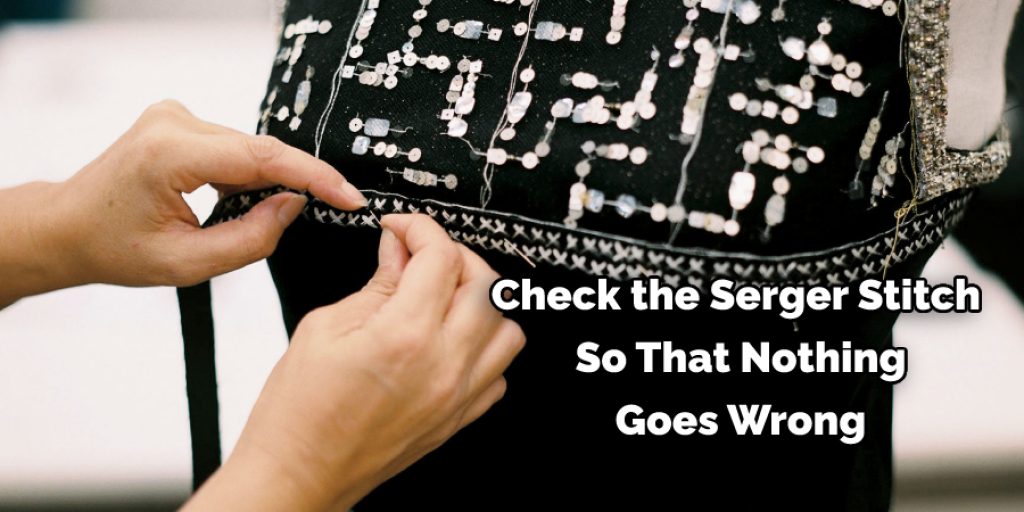
Now, use a serger and color thread that matches your dress and finish sewing the raw edges. It is recommended to check the serger stitch so that nothing goes wrong. You may find some errors, but within a short time, you will find the appropriate settings for your beautiful dress.
Step 5
It’s time to stitch the hem up. So, take your dress and attach the hem using the matching thread. That’s it; your dress will be ready to use.
Final Thoughts
Hopefully, you have understood the process. If you are still confused, feel free to use the comment below.
Jane Hubbard
Jane has always been passionate about hair and beauty. After many years of working as a hairdresser specialist, she decided to start her own consultancy business. She is an experienced haircare and beauty consultant, and she loves helping others find the perfect look for them. She has been writing articles for DIY quickly for over 3 years. In her free time she enjoys keeping up with the latest news in the industry, practicing yoga, and spending time with her friends and family.


