
How to Make a Fabric Wallet with Zipper
Zippered wallets are a little difficult to produce even though you get all the equipment for the task. There seems to be an easy option if you do like something like a zipper and ample space for several currencies and cards: a DIY cloth purse with a zippered wallet. You would not need a zipper on any of your spaces or pockets because it could get too challenging to reach your things.

This thorough guide will help you with such a straps function and a sealed-off internal compartment to create your perfect purse. As you can see, this style is effortless, but you’ll get the handle of cutting your template parts. You can modify it. The zip wallet is a brilliant piece of hardware in the wallet region.
The basic design is straightforward and modest, and the zipper makes it simpler to hold the coins than a regular bifold pocket. This work is a significant guide to dealing with zippers and a perfect place to use little pieces of content leftover from other ventures.
Types of handmade wallets:
Very Easy Selection
This wallet is super easy to make! You can complete it in a few hours and then head out of the house. It’s great for novice sewers, and you can arrange your most valuable cards there.
Wide Bow Zipper Purse
That’s a Safe, easily customizable wallet template! Create your very personalized zipper bag using lace strips and adornments. Organize enough money and a couple of cards, and you’re on the path.
Fold and Stitch Bag
You can cover this basic FREE wallet template with Velcro or snaps and zip it up in the wind. Nice to drop in your bag — or give it as a present to your unique small child.
Instructions:
Interface
Firstly, you would like to add interfacing to the cloth parts on the opposite side. You may not have the coin pouch to do just that. Choose a part of the wet fabric as a barrier between metal and interfacing.
Do not even move with the iron to achieve the best combination. On the opposite, keep it for a few moments, then raise and switch to the next spot. Undo this with all interfacing elements of the designs.
Folding and cutting
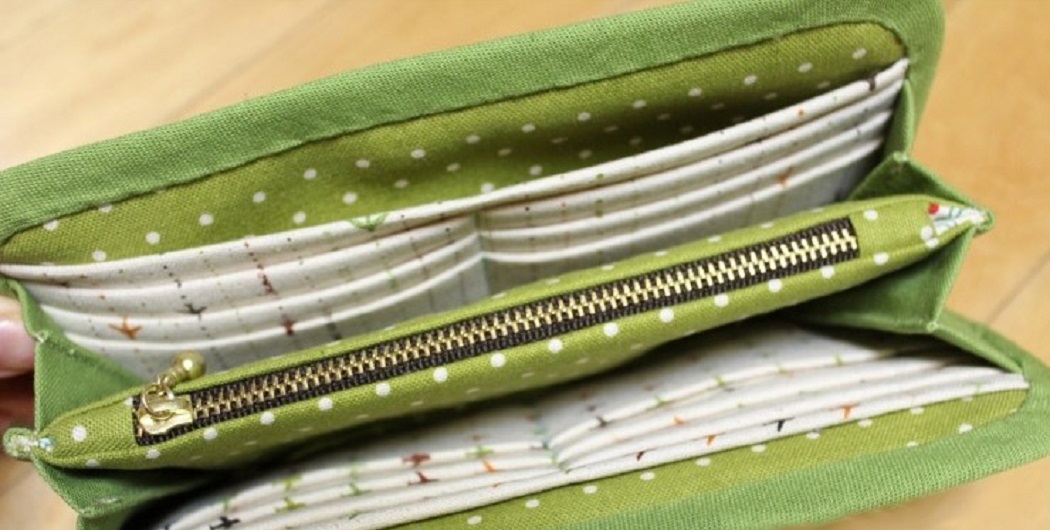
It’s got to split that zippered pouch part in half. Ensured the opposite side was held down and folded backward. Do basting stitching on both faces after you’re finished that doesn’t have a folding. This will be stitched on the top, right, and lower sections. The folding portion’s leading layer will need a simple stitch with approximately 0.25 “side allowances. Backstitching is essential too.
Going on to the pockets
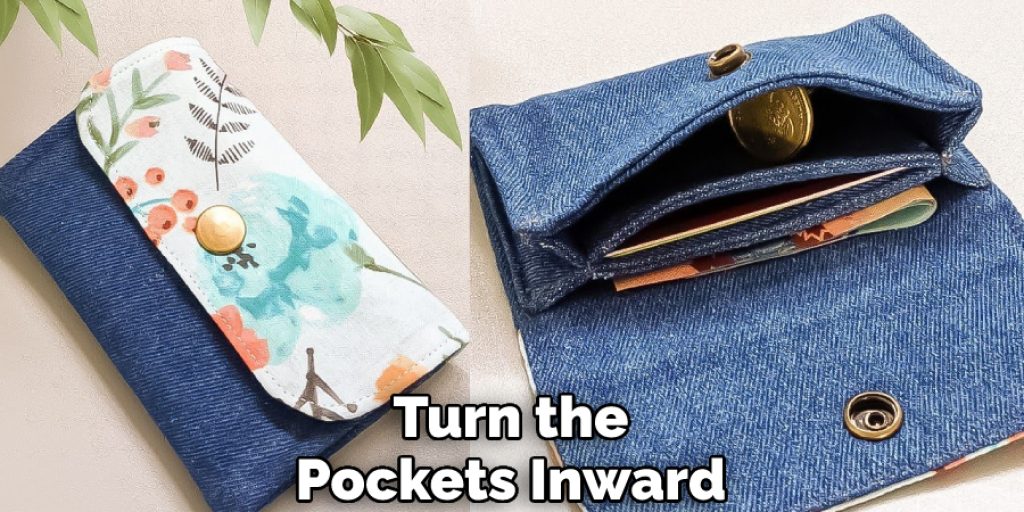
Wrap the parts in half of your wallet, much as you had in your big wallet. When folded, add a 0.25 “fabric allowance on all your payment card cases. Just do so on the right-hand side. Once you’re finished, pick a little slice from the top straight edge without cutting through the border.
It will eventually turn the pockets inward on. Then work out the same stitching on the side pockets as you would. One is also on the left, another on the folding edge with a seam width of 0.25 inches. Quantify 0.75 “along the top side of the comprehensive pack. For ready view, label it with a button. That’s where the peak of your first pack of credit cards can go.
Place the lower part of the wallet with the wider outer rim. The secondary pockets will have their leading layer from the main side, at the 5/8 “point. Apply the same method as you did with the first pockets to ensure it is in position. The last pocket of the cards can be the simplest since it would involve no measures.
Only match the lower portion with the lower end of the broad pocket and replicate sewing from the other two folds. That is where it is open to you to the layout. You may opt to have wide spaces on your line of credit or differentiate them from each other. You should weigh them and put a couple of points down the center of the card folds.
Do lateral stitching down the center to have your six slots to establish differentiation. You must position your loop connector on the top right of the complete wallet. Quantify and place it about half an inch from its ground, and quite vertical based. Knit it next to the edge, and also, don’t neglect the rear stitch.
That’s best to match your big pockets with your purse design bit; both the raw points match after this is finished. To tie the bits around, also use buttons and then do another basting stitching on the base and side edges.
You Can Check It Out To Make Fabric Carrots
For creating the pocket zippered
Place a target and scale down 1 inch. The easiest way to achieve this is to use the marker textile pen to draw a clear line through the wallet section. Get another path below the 1 “line with 3/8”. Create a solid line in the center of this rectangle where you had drawn. Begin at half-inch to left-hand side this turn and end at half-inch until right hand.
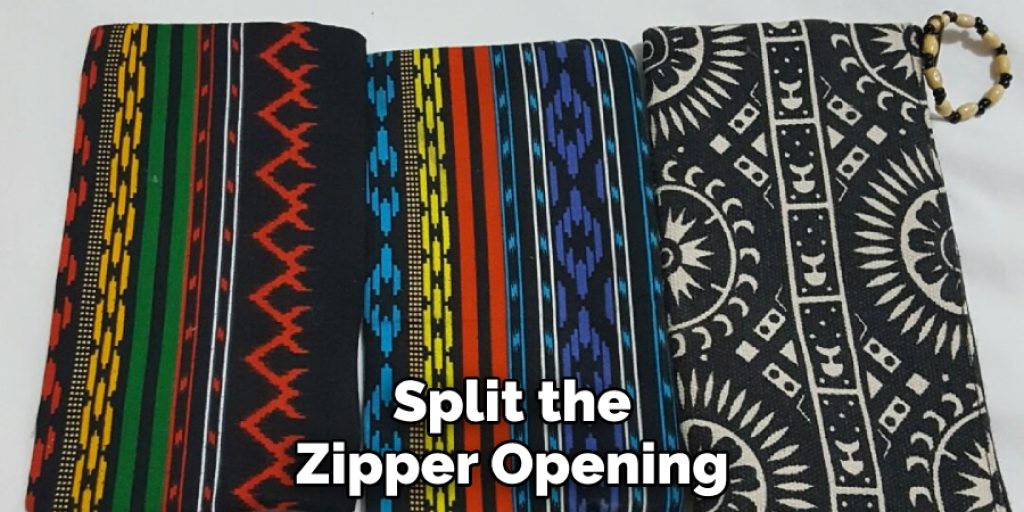
That’s also so you can get a visual image of where to split the zipper opening. You would still like to calculate with your zipper to understand where to begin designing the edges that triangles will reflect. Turn the pockets and position them over the male’s wallet’s second principal design item. Comply with the coin pouch from the left side, starting from 1.5 inches.
Now real work begins. Firstly sew across the bag. Take the top row away from one line to another for this. Then split the triangular edges like you’re slicing in Y-shaped form. When the cutting is finished, drive the whole cloth via the gap from the coins pouch. Now you might have all on the opposite side of a critical item. Position the zipper below the gap and continue to sew along the circumference, passing via the primary fabric.
Topstitches
While you do not already have one, turn to high duty needles-at minimum 14/90—Topstitch across the outer parts. Go gradually, and focus across the photos. When you use that, you should identify the positioning after topstitching and apply stitch-on clips.
Closure
Turn the arrangement and split the coin pocket into sections. Do straight stitches for the edge and basting stitching on the right and left hand—no need to sew the outer hand to the virtual wallet item. Place the secondary hooks and circle to the same location as the wallet’s other hand. Then you can place the two complete purse bits with their side panels around each other.
Press the two parts, helping you manage the sewing and go around the entire thing. Notice that a 3 “space is needed anywhere on the topmost layer, so you can turn the wallet inside and out when you’re finished. Now you get it. Then you learn how to use a zipper to create a cloth bag.
This Homemade pocket includes several slots for organizing your essential documents, currency, and spare change. Choose your shaped cloth to design your personalized wallet for a card set you’ll enjoy using daily. This enjoyable task of stitching falls in an evening and involves only some very convenient-to-master strategies.
Accomplish with a magnet closing and an inner zipper pouch insert; this customized crafted wallet can help you stay packed and clean your backpack, purse, or tote bag. You are checking out our quick tutorials to make your textured cloth wallet and spending time. This basic idea makes a perfect homemade present too!
you may also read now
1.How to Sew Zipper on Homemade Bag with a Lining
Nancy Behan
Nancy is an embroidery artist, fashion blogger and a full time editor at DIY quickly. Nancy edits the fashion section on DIY quickly, focusing on the embroidery and cross stitch articles, alongside with fabric and other costume design elements. She graduated from the University of Michigan with a Bachelor of Arts in Art History. She loves to work on her own projects, read books and watch romantic movies in her spare time.


