
How to Make a Large Masquerade Mask
The theme of the masquerade party has been popular recently. Whether it is a simple birthday party, reunion party, or Halloween, this theme has been going around a lot. The most important part of a masquerade party is the eye mask. You cannot attend the party without having the mask to hide your identity. There are a lot of ways to wear your mask. If you want to be more funky, you can attach some feathers or glitters. Or if you want to go traditional, you can have a simple silk mask with a string that ties behind your head.
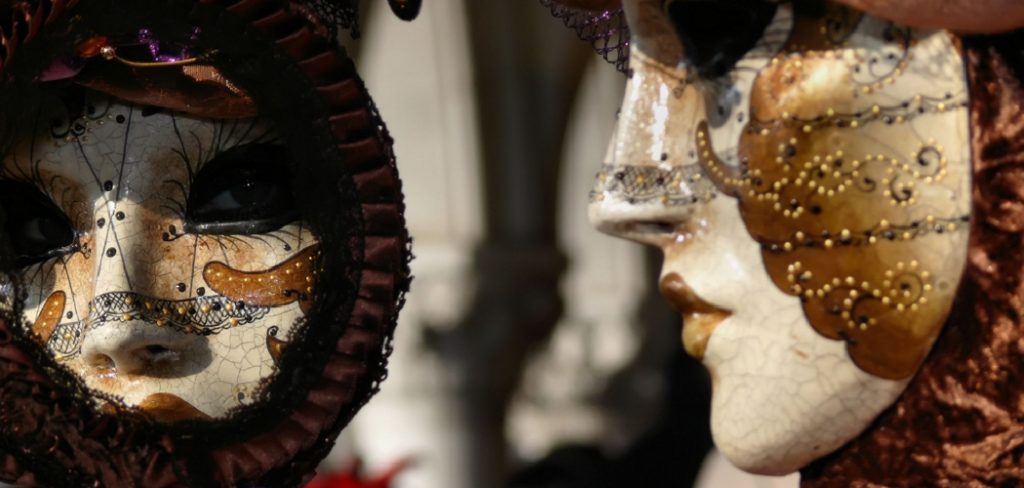
The mask only hides the eye part of your face, and it needs to be a glorious mask. There are many you can find in the market, but it does not take much to make one yourself. You can create one with a few simple elements that you can even find at home. So, if you want to learn how to make a large masquerade mask, keep reading ahead. How to Make a Large Masquerade Mask? Creating your own masquerade mask does not have to be difficult or challenging. You just need to know the proper steps to follow and use the right tools for the job.
DIY: How to Make a Large Masquerade Mask
Step One
The first step of how to make a large masquerade mask is getting all the necessary items you need to make them. The thing you need is-
- Cardboard
- Fabric
- paper
- Glue
- Scissor
- X-acto knife
- Pencil
- Beads and rhinestones
- Lace
- Ribbon
Step Two
The next thing you have to do is outline the mask with the appropriate measurement according to the face shape. It would be best if you drew it first. There are going to be two parts- one is the mask, and the other is the fleur de lis or the piece that you need to attach in between the eyes. The next thing you have to do is mark the position of the straps. Make sure that it is comfortable enough and will not slip off your face. The last thing you need to do is to cut out the mask.

Step Three
The next step is to cut the paper where you draw everything. After that, trace the whole thing on the cardboard. Cut the cardboard according to the measurement with the X-acto knife.
Step Four
Next, you have to trace everything again on the fabric and cut the material with the scissors.
Step Five
Glue the fabric on both sides of the cardboard and wait for them to dry.
Step Six
After the fabric is stick to the cardboard. It is time for decoration. You can decorate it however you want.
To give you some ideas, you can use the lace around the side of the mask. It will cover up any imperfection it has due to the glue.
You can glue up all the beads and rhinestones following any design that you like. The more stones there are, the more glamorous it will be!
Step Seven
As for the last step of how to make a large masquerade mask, add the ribbon to the side of the mask that you can tie around your face. Or, you can add a stick around the mask that you can hold over your face. Anything that works for you! And you are done making the mask! Now you know how to make a large masquerade mask. And, you can use this same method for making smaller masks! Enjoy making your own masquerade mask for Halloween or any other special occasion.
Check it out to learn to make lion king masks.
Final Thoughts
After reading this article, you should now know how to make a large masquerade mask. First, you need to gather your materials. You will need a large piece of cardboard, scissors, a hot glue gun, and some decorative items like feathers, sequins, or glitter. Next, you need to cut out a large oval shape from the cardboard. Then, you need to cut two smaller ovals out of the cardboard for the eyeholes. Next, you need to hot glue the smaller ovals onto the large oval. Finally, you need to decorate your mask however you want. You can use feathers, sequins, or glitter to make your mask unique.
Check it out to learn to make a resin mask.
Elizabeth Davis
Elizabeth is a creative writer and digital editor based in the United States. She has a passion for the arts and crafts, which she developed from a young age. Elizabeth has always loved experimenting with new mediums and sharing her work with others. When she started blogging, she knew that DIYquickly would be the perfect platform to share her tutorials and tips. She's been writing for the blog from the beginning, and her readers love her helpful advice and easy-to-follow instructions. When she's not writing or editing, Elizabeth enjoys spending time with her family and friends.


