
How to Make a Tattoo Stencil With Tracing Paper
Introduction:
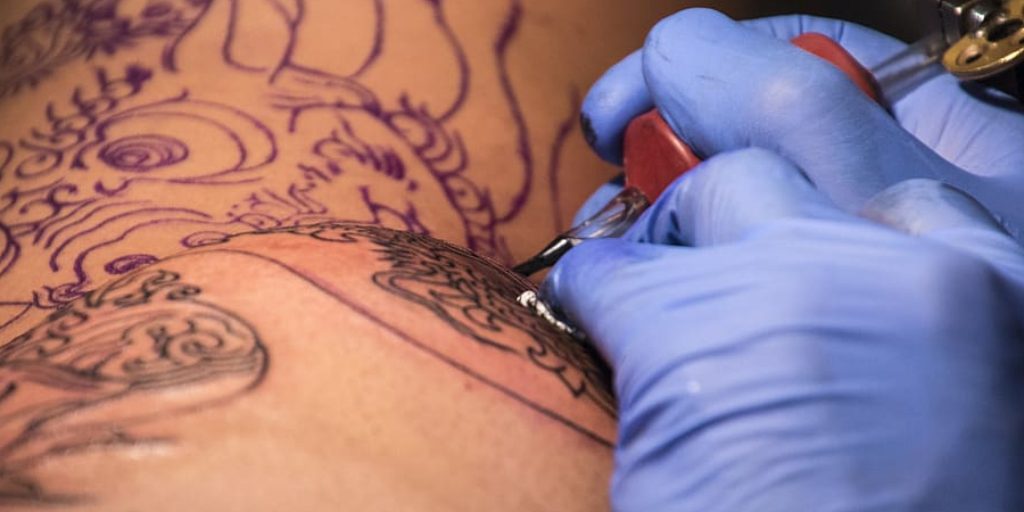
This is why you must put Vaseline, lotion, olive oil, etc., around the area where you will place the stencil so that no excess ink gets on your skin (it should go through only one layer of paper). In this article, I will discuss how to make a tattoo stencil with tracing paper. So let us get started.
A stencil is usually a thin piece of paper that has been cut out in the shape of the design you want to tattoo. The stencil can be placed on top of your skin, and ink or dye is then rubbed or sprayed over the stencil, so it goes through the cuts and creates a pattern on your skin.
Guide on How to Make a Tattoo Stencil With Tracing Paper:
A tracing paper is very similar to regular paper but with finer lines. The tracings are usually used by artists when they want to reproduce the outlines of their drawings. They can be purchased in different materials, such as vellum or trace.
Tracing papers can also be purchased in rolls or sheets. Usually, you buy the roll in sight size (24″x50′). Sight size means that it will cover your full arm when you stretch it out). A guide to making tattoo stencil is stated below:
You Can Check It Out to Make a Paper Talisman
Step 1:
If you want to get a tattoo, you need to first get a tattoo stencil template. You can either get this from a store or download it from the internet. Once you have your template, make sure to draw your design on flat paper and not a wrinkled one. If possible, get your design printed out from an online printer.
Step 2:
Place the tattoo stencil over the person’s face to whom you want to give a tattoo. Hold the piece of paper in front of a mirror for better visibility if this is your own self.
Next, draw around the outline of the stencil with a permanent marker/sharpie pen by going twice through the thickness of its lines.
Of course, if you have got yourself printed, then you can very well use any other kind of marker, but finer markers work best here as they can trace the edges of thicker ones in better detail.
Step 3:
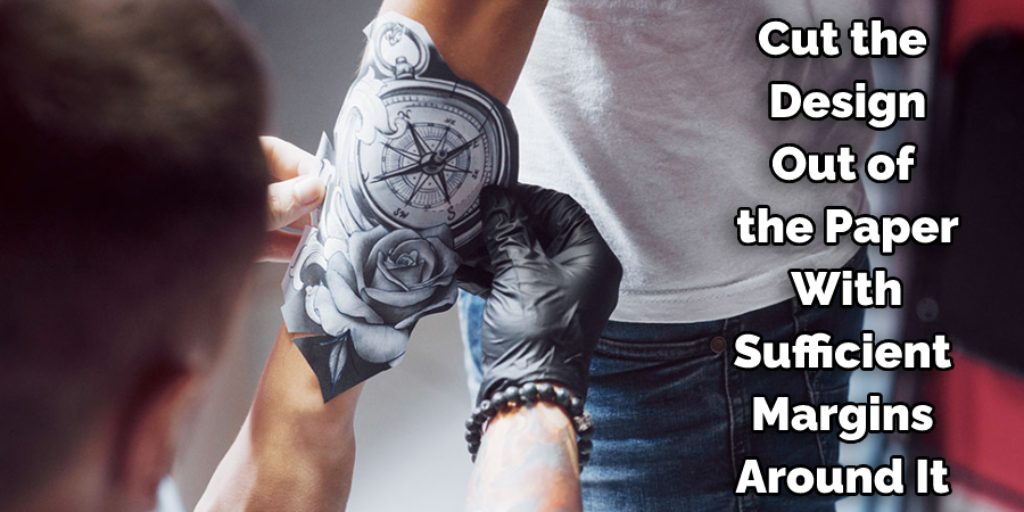
Cut the design out of the paper with sufficient margins around it (which will be used to fold over for smoothening out ripples). Fold the cutout in half and then in quarters. This is done so that you get a symmetrical pattern every time you open your stencil later on.
You get perfect symmetry if you fold it once along its widest dimension, once along its shortest dimension, again along with its longest one but with opposite orientation, and finally once along its shortest dimension without any orientation change.
Step 4:
Stick this stencil template onto your material using spray adhesive or simply stick it down with some glue stick. It does not really matter what type of material you use at this point, as long as it’s not too flimsy.
Make sure that the material has enough thickness so that your stencil can be pressed firmly onto it without any air bubbles between them.
Step 5:
Now begin tracing out your design or pattern by using a permanent marker/sharpie pen (sharper the better), keeping within the contours of the tattoo template. This is how you make an even stencil onto which one may easily transfer black and white images.
If there are any extra spaces around knuckles or across complex curves, you can fill them up with a black marker.
Step 6:
Cut out the traced tattoo stencil from its material and remove it from its backing paper. Now check for any fuzz or wrinkled parts of the tattoo design that may interfere with your stencil’s ability to transfer a perfect image onto skin, fabric, etc.
Flatten those places as much as possible by rubbing against them with something smooth like a book cover. Do not try smoothening those areas by drawing over them again, because the lines drawn over already drawn ones won’t turn out very sharp! You can also use a sheet of sandpaper to smooth out ripples easily.
Step 7:
After you have flattened all the wrinkles and fuzzes your stencil completely, place it back on top of the material from which it was cut out, but now with its porous side facing down.
Make sure that the material beneath it is flat and smooth, or else your stencil will shift a lot while trying to trace over them. Draw over the sides of your stencil carefully, this time using a black marker to make sure that they don’t peel up at all when you remove them from the traced design later on.
Precautions While Making a Tattoo Stencil With Tracing Paper:
1. Make sure that the area of your skin where you plan to get tattooed is clean. If you are an addict to tattoos, make sure that the place has healed completely before getting another tattoo there.
2. Tracing paper will not be able to provide your tattoo with its original form; therefore, after making a stencil by tracing it on the paper, go over the outline with a marker or pen so it can be seen clearly during the application of color on your skin.
3. As mentioned earlier in this article, there may be instances when people might cut their fingers while opening up a package of tracing paper; therefore, ensure that you have put on some gloves before attempting this activity.
4. If you are unsatisfied with your self-made tattoo stencil results, do not despair. Here is a suggestion for you: Practice makes perfect. You can always make another one if this attempt does not satisfy you.

Does Stencil Tattoo Harms Skin?
Stencil Tattooing is a tattoo method where the template, or stencil, is placed on top of the body part that needs to be tattooed. The artist then uses a blade or needle to cut the design into the skin. The tattooing will then follow before adding color later on.
It is common knowledge that cutting into the skin can be harmful as it could lead to infection and scarring if not done properly.
If you are looking for more information about stencil tattoos, you can learn all about how long do tattoos last, what colors make black ink tattoos look better, how much a tattoo hurts, and other related topics from this site!
Conclusion:
I hope this article has been beneficial for learning how to make a tattoo stencil with tracing paper. Thank you and have a nice day.
Elizabeth Davis
Elizabeth is a creative writer and digital editor based in the United States. She has a passion for the arts and crafts, which she developed from a young age. Elizabeth has always loved experimenting with new mediums and sharing her work with others. When she started blogging, she knew that DIYquickly would be the perfect platform to share her tutorials and tips. She's been writing for the blog from the beginning, and her readers love her helpful advice and easy-to-follow instructions. When she's not writing or editing, Elizabeth enjoys spending time with her family and friends.


