
How to Make a Tree Out of Paper for a Bulletin Board
Are you feeling quite interested in studying the perfect process of how to make a tree out of paper for a bulletin board? If yes, we must say this entire article will be a useful resource for you. You need to believe us because we are not lying!
To learn an effective procedure for making a tree out of paper for a bulletin board, we need to follow some fundamental steps. If we failed to maintain all the steps accordingly, we could not hope to achieve our most desired outcome.
Apart from these factors, you need to remember that if we want to have our work done without creating any messes or troubles, there are specific points we should bear in mind. That is, we have to follow some safety measures.
The great news is, considering all these points, we will discuss a step-by-step process of making a tree out of paper for a bulletin board. Not only that, but here we will also provide you with some precautionary measures. If you want to know more about this topic, we recommend reading the rest of this article’s segments. Then let’s jump into the content!
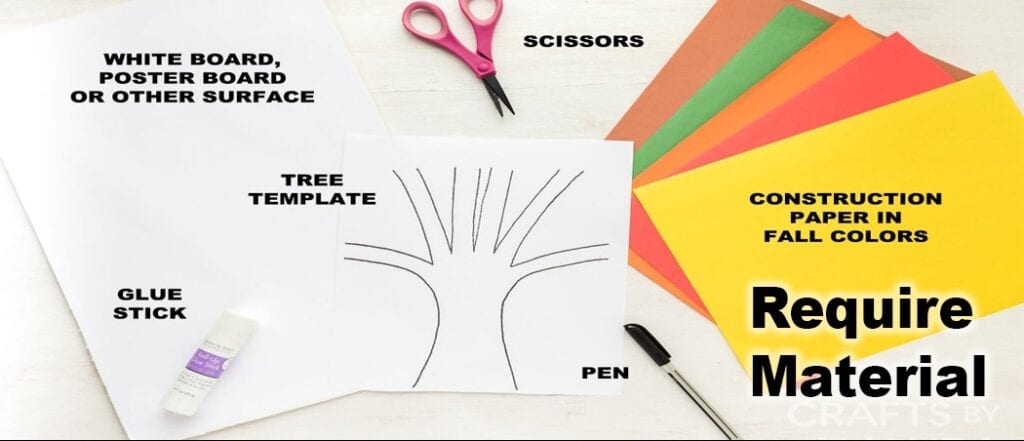
Summary: A quick and easy way to make a tree out of paper for your bulletin board is to use a glue stick and some scissors. Cut a large rectangle out of paper, then cut the rectangle into smaller squares. Glue one square at a time to the center of the larger rectangle, making sure to line up the edges. Let the glue dry, then hang your tree on your bulletin board!
An Overall Overview of the Topic
Without many stretches, a paper tree can be constructed from cardstock paper, paper, or earthy-colored paper packs to apply as a focus at your next birthday party.
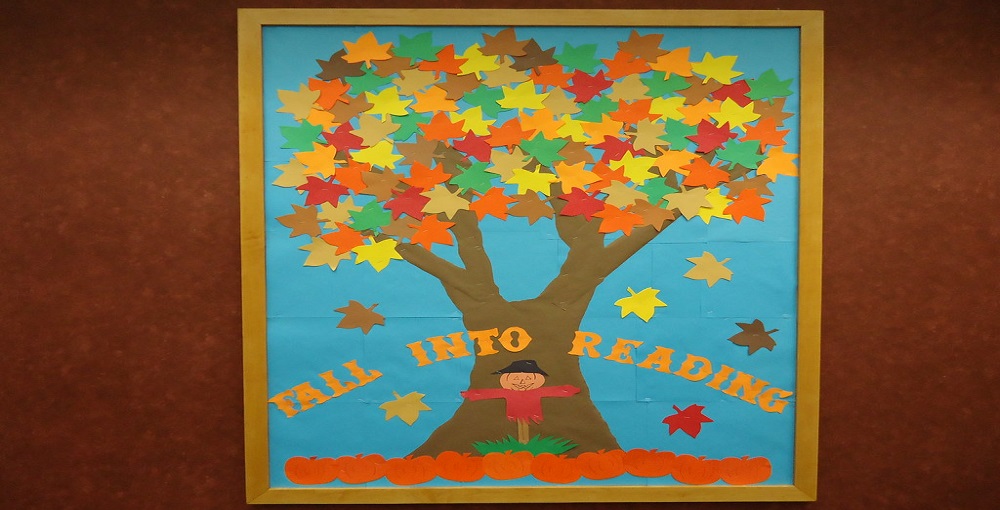
Making your bulletin board more creative can be fun; however, it can be difficult to develop ideas. This text will give you more than one hint on the best way to orchestrate matters on your bulletin board to make it look more exciting.
The Process of How to Make a Tree Out of Paper for a Bulletin Board
1. Crease a sheet of earthy-colored cardstock down the middle the long way. Draw the storage compartment. You should make four patterns of the equivalent tree. You may make the garage compartment any length you would possibly need. Be inventive in making tree branches in various ways.
2. Reduce the tree. Reduce the cardstock even as it is collapsed to land up that may be an ideal representation of itself along the collapsed facet. By using a reduced or aspect-cut blade, lower away any spots of the paper that will not be inside your signature and some from the perimeters. Use your Reduce to operate around the inverted piece of scrap paper, reducing it so that all the facet lines are on the same side.
3. Follow your tree cautiously multiple times. Replicate the tree form onto three more sheets to make four indistinguishable bushes. To paint, fill in the leaves and branches with loose brush strokes. The dots on the end of the branch are the exposed buds or seeds. The medium green is olive green mixed with some yellow-green. When painting trees, I like to use a piece of a moist sponge.
4. Use scissors to put off each of the four tree branches. Ensure you slice precisely to wind up with indistinguishable tree trunks. Stick a toothpick into the end of the main trunk, and use the pipe cleaner to form two smaller trunks. Stick the small tree on top of the big one.
5. Overlap the trunks into equal parts. Utilize a ruler. At that point, overlap the boxes to overlay them into equal parts. This may be a little hard to do, so take it slowly. Just ensure that the surface of the boxes is made even and level with each other.
6. Overlay every one of the four trees in a comparable spot utilizing the first tree that became collapsed. You need to utilize the following four trees that get rid of the very first tree. This is to ensure that you have a great curve for your deck.
7. Paste the trunks collectively. Utilize a heated glue weapon to paste two components of the collapsed boxes collectively. At that point, stick the two units collectively.
8. Utilize lightweight paper to cut little leaves. Utilizing numerous various shades of greens or yellows will give the tree profundity. Overlay a bit of paper. You can likewise make the tree in a vintage style by picking brown or ocher.
9. Use sharp scissors to do away with the leaf form of the collapsed rectangular to cut several leaves one after another. You can likewise utilize a leaf format to print pages of diverse leaves and, in a while, cut them out exclusively. You can make your own simple leaf book with the correct materials. Make sure to include some leaves in your book.
10. Use a create stick or a heated glue weapon to join the leaves onto the parts. Preserve masking the tree till you arrive at your perfect look.
11. Unfurl six sheets. Tape the pages together longwise. Fold the paper into a cylinder. Utilize a cardboard cylinder and move as a manual to fold the paper into a cylinder.
12. Cast off the cardboard cylinder. Cautiously haul the cardboard cylinder. Try not to let the paper move come unraveled.
13. Keep the bottom of the paper tube in a single hand. Flip the roll to make an indistinguishable cut. Rehash this additional activity.
14. Try not to make a collapsed wrinkle; twist it a bit. Cause the tree to develop. Presently it is an ideal opportunity to play with your tree and cause it to set!
15. Squeeze the private layer of paper and delicately pull upwards at the paper.

Conclusion
In the end, we will assume that all your inquiries and confusion regarding how to make a tree out of paper for a bulletin board may have the proper solution. And as a result, you will now apply all your acquired knowledge practically. Ensure you follow the precautions; then, you are good to go!
You may read also –
Elizabeth Davis
Elizabeth is a creative writer and digital editor based in the United States. She has a passion for the arts and crafts, which she developed from a young age. Elizabeth has always loved experimenting with new mediums and sharing her work with others. When she started blogging, she knew that DIYquickly would be the perfect platform to share her tutorials and tips. She's been writing for the blog from the beginning, and her readers love her helpful advice and easy-to-follow instructions. When she's not writing or editing, Elizabeth enjoys spending time with her family and friends.


