
How to Make Your Art Look Soft
When it comes to artistic techniques, softness can be a desirable attribute. In this blog post, we’ll take a look at some tips and tricks for how to make your art look soft. There are several tricks you can use to soften the appearance of your art. We’ll also discuss other ways to ease your art, including tips for choosing the right materials and colors.

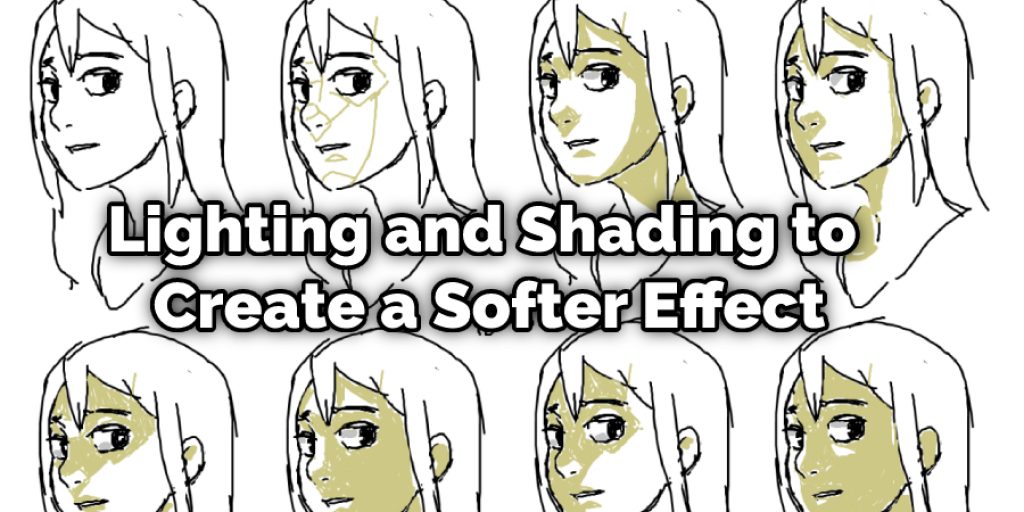
By following these tips, you can create stunning pieces with a gentle, calming effect. In this blog post, we’ll show you how to use lighting and shading to create a softer effect. With just a little bit of effort, you can make your art look dreamy and ethereal perfect for evoking emotion in your viewers. So let’s get started!
10 Ways on How to Make Your Art Look Soft
1. Blurring:
This is a pretty common one. It’s one of the four fundamental techniques of digital art, along with scaling, rotating, and cropping. In this case, it’s used to soften details and smooth out hard edges on an object or character.
2. Anti-aliasing:
This is an essential one. It’s more of a concept than a simple technique, but this is why it works. It smooths out the jagged edges that would otherwise appear when using specific digital drawing or rendering methods. For example, jagged lines can appear when drawing pixel art, and your lines are only 1 pixel wide.
When you’re using a limited color palette and have to use dithering, which creates a pattern of differently-colored pixels to create the illusion of a shade or gradient that isn’t available, that also makes jagged lines. Finally, aliasing only becomes noticeable when you have large objects with very noticeable edges.
3. Shading With a Pencil:
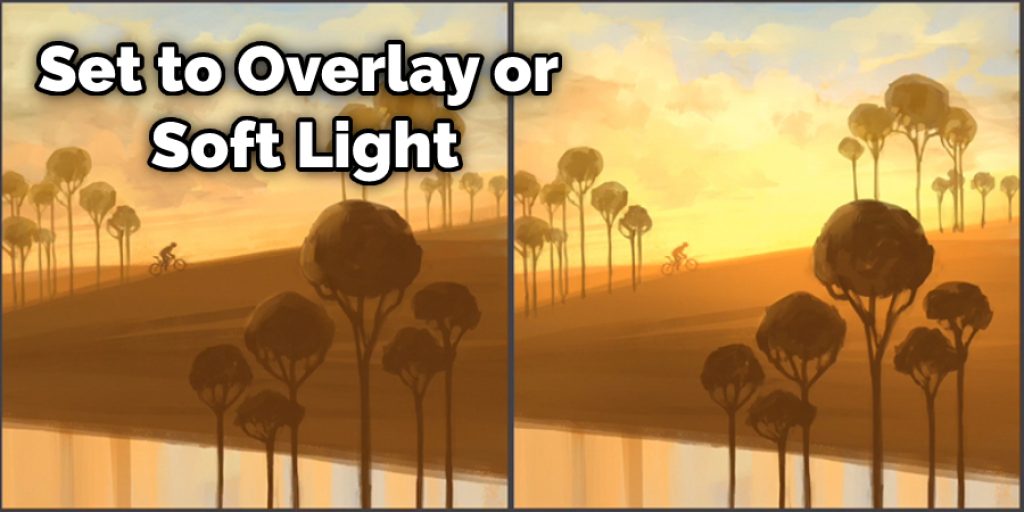
The pencil tool in a graphics program is a great way to make a digital drawing look more natural, not only by creating the shading that you would with an actual pencil and paper but also by using fundamental physics.
For example, using the pencil tool to draw on a layer set to “overlay” or “soft light” will create a darker line with more contrast, making it appear thicker. The pencil toolset to “multiply” will create a darker line with less contrast, making it appear thinner.
4. Working in Grayscale:
This one’s pretty self-explanatory. When working in black and white rather than color, you can focus on the actual tone rather than color saturation. This is a great way to focus on gradients and shading.
5. Adding Noise:
This one’s also pretty self-explanatory, but it’s a straightforward yet effective technique. Noise adds random pixels to your image in lighter colors, making it look a little more natural. It’s easiest to grab a black and white noise brush from the settings panel in your drawing program, but there are free ones out there on the internet if you look hard enough.
6. Softly Defined Edges:
This is a big one. There are two ways to use this technique either you can use the pencil tool with it set to overlay or soft light, which is what I described above, or you can just do whatever it is that got your character’s edges soft in the first place and then soften them even more by using a blur or smudge tool.
7. Distance/Perspective:
This one’s up to you, but how you view an object affects how soft or crisp it will appear. For example, if you’re sitting across from someone at a table and talking to them face-to-face, they’ll look pretty sharp because you’re pretty close.
However, if you were to look at them from further away, they’ll start to appear softer because you’re seeing them from a distance. It’s the same idea with art. A closer character or object will be more detailed and crisp than one that is farther back in the picture.

8. Coloring with Markers and Pens:
If you’re using markers or pens for coloring your drawing, then you’ve already got some soft edges. This one’s pretty simple: try not to use markers and pens and colors to make your picture look crisper. Try using browns and greens instead of black and blues if you want it to look slightly softer.
9. Warm Lighting:
If you light your piece with warmer light sources (yellow- or red-hued), it will create a softening effect on details and lines. This is because our eyes are quite sensitive to orangey colors, so when there are more of them in the picture, the whole thing will look a little softer. So try setting your light source to yellow or orange instead of blue, even if it doesn’t make sense for the picture you’re drawing.
10. Reflections in Bright Sunlight:
This is another one that’s up to you, but it’s something that can be studied and used. Light bounces off of objects and reflects into its surroundings, so when the light in a picture has bright areas with lots of contrast, try to keep those areas away from your focal points. For example, if sunlight is directly on a tree, it’s probably best to put it in the shade so there isn’t too much contrast.
Quick Tips to Improve your Digital Lineart
Tip 01: Keep Your Sketch Clean and Tight
Start your lineart by either hand drawing it or using a Graphics Tablet to draw your lineart. Don’t let it be too messy and fluid if you use the tablet! Instead, keep it clean and straightforward so that you can clean it up later with the brush tool if needed.
Tip 02: Prepare Your Sketch for Inking
You can either use a graphics tablet to ink directly onto the computer, or you can clean up the sketch with the brush tool and add a layer underneath your lineart to ink on top of. If you are doing traditional inking, get it ready to scan into the computer.
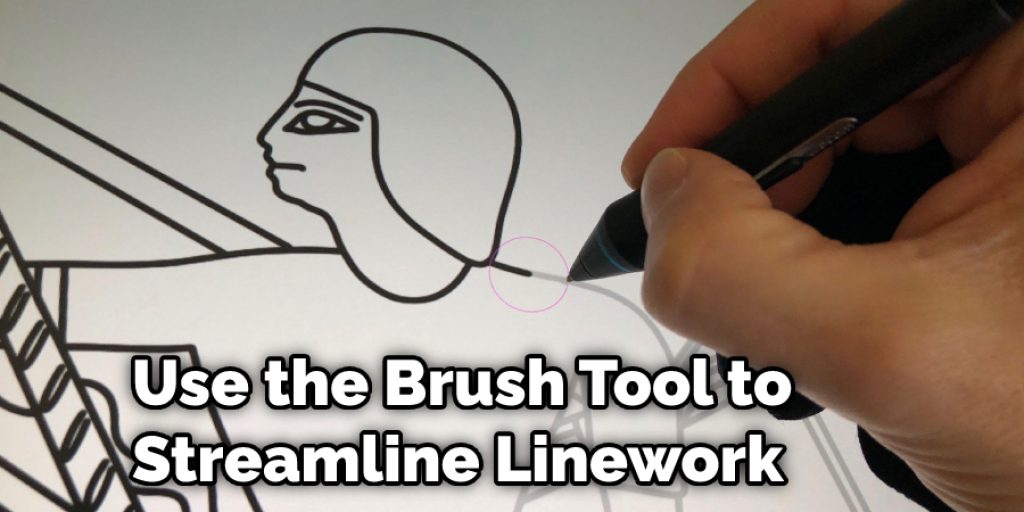
Tip 03: Use a Brush Tool to Simplify Your Linework
Once you have finished your lineart, use the brush tool to streamline your linework. Clean up any jaggy or messy areas that appear on your lines. You can also use the brush tool to thicken and thin out some of the lines, but do not go overboard with this!
Tip 04: Use Stabilization With Your Pen Tool
Before you begin coloring, use the stabilization tool to straighten out your lines. This will make all of your lines nice and consistent so they can be colored precisely.
Tip 05: Tweaking Shadows and Highlights
After colorizing your lineart, start by tweaking the shadows and highlights with a soft brush or a light gray color. This will help blend the colors and make your lineart look more realistic.
Tip 06: Decide on a Color Scheme Before You Start Coloring
Before you begin to color, know which colors you want to give each of your elements! This makes it easier when trying to find those matching colors and keeping the overall theme consistent. Make sure to follow a color scheme!
Tip 07: Keep Your Line Width Consistent
Once you start coloring, keep your line width consistent. You can do this by selecting the line tool and then clicking the little arrow next to it to open up the settings menu. Change the width there until it is something similar for all of your lines. Of course, it’s okay if they are not the same!
Frequently Asked Questions
Q: What Kind of Paper Should I Use to Make My Art Look Soft?
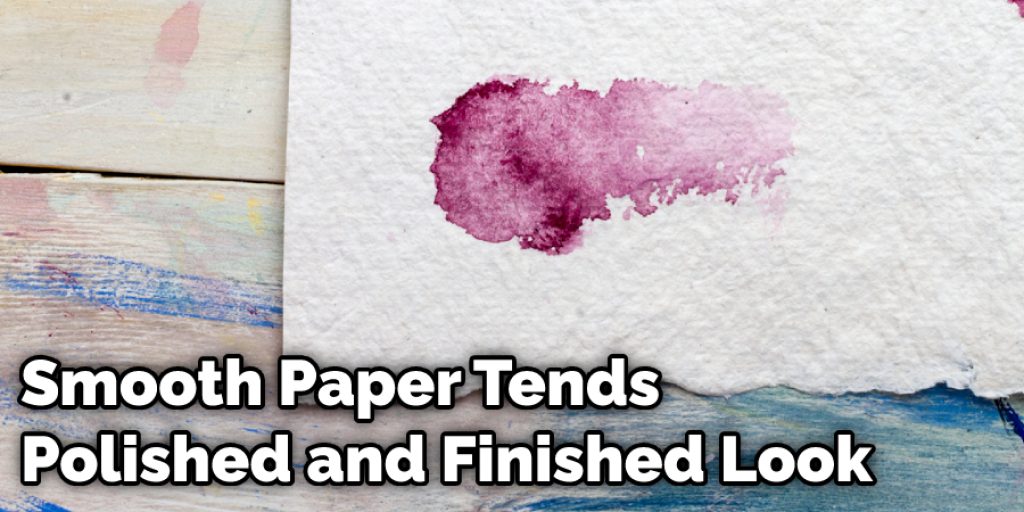
Every type of paper has its texture and finish. Paper textures can be relatively smooth, like a standard sheet of printer paper, or they could be a little rougher with more teeth to them.
If you want your art to look soft, think about the look and feel of the paper. For example, it may look a little rougher if you use very textured paper. On the other hand, smooth paper tends to have a more polished and finished look. If you want to know more about how to make your art look soft then consider reading this full blog post.
Q: What Type of Pencils and Brushes Should I Use?
Softer lead pencils tend to leave lighter marks that don’t fill in the tooth on the paper as much if you’re using pencils. Likewise, if you’re using a graphite stick to the shade, one with softer leads will also give lighter lines without leaving too wide a mark.
For your brushes, if you use watercolors or acrylics, think about the stiffness of the bristles. Brush hairs that are very soft and wispy tend to give a more textured look than stiffer bristles.
Conclusion
The best way to create a soft appearance is by using an off-white or cream color. This will give your art just the right amount of warmth and balance that it needs while not looking too washed out. For example, if you want to paint something red, choose a shade of red that has some gray in it, like burnt sienna.
Similarly, when painting with blue colors such as ultramarine or cobalt blue, use white mixed into the paint for more muted tones. Finally, don’t forget about texture! An artist can easily add dimensionality and interest by incorporating brush strokes on canvas paper or texture to wood panels.
We hope this blog post on how to make your art look soft has helped you. If you have any questions or want to know more about this topic, then feel free to comment below!
Elizabeth Davis
Elizabeth is a creative writer and digital editor based in the United States. She has a passion for the arts and crafts, which she developed from a young age. Elizabeth has always loved experimenting with new mediums and sharing her work with others. When she started blogging, she knew that DIYquickly would be the perfect platform to share her tutorials and tips. She's been writing for the blog from the beginning, and her readers love her helpful advice and easy-to-follow instructions. When she's not writing or editing, Elizabeth enjoys spending time with her family and friends.


