How to Put Vinyl on Canvas
Vinyl on canvas is a popular medium for creating vibrant and durable artwork, allowing artists and crafters to explore their creativity in new and exciting ways. This technique combines the flexibility of vinyl with the texture of canvas, resulting in projects ranging from personalized home décor to unique gifts.
Whether you are a seasoned artist or a beginner looking to dip your toes into the world of vinyl applications, this guide on how to put vinyl on canvas will provide you with step-by-step instructions and helpful tips to successfully put vinyl on canvas, ensuring a professional-looking finish every time.
Benefits of Using Vinyl on Canvas
Before we dive into the process of applying vinyl onto canvas, let’s explore some of the benefits of using this medium:
Durability:
Vinyl is known for being a durable material, making it ideal for long-lasting projects on canvas. It can withstand wear and tear, making it great for creating pieces that will be displayed or used frequently.
Versatility:
Vinyl comes in a variety of colors, patterns, and finishes, allowing you to create endless possibilities when it comes to your canvas art. You can mix and match different vinyls to create unique designs or use them as accents to enhance your artwork.
Easy Application:
Compared to other mediums like paint or ink, applying vinyl onto canvas is relatively easy and mess-free. With the right tools and techniques, you can achieve clean lines and professional-looking results in no time.
Materials Needed
To get started, you will need the following materials:
Vinyl of Your Choice (Permanent or Removable):
Choose a vinyl that best suits your project’s needs, whether it be a permanent or removable option. Permanent vinyl is great for creating long-lasting pieces, while removable vinyl allows for easier adjustments and repositioning.

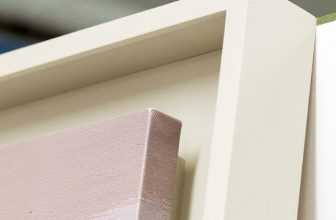
Canvas:
Select a canvas in the size of your choice, taking into consideration the dimensions of your design and where you plan to display it.
Cutting Machine (Optional):
A cutting machine, such as a Cricut or Silhouette, can assist with precise cuts and intricate designs. However, if you do not have access to one, you can still create simple designs using scissors or an X-Acto knife.
Transfer Tape:
This adhesive paper will allow you to transfer your vinyl design onto the canvas without damaging it.
Squeegee or Credit Card:
A squeegee or credit card can be used to smooth out any air bubbles and ensure the vinyl adheres well to the canvas.
8 Step-by-step Guidelines on How to Put Vinyl on Canvas
Step 1: Prepare Your Canvas
Before applying vinyl, it’s essential to prepare your canvas to ensure optimal adhesion and a smooth finished product. Start by selecting a clean, dry canvas; dust or debris can interfere with the vinyl’s ability to stick properly. If your canvas has been previously used or is marked, consider wiping it down with a lint-free cloth. For best results, you may also want to lightly sand the surface of the canvas if it’s particularly glossy, as this will create a better grip for the vinyl.
Once your canvas is clean and dry, lay it flat on a stable work surface, ensuring you have enough space to work without interruptions. This preparation step is crucial for achieving a professional-looking application.
Step 2: Design Your Vinyl Decal
Now that your canvas is prepped, it’s time to design your vinyl decal. If you have a cutting machine, use the software that came with it to create your design. You can also choose from pre-made designs available online or create your own using graphic design software. Keep in mind that intricate designs or small details may be more challenging to work with on canvas, so start with simpler designs if you are new to this technique.

Once your design is complete, remember to mirror (flip horizontally) the image before cutting if it contains text or any elements that need to face a specific direction when applied onto the canvas.
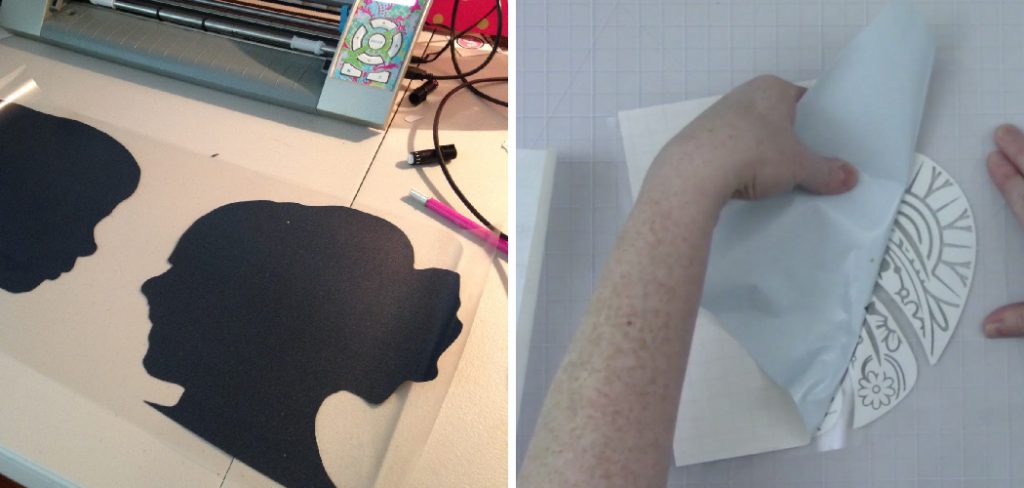
Step 3: Cut Your Vinyl Decal
With your design finalized, it’s time to cut your vinyl decal. If you’re using a cutting machine, load your vinyl into the machine following the manufacturer’s instructions. Ensure that the blade is set to the appropriate depth for the type of vinyl you’re using, as this will help achieve clean cuts without damaging the material. Begin the cutting process and monitor it closely to ensure everything is proceeding smoothly.
Once the cutting is complete, carefully unload the vinyl from the machine, taking care not to damage the intricate parts of your design. If you’re cutting by hand, use scissors or an X-Acto knife to follow your design closely, maintaining clean edges. After cutting, remove any excess vinyl using a weeding tool or tweezers from the areas that aren’t part of your decal, leaving only your intended design ready for application.
Step 4: Prepare Your Vinyl Decal for Transfer
Now that your vinyl decal is cut and trimmed, the next step is to prepare it for transfer onto the canvas. Begin by taking a piece of transfer tape, ensuring it’s slightly larger than your decal. Gently peel the backing off the transfer tape, being careful not to let it stick to itself. Position the transfer tape over your vinyl decal and press it down, starting from one side and moving to the other. Use a squeegee or credit card to firmly adhere to it and eliminate any air bubbles.
This step is essential as it lifts your vinyl design cleanly, making it easier to apply onto the canvas. Once the vinyl is secure on the transfer tape, peel the vinyl off its backing carefully, ensuring that it remains stuck to the transfer tape and ready for placement on the canvas.
Step 5: Apply Your Vinyl Decal onto the Canvas
Now that your vinyl decal is prepped and ready, it’s time to apply it to the canvas. Start by carefully positioning your decal on the canvas, ensuring that it’s straight and aligned with your intended design. Once in place, use a squeegee or credit card to press firmly against the transfer tape, adhering the vinyl onto the canvas as you peel off the tape slowly.
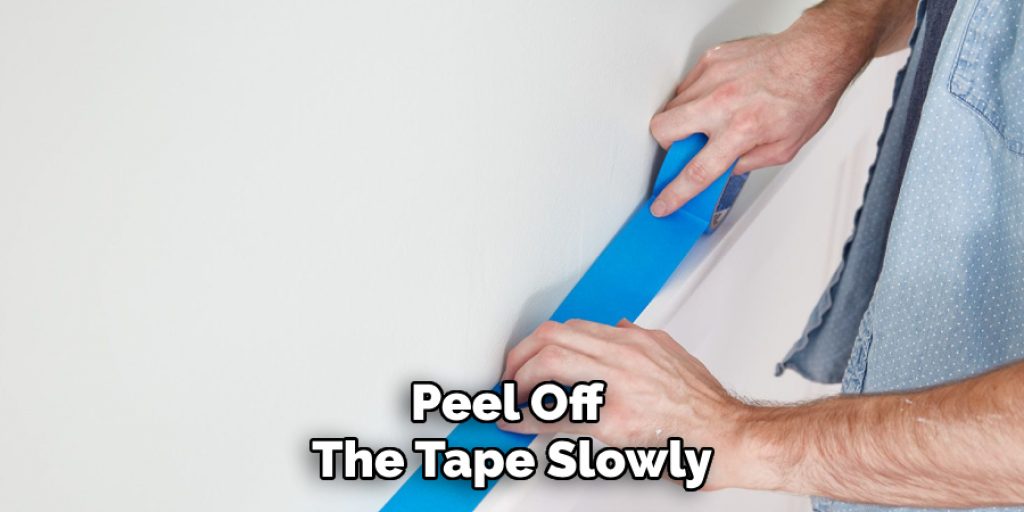
This process requires patience and precision to achieve an overall smooth finish. If any air bubbles appear during this step, gently lift up the area and smooth them out using a squeegee.
Step 6: Remove Transfer Tape
Once your vinyl decal is firmly in place on the canvas, you can remove the transfer tape carefully. Begin by peeling it back at a sharp angle, ensuring that all parts of your design stick to the canvas. You may also want to use a weeding tool or tweezers to help lift off any stubborn pieces.
If some small areas seem like they aren’t sticking properly, press them down gently with your fingers until they adhere.
Step 7: Finishing Touches
After removing the transfer tape, take a few moments to smooth out any final air bubbles using a squeegee or credit card before pressing down the edges securely. You can also use a hairdryer set to low heat and gently warm up the vinyl, which will help it adhere better and eliminate any remaining bubbles.
You can now use your canvas as desired. You may also want to add a layer of clear acrylic sealer over the vinyl decal to protect it and make it more durable.
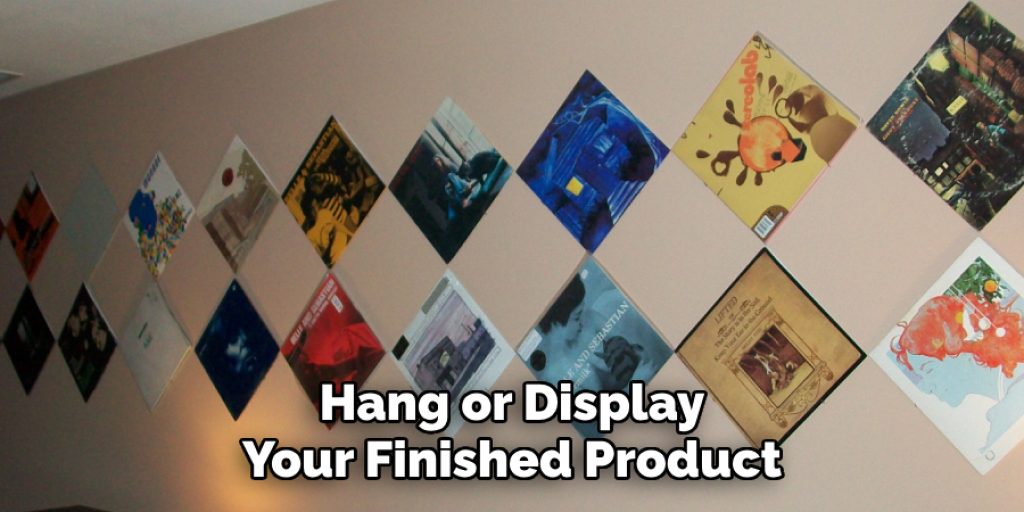
Step 8: Let Your Vinyl Decal Set
Finally, your vinyl decal is securely in place on your canvas, but it’s essential to let it set before displaying or hanging it. Leave the canvas flat for at least 24 hours to ensure that the adhesive has fully bonded with the fabric. After this time, you can hang or display your finished product as desired.
Following these steps on how to put vinyl on canvas will help you achieve a professional-looking vinyl decal on your canvas that is sure to impress. With some practice, you can experiment with different designs and techniques to create unique pieces of art for your home or as gifts for others. Remember to have fun and be patient, as working with vinyl decals on canvas can take some time and precision, but the end result is worth it! Happy crafting!
Conclusion
Now that you know how to put vinyl on canvas step-by-step, you can create beautiful pieces of art and customized decor for your home or as gifts for others. Remember always to prepare your canvas properly, design and cut your vinyl decal with care, and take your time applying it onto the canvas for the best results.
With some practice, you’ll be able to master this technique and create unique and stunning pieces that will last for years to come. So go ahead, get creative, and have fun! Happy crafting!
Elizabeth Davis
Elizabeth is a creative writer and digital editor based in the United States. She has a passion for the arts and crafts, which she developed from a young age. Elizabeth has always loved experimenting with new mediums and sharing her work with others. When she started blogging, she knew that DIYquickly would be the perfect platform to share her tutorials and tips. She's been writing for the blog from the beginning, and her readers love her helpful advice and easy-to-follow instructions. When she's not writing or editing, Elizabeth enjoys spending time with her family and friends.