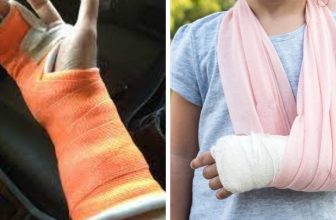
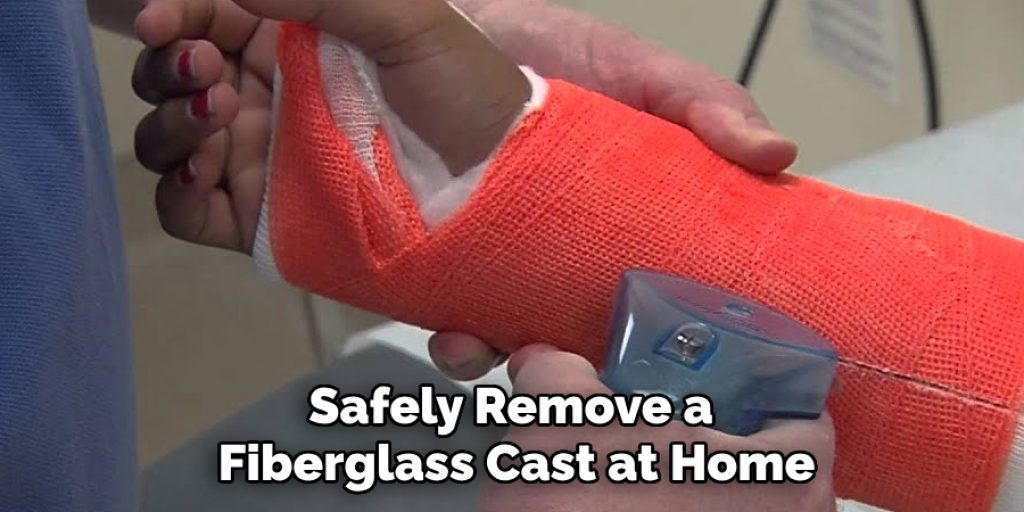
How to Remove a Fiberglass Cast at Home
A fiberglass cast is a common treatment for broken bones, as it helps to immobilize and support the injured area while it heals. However, once the bone has healed, it’s important to remove the cast properly to prevent any further injury or discomfort. While you can have a healthcare professional remove your cast, you may also be able to safely remove it at home if certain guidelines are followed. In this blogpost on how to remove a fiberglass cast at home , we will discuss the steps involved and important safety precautions to keep in mind.
What is FiberGlass Cast?
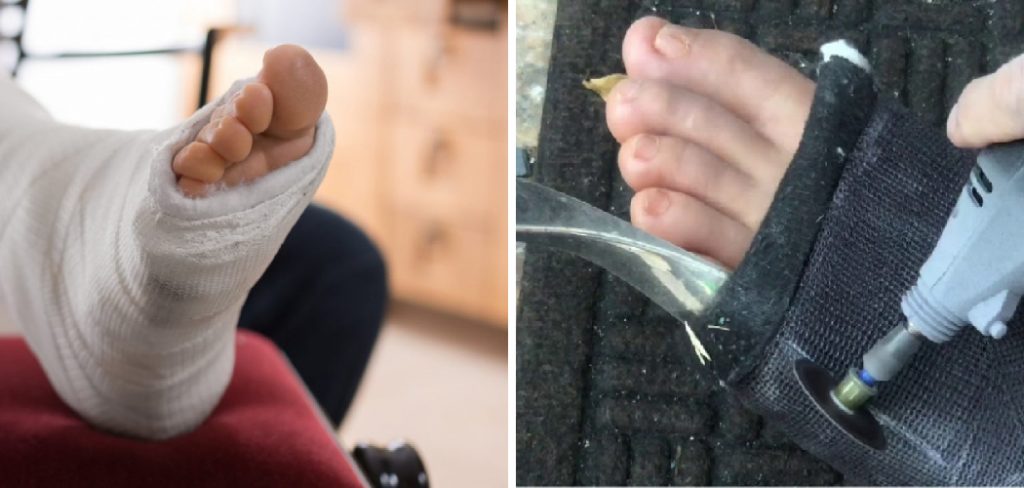
Before we dive into the removal process, it’s important to understand what a fiberglass cast is. A fiberglass cast is a type of rigid and durable material made up of woven glass fibers and resin. It is used to immobilize and support a broken bone or injured joint while it heals. Unlike traditional plaster casts, fiberglass casts are lighter, more breathable, and can be waterproof if properly sealed. They are also easier to remove and can be molded to fit the specific shape of the injured area, providing better support and comfort.
You can typically get a fiberglass cast at a hospital or clinic, and it usually takes around 20-30 minutes to apply. The cast will then need to be worn for several weeks until the bone has fully healed.
Why Would You Need to Remove a Fiberglass Cast?
Removing a fiberglass cast is necessary once the bone has fully healed. This usually takes around 4-6 weeks, depending on the severity of the injury. If you leave the cast on for longer than needed, it can lead to muscle atrophy, skin irritation or infection, and stiffness in the joints.
In some cases, a healthcare professional may also need to remove the cast if there are any complications or concerns, such as signs of infection or excessive swelling. You should always consult with your doctor before attempting to remove a cast at home.
Safety Precautions
Before attempting to remove your fiberglass cast at home, there are some important safety precautions you should keep in mind:
Wait for the Recommended Time:
It’s crucial to wait for the recommended amount of time before removing your cast. Removing it too early can lead to re-injury or delayed healing.

Have Someone Assist You:
Removing a fiberglass cast requires some strength and coordination, so it’s best to have someone help you with the process. This will also ensure that you have someone to assist you in case of any complications.
Needed Materials:
To remove your fiberglass cast at home, you will need the following materials:
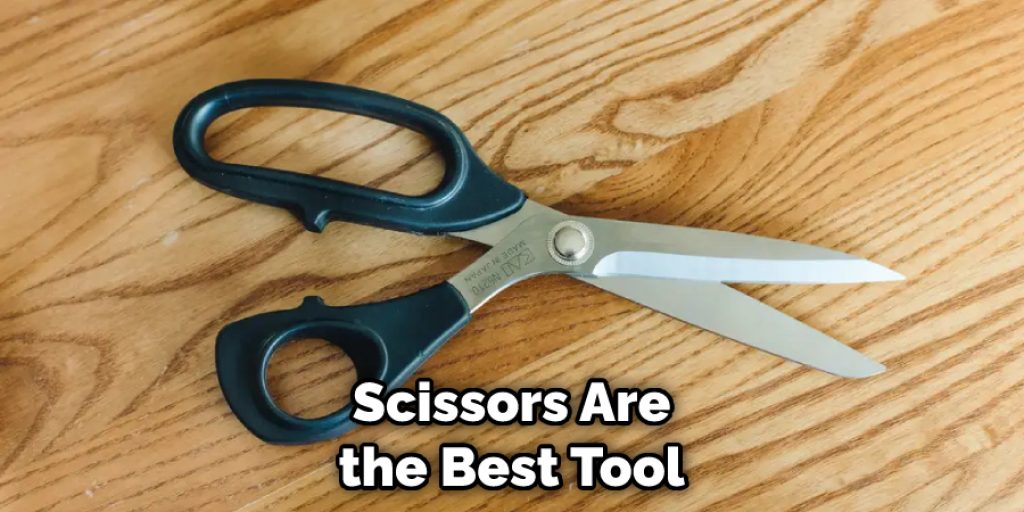
Scissors:
You will need a pair of sharp scissors to cut through the cast material.
Padding Material:
To protect your skin from the sharp edges of the scissors, you will need some padding material such as gauze or cotton balls.
Petroleum Jelly:
This can be used to lubricate the skin and make it easier to remove the cast.
Towel:
To catch any debris or dust from the cast, it’s a good idea to have a towel underneath.
11 Step-by-step Guidelines on How to Remove a Fiberglass Cast at Home
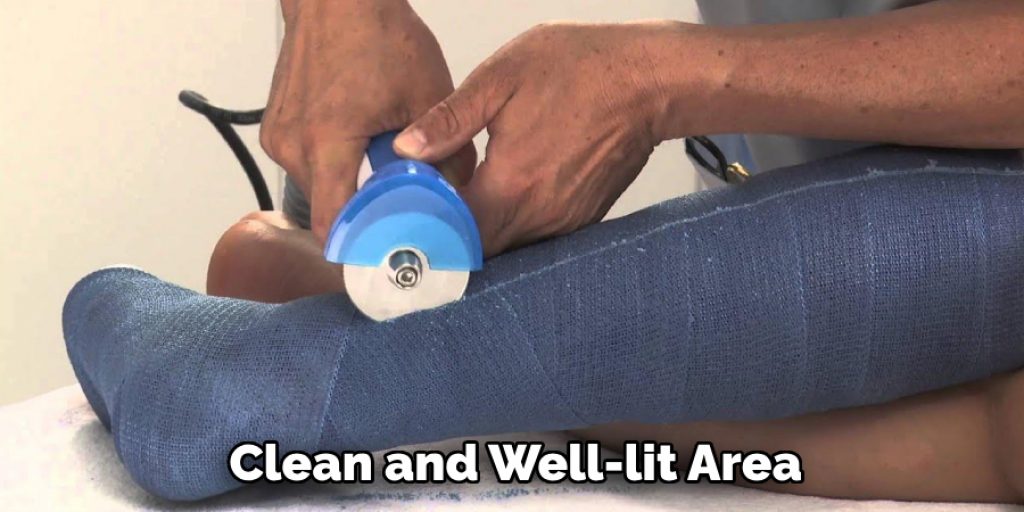
Step 1: Prepare the Area
Make sure you have a clean and well-lit area to work in. Lay down the towel to catch any debris from the cast. Have all your materials ready and within reach. You may also want to wear old clothes that you don’t mind getting dirty in case of any spills. It’s also a good idea to have someone on standby in case you need assistance. But if you are alone, make sure you have a phone nearby to call for help if needed.
Step 2: Assess the Cast
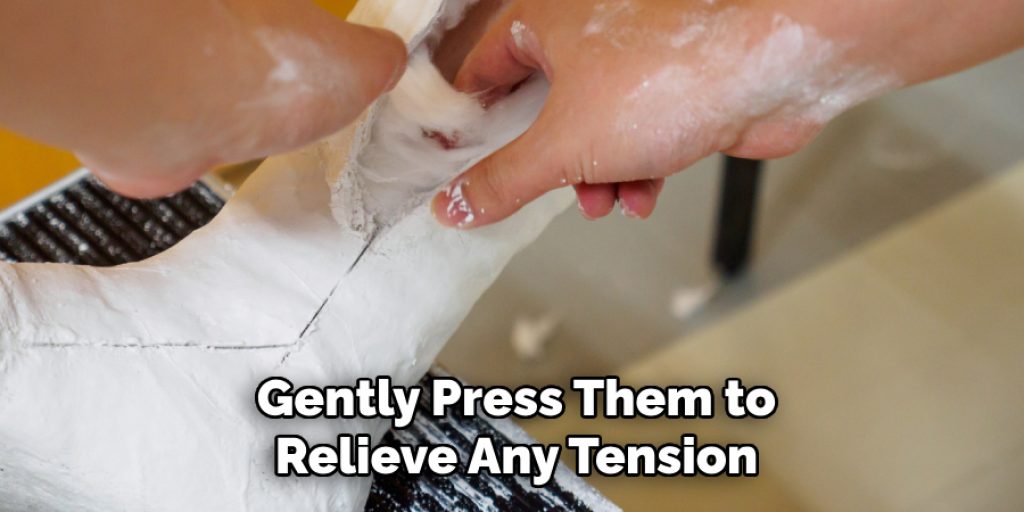
Take a look at the cast and locate any edges or seams. You will need to start cutting from these areas. But before you do, make sure there are no pressure points around the cast. If there are any, gently press them to relieve any tension. The last thing you want is to cut through the cast and accidentally pinch your skin.
Step 3: Protect Your Skin
Place the padding material around any edges or seams of the cast to protect your skin from sharp edges. You can also use petroleum jelly on your skin to make the removal process smoother. It’s important to note that the cast material may be slightly warm, so be careful not to burn yourself. The padding material will also help to catch any debris from the cast as it is being removed.
Step 4: Start Cutting
Using the scissors, carefully cut along the edges and seams of the cast. Make sure to hold the scissors at an angle so you are not cutting directly towards your skin. Be patient and take your time, as rushing can lead to accidents. It may take a few minutes to cut through the entire cast. But if you feel any pain or discomfort, stop immediately and reassess the area.
Step 5: Check for Pressure Points
Once you have cut through the cast, gently pull it away from your skin to check for any pressure points. If there are any, use the scissors to create a small hole in the cast material to relieve any tension. Then continue cutting around the area. The pressure points are usually found around bony areas such as the elbow or knee.
Step 6: Support the Injured Area
As you continue to cut and remove the cast, make sure to support the injured area with your other hand. This will prevent any sudden movements that could cause pain or discomfort. It’s also a good idea to keep the injured area elevated to reduce swelling. You can use pillows or a sling for support. The last thing you want is to remove the cast and then accidentally bump or strain the healing bone or joint.
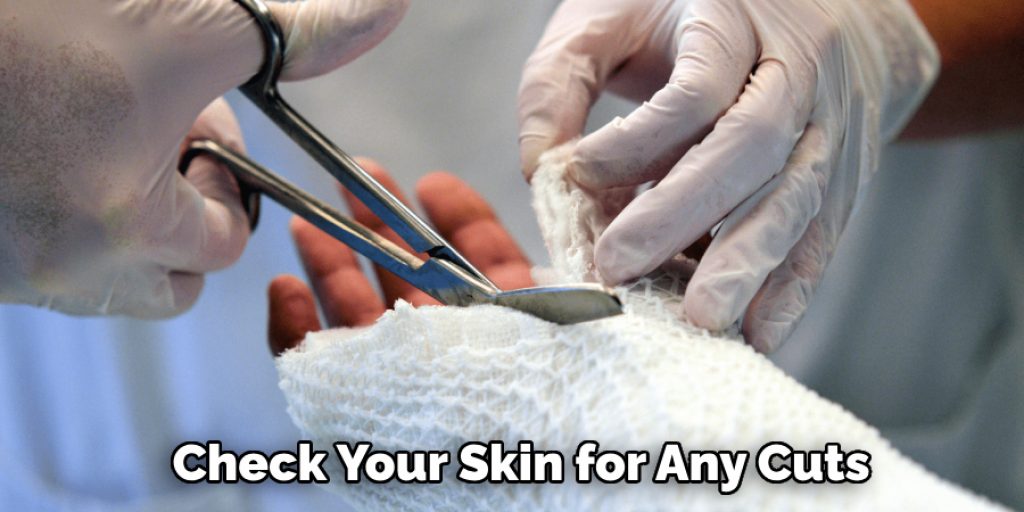
Step 7: Check for Any Cuts
Once the cast is fully removed, check your skin for any cuts or scrapes. If there are any, clean them with soap and water, and apply an antibacterial ointment. Cover them with a bandage if necessary. It’s common to have some redness or irritation around the area where the cast was, but this should go away within a few days. If you notice any unusual symptoms, such as excessive pain or swelling, contact your healthcare provider immediately.
Step 8: Wash Your Skin
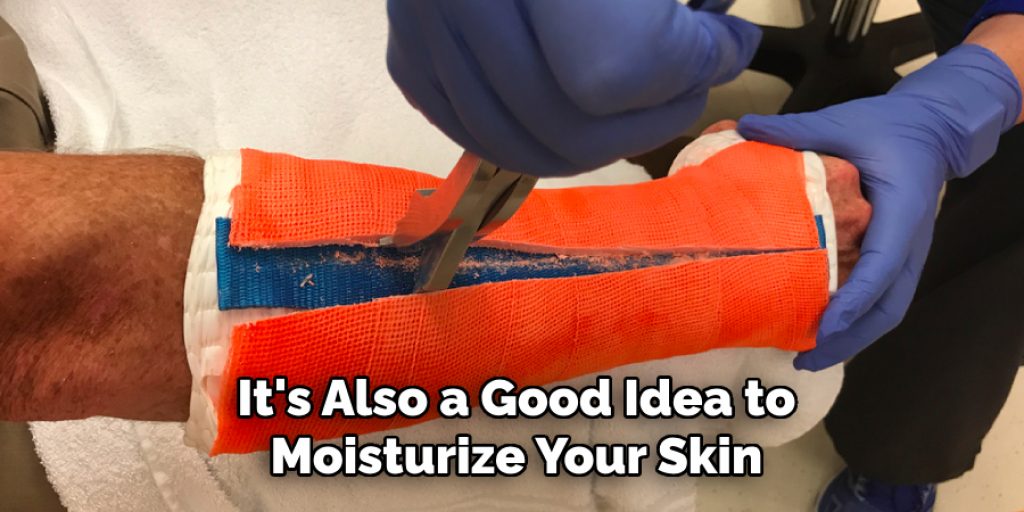
After removing the cast, it’s important to thoroughly wash your skin with soap and water to remove any debris or residue from the cast. Gently scrub around the area to promote blood circulation and help with healing. You can also use a washcloth or towel to gently exfoliate any dead skin cells. It’s also a good idea to moisturize your skin after washing.
Step 9: Moisturize
After washing your skin, pat it dry with a clean towel and then apply a moisturizing lotion. This will help to keep your skin hydrated and prevent any dryness or itching. You can also use aloe vera gel or other cooling products to soothe any discomfort in the skin. It’s important to keep the skin moisturized as it may be sensitive and prone to irritation after being in a cast for several weeks.
Step 10: Start Moving
Now that your cast is off, it’s important to start slowly moving the injured area. This will help to improve blood flow and promote healing. You may experience some stiffness or weakness at first, but with time and gentle exercises recommended by your doctor, you will regain strength and mobility. Be cautious not to overexert yourself and listen to your body’s signals. It’s important to take things slowly and gradually increase your activity level.
Step 11: Follow Up with Your Doctor
After removing the cast at home, it’s important to follow up with your doctor for a check-up. They will assess the healing progress and may recommend physical therapy or other treatments to help with recovery. They may also provide you with a new cast or brace if necessary. It’s essential to follow your doctor’s instructions for the best possible outcome.
Following these step-by-step guidelines on how to remove a fiberglass cast at home will help you safely and effectively remove a fiberglass cast at home. Just remember to take your time, protect your skin, and seek medical attention if needed. And most importantly, have patience and be gentle with the injured area as it continues to heal.
Do You Need to Use Professional?
While it is possible to remove a fiberglass cast at home, it is always best to seek the help of a healthcare professional. They are trained and experienced in safely removing casts without causing any harm or discomfort. They can also assess the area for any complications or underlying issues that may require further treatment. Plus, they can provide you with proper instructions on how to care for the injured area after the cast removal. It’s always better to be safe and seek professional help when it comes to your health and well-being.
So, if you have any concerns or are unsure about removing a cast at home, don’t hesitate to seek medical assistance. Your doctor will ensure that the cast is safely removed without causing any harm or complications. Therefore, it’s best to leave the cast removal to the professionals. However, if you do choose to remove a fiberglass cast at home, make sure to follow these steps carefully and consult with your doctor beforehand. With proper care and precautions, you can safely remove a fiberglass cast at home and continue on your path toward healing an injury.
How Much Will It Cost?
The cost of removing a fiberglass cast at home can vary depending on the tools and supplies needed. Some items, such as scissors and soap, may already be available in your household, while others, like padding material and moisturizing lotion, may need to be purchased. If you choose to seek professional help for cast removal, the cost may also depend on your healthcare provider and insurance coverage. It’s important to factor in these costs and discuss them with your doctor beforehand to determine the best option for you. Overall, removing a fiberglass cast at home can be a cost-effective solution, but it’s essential to prioritize safety and consult with your healthcare provider before making any decisions.
Additional Tips
- If you experience any excessive pain, swelling, or other unusual symptoms during the cast removal process, stop immediately and seek medical attention.
- Keep the injured area elevated for a few days after removing the cast to reduce swelling.
- Avoid using any sharp objects near the skin when cutting through the fiberglass material.
- Follow your doctor’s instructions for rehabilitation exercises and physical therapy to regain strength and mobility in the injured area.
- If you notice any changes or concerns with your skin, such as redness, irritation, or rashes, consult with your doctor for proper treatment.
- Be patient during the healing process and don’t rush into vigorous activities before fully recovering.
- Ask your doctor for specific care instructions for your particular injury and follow them carefully.
- Always seek medical assistance if you have any doubts or concerns about removing a fiberglass cast at home. Overall, proper care and caution are key to safely and effectively removing a fiberglass cast at home. By following these guidelines and seeking professional help if needed, you can ensure a successful recovery from your injury.
Frequently Asked Questions

Q: How Long Should I Keep the Cast on Before Attempting to Remove It at Home?
A: It’s best to follow your doctor’s instructions and keep the cast on for the recommended timeframe. Removing a cast too early can hinder the healing process and cause further injury. You can consult with your doctor for an estimate of when the cast can be safely removed at home. It’s always better to err on the side of caution and keep the cast on for longer if unsure.
Q: Can I Reuse the Cast After Removing It at Home?
A: It’s not recommended to reuse a fiberglass cast after removal as it may lose its shape and effectiveness. Moreover, the cast may also harbor bacteria from your skin, making it unhygienic for future use. If you need a new cast, consult with your doctor for proper fitting and care instructions. You may also need a new cast if there are any changes in the healing process or if your doctor recommends it. You should always prioritize safety and follow your doctor’s advice when it comes to cast removal and replacement.
Q: Can I Remove the Cast by Myself?
A: While it is possible to remove a fiberglass cast at home, it’s always best to seek professional help. Removing the cast by yourself may cause harm or discomfort, especially if you are unsure of what to do. It’s essential to prioritize safety and consult with your doctor before attempting to remove the cast at home. If you do choose to remove it yourself, make sure to follow proper precautions and be gentle with the injured area. In conclusion, while it is possible to safely remove a fiberglass cast at home, it’s always best to consult with your doctor and seek professional help for optimal results.
Q: Can I Shower or Bathe with the Cast On?
A: It’s best to avoid getting a fiberglass cast wet, as it may weaken and lose its effectiveness. If you need to clean yourself, use a damp washcloth and carefully wipe around the casted area. You can also cover the cast with a plastic bag or waterproof material if necessary. Consult with your healthcare provider for more specific instructions on showering or bathing with a cast. Overall, it’s essential to keep the cast dry and clean to prevent any complications or delays in the healing process.

Q: What If I Notice Any Changes in the Injured Area After Removing the Cast?
A: If you notice any concerning changes, such as increased pain, swelling, or discomfort, it’s crucial to consult with your doctor immediately. These may be symptoms of further injury or infection that require medical attention. It’s always better to err on the side of caution and seek professional help if you have any doubts or concerns. Your doctor can provide proper treatment and advice for a successful recovery from your injury.
Conclusion
In conclusion on how to remove a fiberglass cast at home, removing a fiberglass cast at home can be a cost-effective and convenient solution for some individuals. However, it’s crucial to prioritize safety and consult with your healthcare provider before attempting to remove the cast. By following these tips and precautions, you can safely remove the cast at home and continue on your journey toward healing an injury. Remember to always listen to your body and seek professional help if needed for a successful recovery. So, prioritizing safety and proper care is key to effectively removing a fiberglass cast at home.
Check it out to learn to remove your own cast.
you may also read now